6
SETTING UP THE PROJECTOR
There are a number of factors to consider when determining where to set up the projector, including the size and shape of your screen, the location of your power outlets, and the distance between the projector and the rest of your equipment. But here are some general guidelines.
NOTE: To ensure adequate cable access, do not place the
projector within 6 inches (.15m) of a wall or other object.
Position the projector on a flat surface at a right angle to the screen.
The projector should be within 10 feet (3 m) of your power source and within 6 feet (1.8 m) of your video source(s), unless good quality extension cables are to be used.
When installing the projector on the ceiling, refer to the installation guide that comes with the Ceiling Mount Kit for more information. Knoll recommends use of an authorized Knoll CM25 ceiling mount. The addition of a CM20+6 extension bar lowers the projector 6” per bar as required. The ceiling mount kit may be sold separately.
Position the projector the desired distance from the screen.
NOTE: The projector must be at least 5.6 feet (1.7 m) from the projection screen.
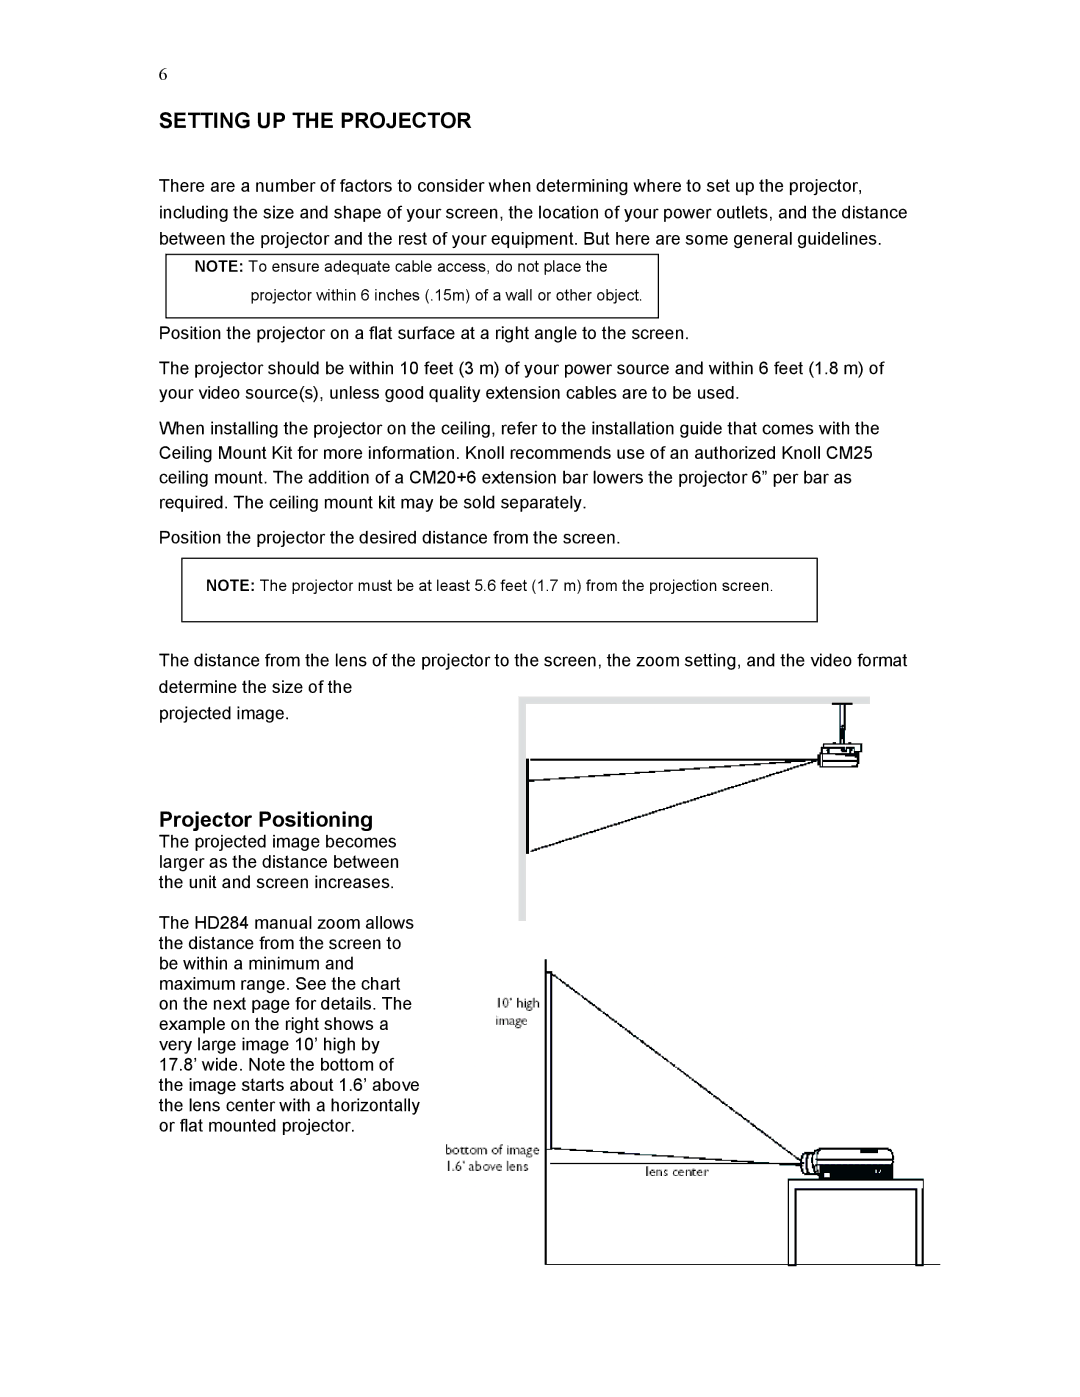
The distance from the lens of the projector to the screen, the zoom setting, and the video format determine the size of the
projected image.
Projector Positioning
The projected image becomes larger as the distance between the unit and screen increases.
The HD284 manual zoom allows the distance from the screen to be within a minimum and maximum range. See the chart on the next page for details. The example on the right shows a very large image 10’ high by 17.8’ wide. Note the bottom of the image starts about 1.6’ above the lens center with a horizontally or flat mounted projector.