Calibrating the Printer
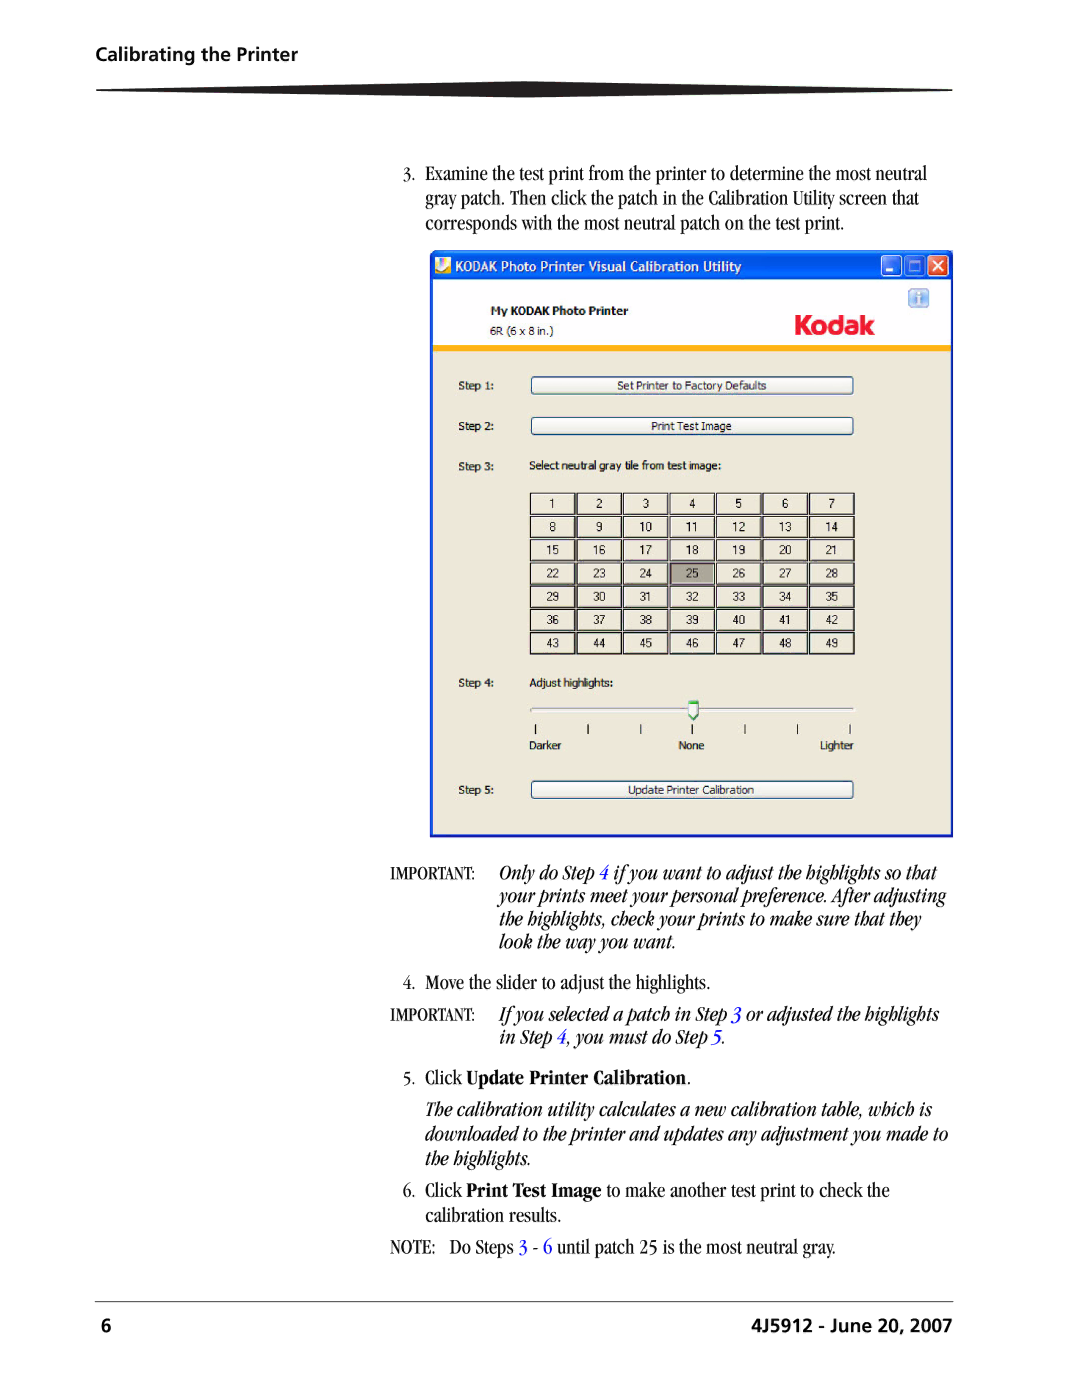
3.Examine the test print from the printer to determine the most neutral gray patch. Then click the patch in the Calibration Utility screen that corresponds with the most neutral patch on the test print.
IMPORTANT: Only do Step 4 if you want to adjust the highlights so that your prints meet your personal preference. After adjusting the highlights, check your prints to make sure that they look the way you want.
4.Move the slider to adjust the highlights.
IMPORTANT: If you selected a patch in Step 3 or adjusted the highlights in Step 4, you must do Step 5.
5.Click Update Printer Calibration.
The calibration utility calculates a new calibration table, which is downloaded to the printer and updates any adjustment you made to the highlights.
6.Click Print Test Image to make another test print to check the calibration results.
NOTE: Do Steps 3 - 6 until patch 25 is the most neutral gray.
6 | 4J5912 - June 20, 2007 |
