
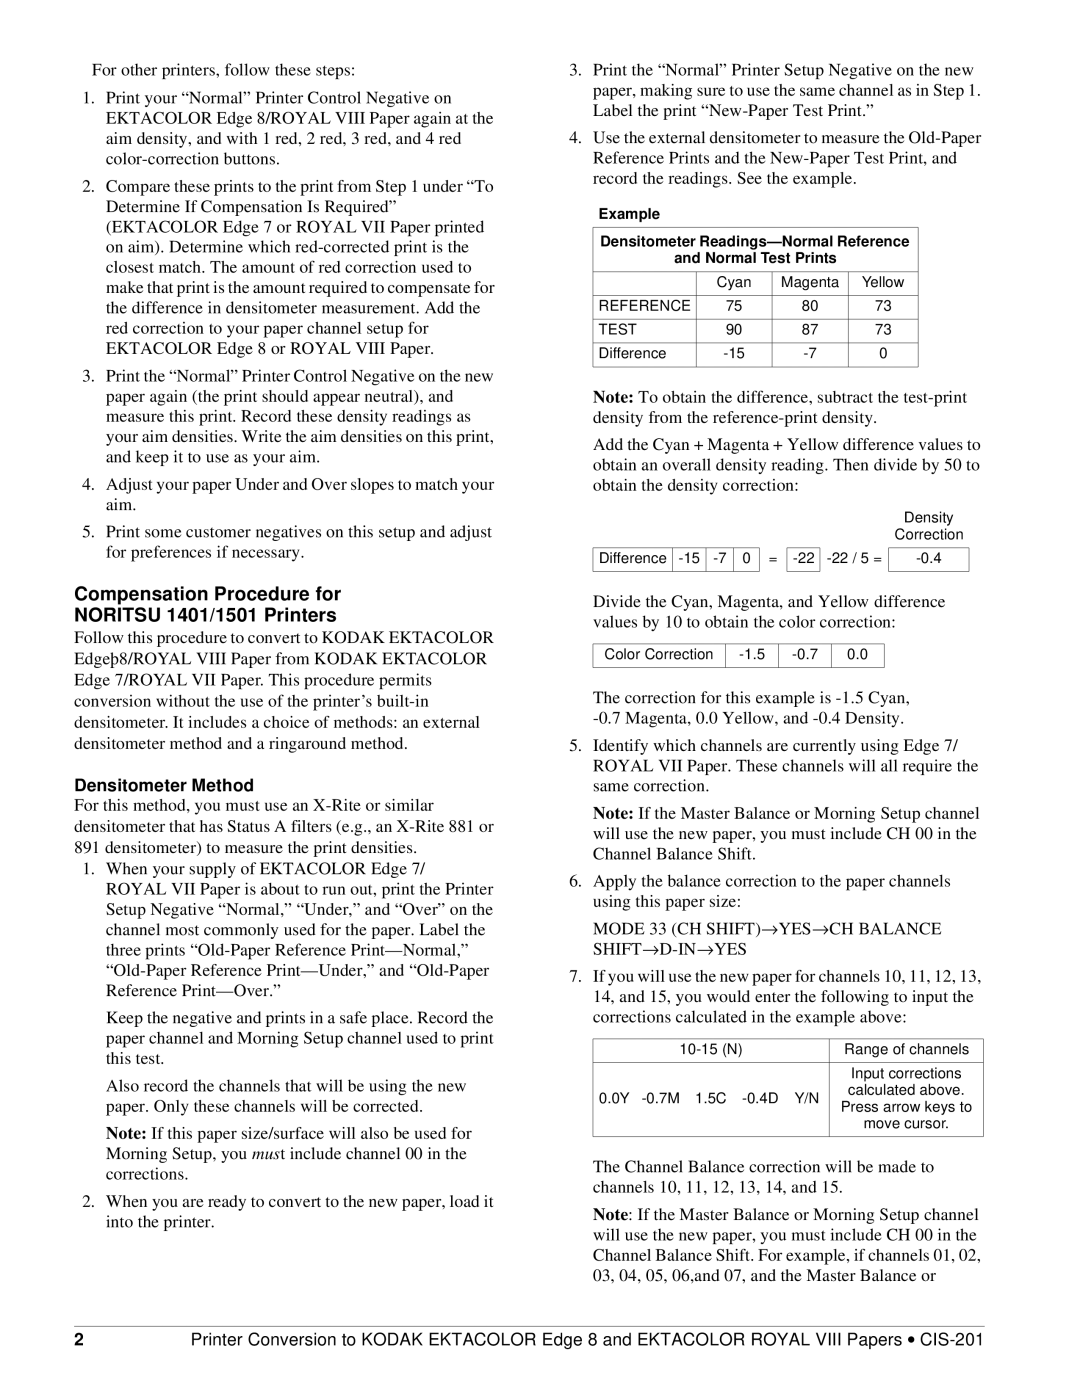
CIS-201 specifications
The Kodak CIS-201 is a cutting-edge imaging solution that embodies the evolution of scanner technology for various business applications. As an advanced contact image sensor (CIS) scanner, the CIS-201 is designed to deliver high-quality image capture with efficiency and precision, making it an essential tool for modern document management and business operations.One of the standout features of the Kodak CIS-201 is its exceptional image quality. With a high optical resolution, this scanner is capable of producing clear and detailed images, which are crucial for various applications, from archiving important documents to digitizing photographs. Its advanced image processing technology further enhances the clarity and sharpness of scanned images, ensuring that no detail is lost.
Speed is another significant characteristic of the CIS-201. This model is engineered for high-speed scanning, allowing users to quickly scan large volumes of documents without compromising quality. This efficiency makes it particularly suited for busy office environments where time is of the essence. The scanner can handle both color and monochrome documents, streamlining workflows and improving productivity.
The user-friendly interface of the Kodak CIS-201 simplifies operation for users of all skill levels. With intuitive controls and easy setup, new users can quickly familiarize themselves with the device, reducing training time and enhancing efficiency. Additionally, the scanner supports a variety of media sizes, from standard letter-sized documents to larger formats, providing versatility for different scanning needs.
One of the innovative technologies integrated into the CIS-201 is its advanced image enhancement features, which include automatic cropping, deskewing, and background cleanup. These features not only save time in post-processing but also ensure that the final output is professional-quality.
In terms of connectivity, the Kodak CIS-201 offers various options, including USB interfaces, making it highly compatible with different systems and devices. This flexibility enables easy integration into existing document workflows, ensuring that businesses can leverage the scanner's capabilities without extensive modifications to their current setups.
Overall, the Kodak CIS-201 stands out as a robust, efficient, and user-friendly imaging solution tailored for the demands of modern businesses. With its remarkable image quality, speed, and advanced technologies, the CIS-201 supports seamless document management processes, paving the way for enhanced productivity and streamlined operations in an increasingly digital world.