NOTE : Fog and mist will not harm your remote thermo/hygro sensor but direct rain must be avoided.
To complete the set up of your indoor weather station after the 10 minutes have passed please follow the steps in the Detailed Set Up Guide.
Note : The remote thermo/hygro sensor transmits a signal every 5 minutes; after the batteries have been installed, the indoor weather station will search for the signal for a duration of 5 minutes. If there is no temperature reading in the OUTDOOR LCD after 5 minutes, make sure the units are within range of each other, or repeat the battery installation procedure.
DETAILED SET-UP GUIDE
I.Battery Installation
Batteries will fit tightly. To avoid
Mounting
Bracket/Recent
| + | Battery |
AA LR6 | AA LR6 | Cover |
SIZE | SIZE |
|
Rain | + |
| |
Cover |
|
REMOTE
433 MHz
![]()
Transmitter
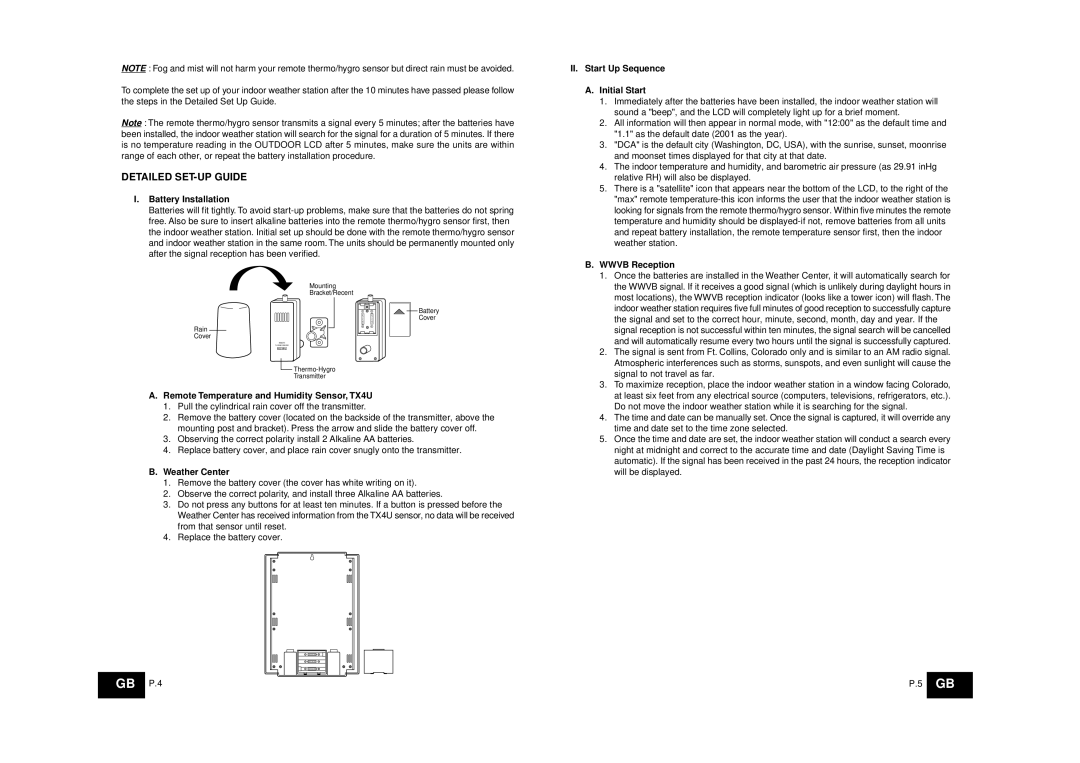
A.Remote Temperature and Humidity Sensor, TX4U
1.Pull the cylindrical rain cover off the transmitter.
2.Remove the battery cover (located on the backside of the transmitter, above the mounting post and bracket). Press the arrow and slide the battery cover off.
3.Observing the correct polarity install 2 Alkaline AA batteries.
4.Replace battery cover, and place rain cover snugly onto the transmitter.
B.Weather Center
1.Remove the battery cover (the cover has white writing on it).
2.Observe the correct polarity, and install three Alkaline AA batteries.
3.Do not press any buttons for at least ten minutes. If a button is pressed before the Weather Center has received information from the TX4U sensor, no data will be received from that sensor until reset.
4.Replace the battery cover.
II.Start Up Sequence
A.Initial Start
1.Immediately after the batteries have been installed, the indoor weather station will sound a "beep", and the LCD will completely light up for a brief moment.
2.All information will then appear in normal mode, with "12:00" as the default time and "1.1" as the default date (2001 as the year).
3."DCA" is the default city (Washington, DC, USA), with the sunrise, sunset, moonrise and moonset times displayed for that city at that date.
4.The indoor temperature and humidity, and barometric air pressure (as 29.91 inHg relative RH) will also be displayed.
5.There is a "satellite" icon that appears near the bottom of the LCD, to the right of the "max" remote
B.WWVB Reception
1.Once the batteries are installed in the Weather Center, it will automatically search for the WWVB signal. If it receives a good signal (which is unlikely during daylight hours in most locations), the WWVB reception indicator (looks like a tower icon) will flash. The indoor weather station requires five full minutes of good reception to successfully capture the signal and set to the correct hour, minute, second, month, day and year. If the signal reception is not successful within ten minutes, the signal search will be cancelled and will automatically resume every two hours until the signal is successfully captured.
2.The signal is sent from Ft. Collins, Colorado only and is similar to an AM radio signal. Atmospheric interferences such as storms, sunspots, and even sunlight will cause the signal to not travel as far.
3.To maximize reception, place the indoor weather station in a window facing Colorado, at least six feet from any electrical source (computers, televisions, refrigerators, etc.). Do not move the indoor weather station while it is searching for the signal.
4.The time and date can be manually set. Once the signal is captured, it will override any time and date set to the time zone selected.
5.Once the time and date are set, the indoor weather station will conduct a search every night at midnight and correct to the accurate time and date (Daylight Saving Time is automatic). If the signal has been received in the past 24 hours, the reception indicator will be displayed.
+
+![]()
![]() +
+
GB | P.4 | P.5 | GB |
|
|
|
|