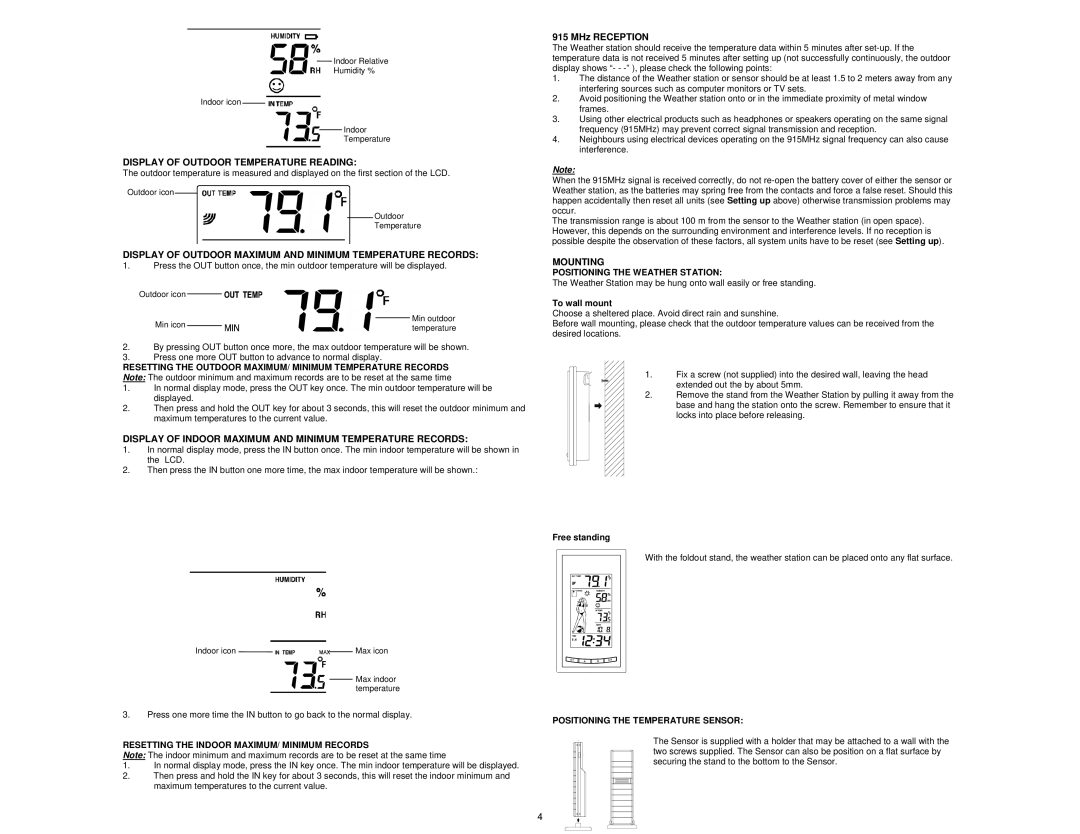
Indoor Relative
Humidity %
Indoor icon ![]()
![]()
![]()
![]()
![]()
![]()
![]()
![]() Indoor
Indoor
Temperature
DISPLAY OF OUTDOOR TEMPERATURE READING:
The outdoor temperature is measured and displayed on the first section of the LCD.
Outdoor icon ![]()
![]()
![]()
![]()
![]()
Outdoor
Temperature
DISPLAY OF OUTDOOR MAXIMUM AND MINIMUM TEMPERATURE RECORDS:
1.Press the OUT button once, the min outdoor temperature will be displayed.
Outdoor icon |
|
|
|
| Min outdoor |
|
|
|
| ||
Min icon |
|
|
|
| |
|
|
|
| ||
|
|
|
| temperature | |
|
|
|
|
|
|
2.By pressing OUT button once more, the max outdoor temperature will be shown.
3.Press one more OUT button to advance to normal display.
RESETTING THE OUTDOOR MAXIMUM/ MINIMUM TEMPERATURE RECORDS Note: The outdoor minimum and maximum records are to be reset at the same time
1.In normal display mode, press the OUT key once. The min outdoor temperature will be displayed.
2.Then press and hold the OUT key for about 3 seconds, this will reset the outdoor minimum and maximum temperatures to the current value.
DISPLAY OF INDOOR MAXIMUM AND MINIMUM TEMPERATURE RECORDS:
1.In normal display mode, press the IN button once. The min indoor temperature will be shown in the LCD.
2.Then press the IN button one more time, the max indoor temperature will be shown.:
Indoor icon |
| Max icon |
|
![]()
![]()
![]()
![]() Max indoor
Max indoor ![]()
![]() temperature
temperature
3.Press one more time the IN button to go back to the normal display.
RESETTING THE INDOOR MAXIMUM/ MINIMUM RECORDS
Note: The indoor minimum and maximum records are to be reset at the same time
1.In normal display mode, press the IN key once. The min indoor temperature will be displayed.
2.Then press and hold the IN key for about 3 seconds, this will reset the indoor minimum and maximum temperatures to the current value.
915 MHz RECEPTION
The Weather station should receive the temperature data within 5 minutes after
1.The distance of the Weather station or sensor should be at least 1.5 to 2 meters away from any interfering sources such as computer monitors or TV sets.
2.Avoid positioning the Weather station onto or in the immediate proximity of metal window frames.
3.Using other electrical products such as headphones or speakers operating on the same signal frequency (915MHz) may prevent correct signal transmission and reception.
4.Neighbours using electrical devices operating on the 915MHz signal frequency can also cause interference.
Note:
When the 915MHz signal is received correctly, do not
The transmission range is about 100 m from the sensor to the Weather station (in open space). However, this depends on the surrounding environment and interference levels. If no reception is possible despite the observation of these factors, all system units have to be reset (see Setting up).
MOUNTING
POSITIONING THE WEATHER STATION:
The Weather Station may be hung onto wall easily or free standing.
To wall mount
Choose a sheltered place. Avoid direct rain and sunshine.
Before wall mounting, please check that the outdoor temperature values can be received from the desired locations.
1. Fix a screw (not supplied) into the desired wall, leaving the head extended out the by about 5mm.
2.Remove the stand from the Weather Station by pulling it away from the
base and hang the station onto the screw. Remember to ensure that it locks into place before releasing.
Free standing
With the foldout stand, the weather station can be placed onto any flat surface.
POSITIONING THE TEMPERATURE SENSOR:
The Sensor is supplied with a holder that may be attached to a wall with the two screws supplied. The Sensor can also be position on a flat surface by securing the stand to the bottom to the Sensor.
4
