The equipment is provided with a coffee counter (14) for dosing checking.
Caution! The equipment is provided with an internal protection device designed to safeguard electrical components, which causes the machine to stop in the event of overheating.
In this case, wait for the equipment to cool down before restarting it. In any event, make sure that overheating is not caused by external heat sources.
10 – MAINTENANCE
- Ensure that the equipment power plug is disconnec- ted.
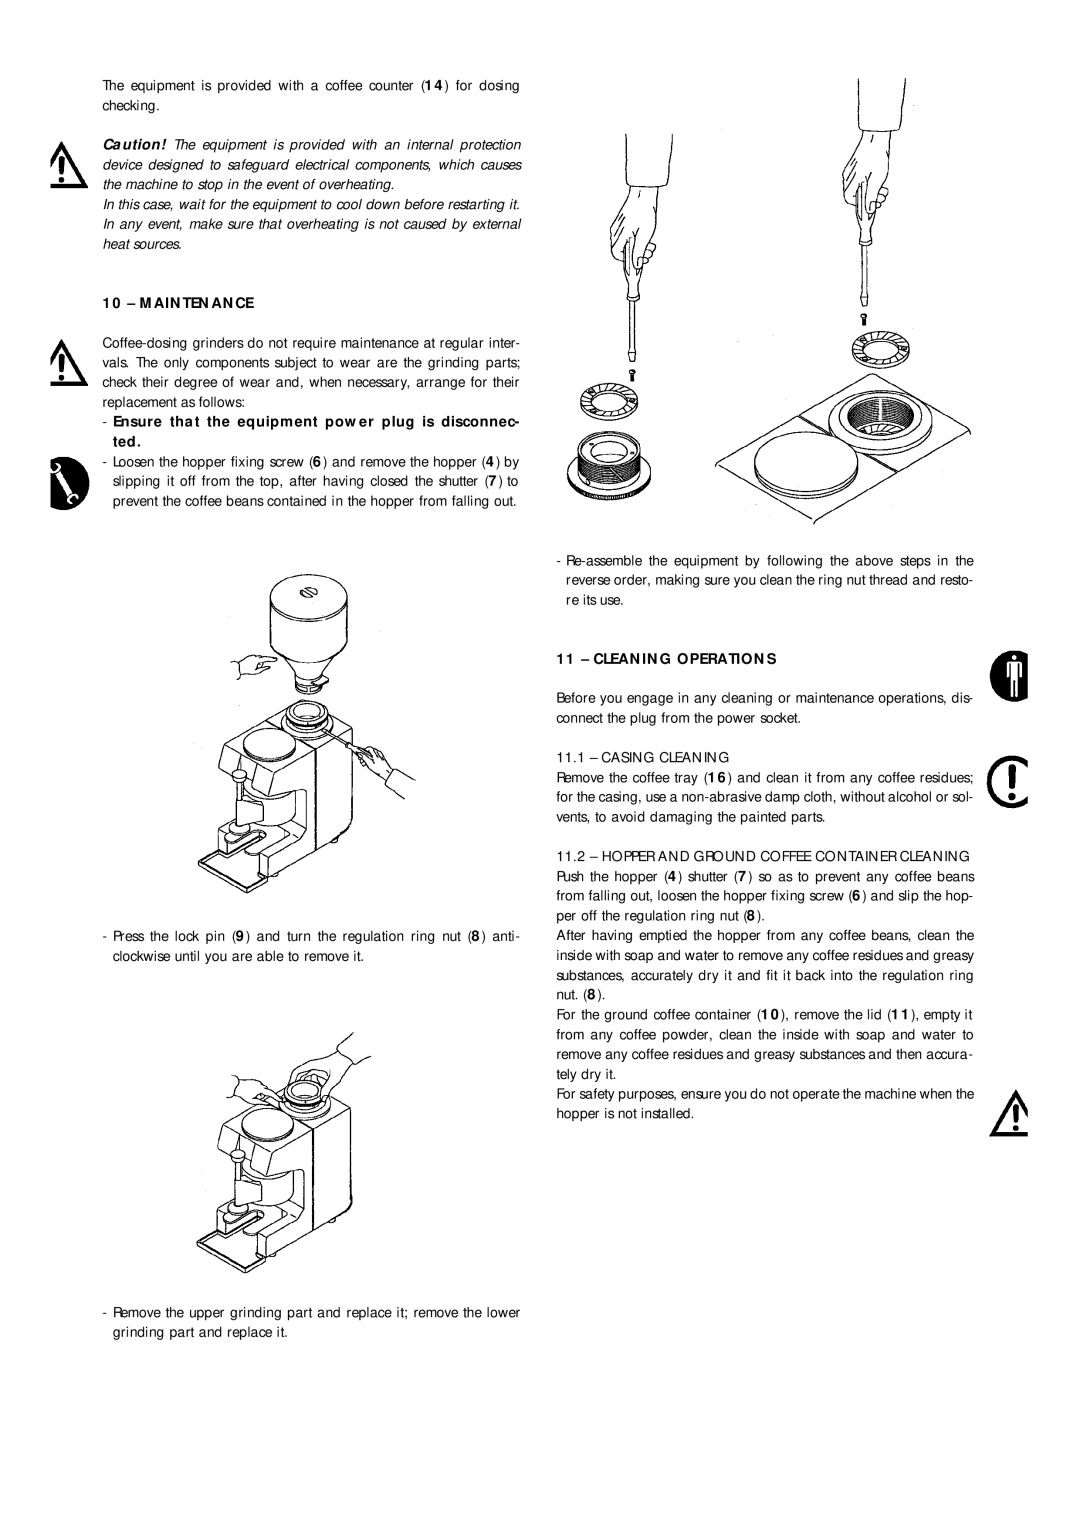
-Loosen the hopper fixing screw (6) and remove the hopper (4) by slipping it off from the top, after having closed the shutter (7) to prevent the coffee beans contained in the hopper from falling out.
- Press the lock pin (9) and turn the regulation ring nut (8) anti- clockwise until you are able to remove it.
-
11 – CLEANING OPERATIONS
Before you engage in any cleaning or maintenance operations, dis- connect the plug from the power socket.
11.1 – CASING CLEANING
Remove the coffee tray (16) and clean it from any coffee residues; for the casing, use a
11.2– HOPPER AND GROUND COFFEE CONTAINER CLEANING Push the hopper (4) shutter (7) so as to prevent any coffee beans from falling out, loosen the hopper fixing screw (6) and slip the hop- per off the regulation ring nut (8).
After having emptied the hopper from any coffee beans, clean the inside with soap and water to remove any coffee residues and greasy substances, accurately dry it and fit it back into the regulation ring nut. (8).
For the ground coffee container (10), remove the lid (11), empty it from any coffee powder, clean the inside with soap and water to remove any coffee residues and greasy substances and then accura- tely dry it.
For safety purposes, ensure you do not operate the machine when the hopper is not installed.
-Remove the upper grinding part and replace it; remove the lower grinding part and replace it.
