LaCie hard disk • DESIGN BY NEIL POULTON | Formatting & Partitioning |
User Manual | page 17 |
|
|
3.2. Mac Users
CAUTION: Following these steps will erase everything from the your hard drive. If you have information that you want to protect or continue to use, back up this information before performing these steps.
1.Connect the drive to the computer and turn on the drive.
2.Select Utilities from the Go menu in the Finder menu bar.
3.In the Utilities folder,
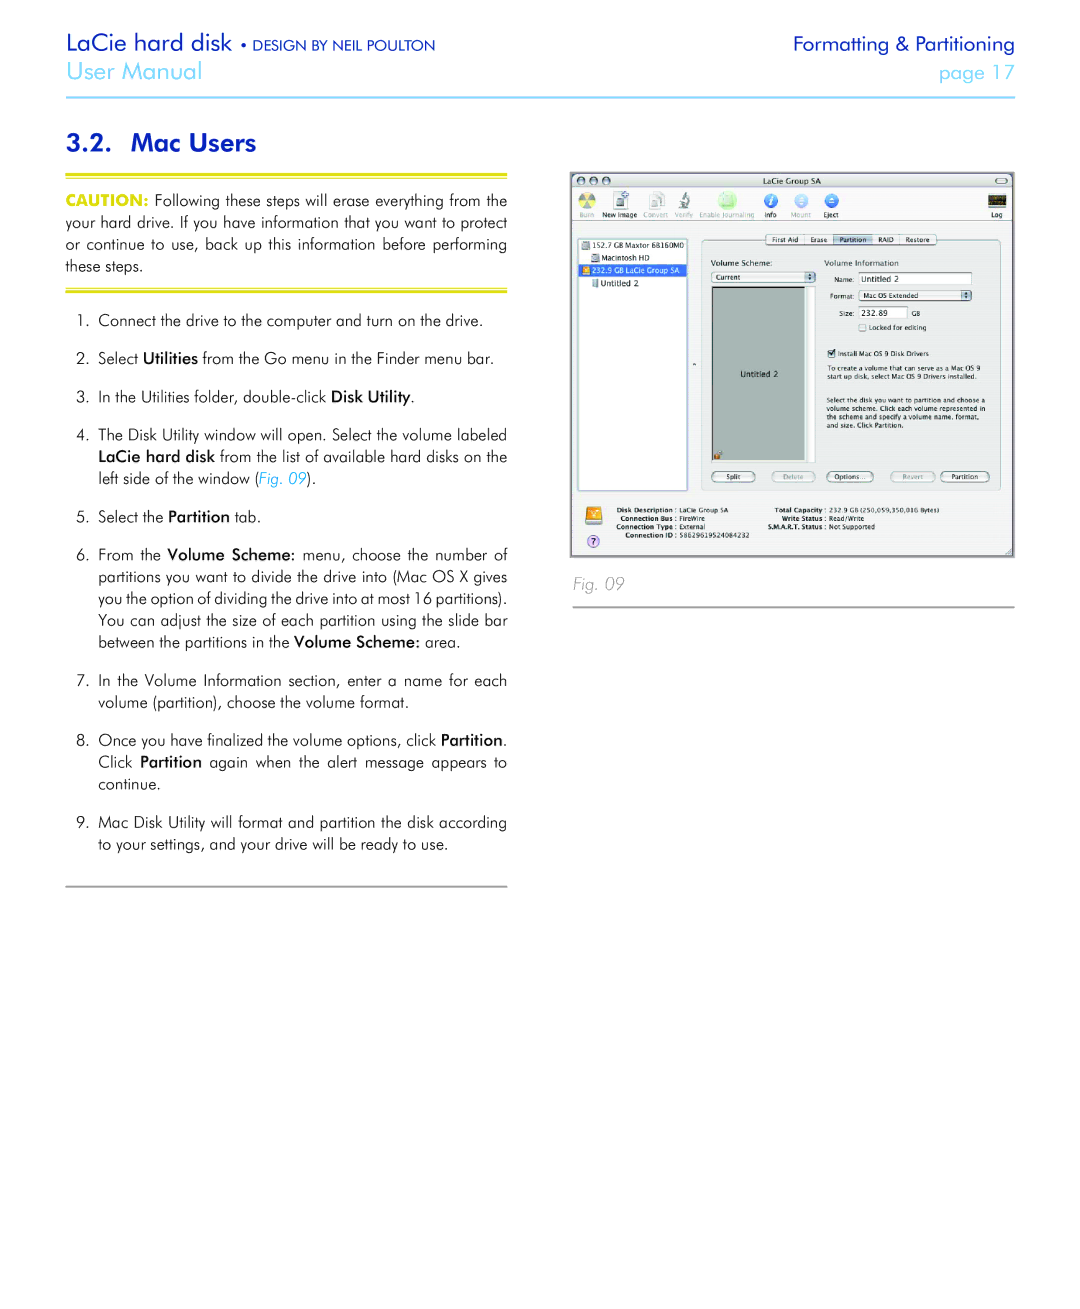
4.The Disk Utility window will open. Select the volume labeled LaCie hard disk from the list of available hard disks on the left side of the window (Fig. 09).
5.Select the Partition tab.
6.From the Volume Scheme: menu, choose the number of
partitions you want to divide the drive into (Mac OS X gives | Fig. 09 | |
you the option of dividing the drive into at most 16 partitions). | ||
| ||
You can adjust the size of each partition using the slide bar |
| |
between the partitions in the Volume Scheme: area. |
|
7.In the Volume Information section, enter a name for each volume (partition), choose the volume format.
8.Once you have finalized the volume options, click Partition. Click Partition again when the alert message appears to continue.
9.Mac Disk Utility will format and partition the disk according to your settings, and your drive will be ready to use.
