Land Pride
Assembly Instructions
Removal of Pulleys & Inner Enclosure
The following removed components will not be reused in assembly of the new CVT drive.
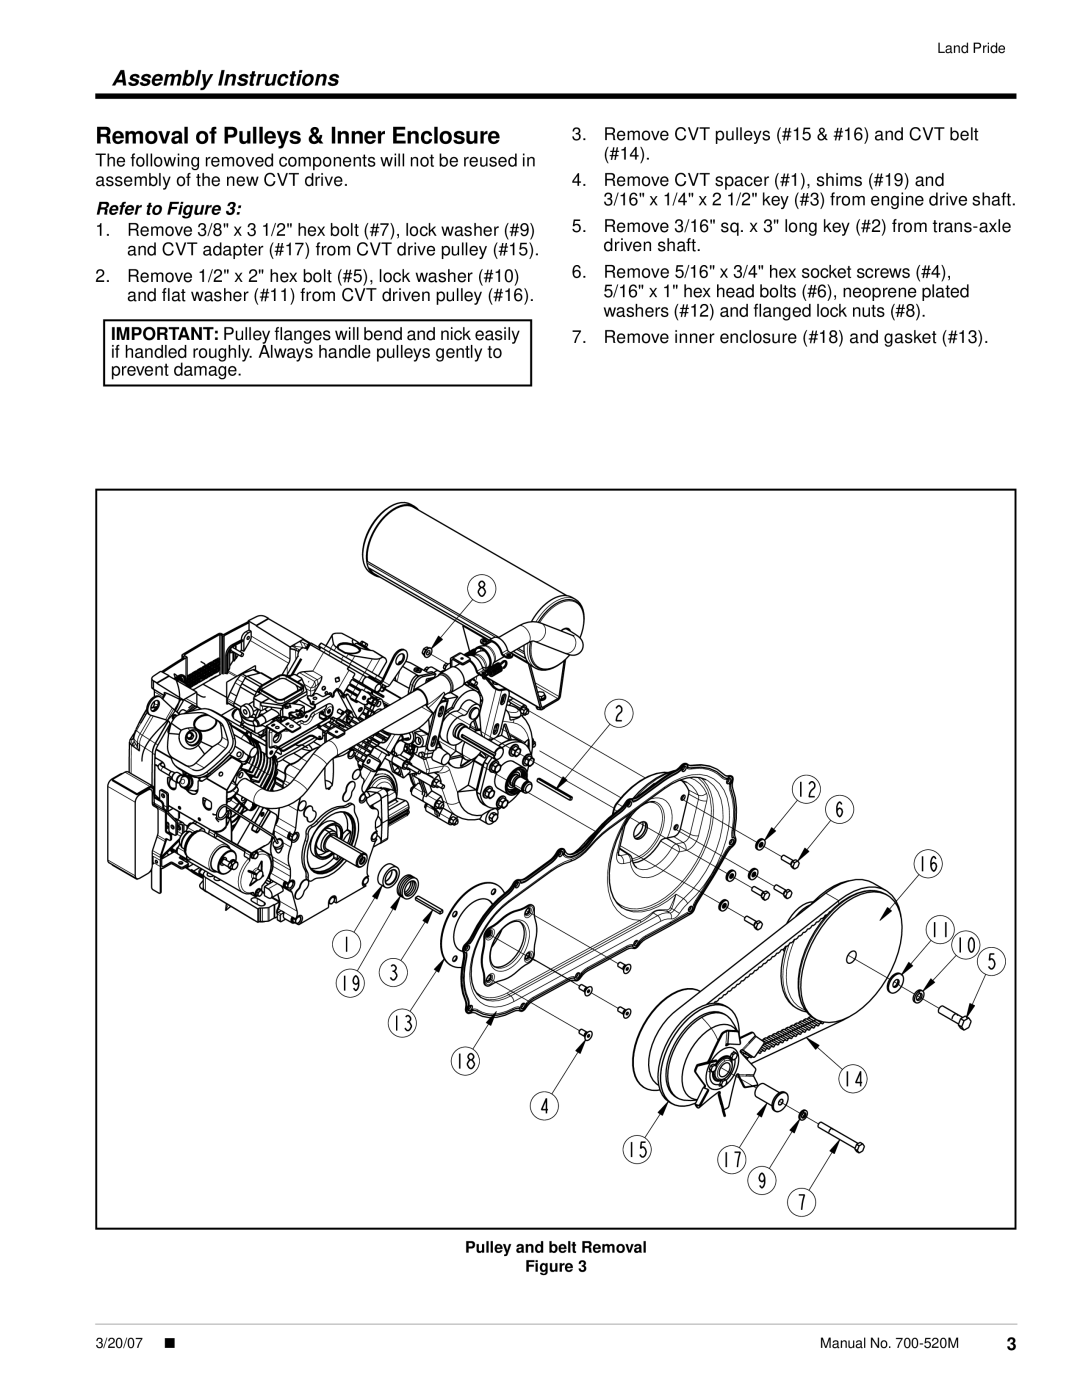
Refer to Figure 3:
1.Remove 3/8" x 3 1/2" hex bolt (#7), lock washer (#9) and CVT adapter (#17) from CVT drive pulley (#15).
2.Remove 1/2" x 2" hex bolt (#5), lock washer (#10) and flat washer (#11) from CVT driven pulley (#16).
IMPORTANT: Pulley flanges will bend and nick easily if handled roughly. Always handle pulleys gently to prevent damage.
3.Remove CVT pulleys (#15 & #16) and CVT belt (#14).
4.Remove CVT spacer (#1), shims (#19) and
3/16" x 1/4" x 2 1/2" key (#3) from engine drive shaft.
5.Remove 3/16" sq. x 3" long key (#2) from
6.Remove 5/16" x 3/4" hex socket screws (#4), 5/16" x 1" hex head bolts (#6), neoprene plated washers (#12) and flanged lock nuts (#8).
7.Remove inner enclosure (#18) and gasket (#13).
Pulley and belt Removal
Figure 3
3/20/07 ■ | Manual No. | 3 |