Land Pride
Assembly Instructions
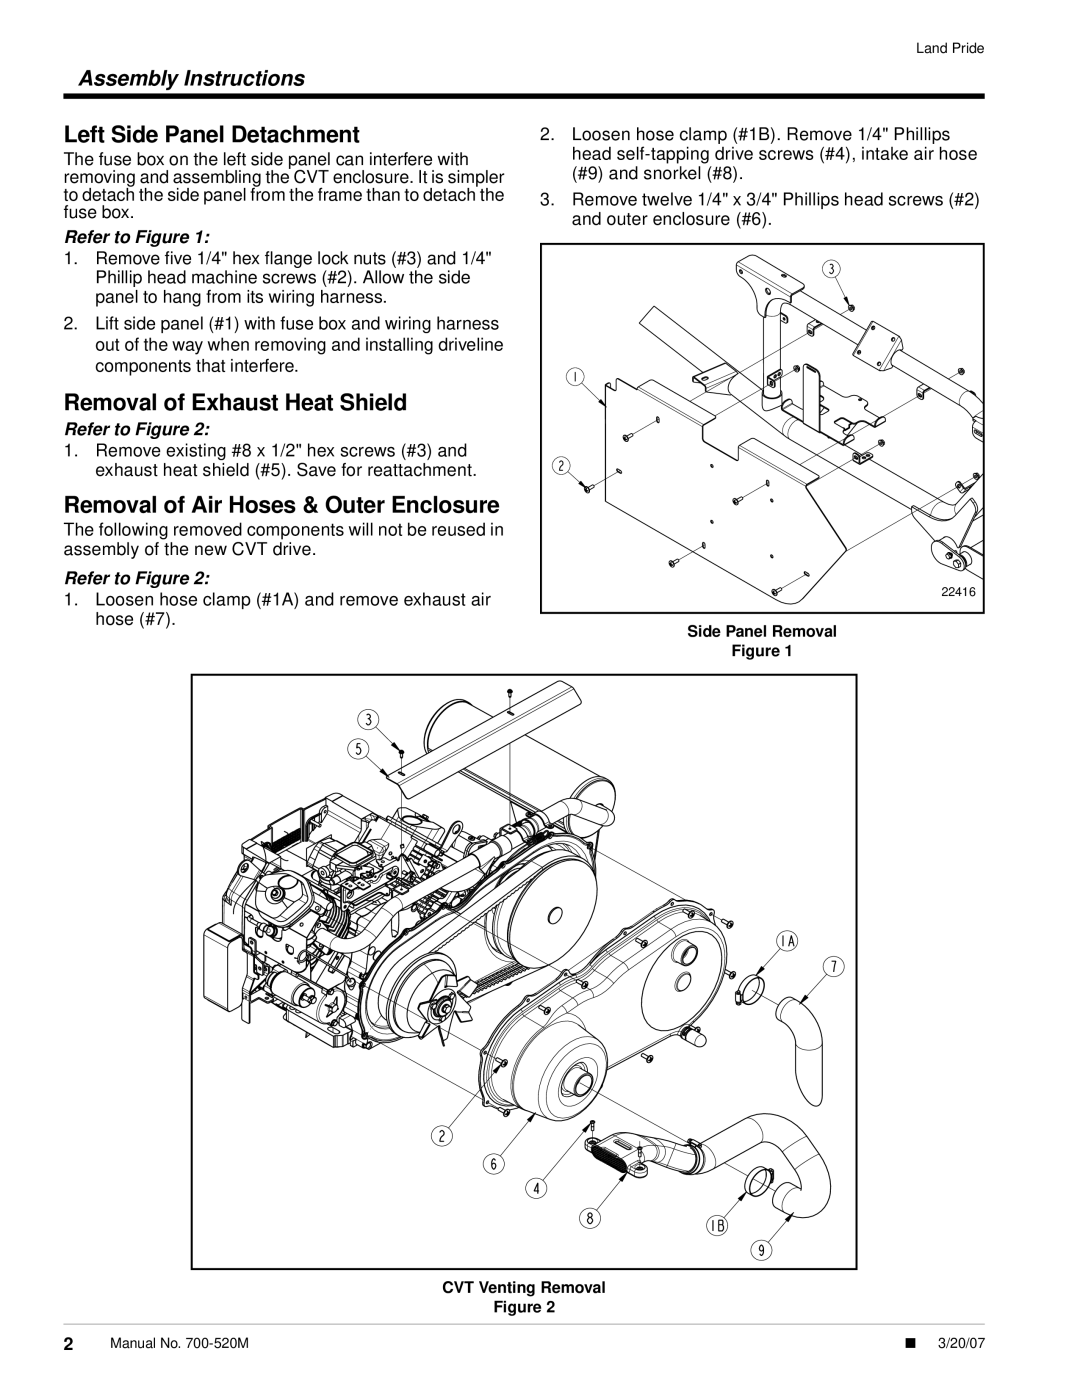
Left Side Panel Detachment
The fuse box on the left side panel can interfere with removing and assembling the CVT enclosure. It is simpler to detach the side panel from the frame than to detach the fuse box.
Refer to Figure 1:
1.Remove five 1/4" hex flange lock nuts (#3) and 1/4" Phillip head machine screws (#2). Allow the side panel to hang from its wiring harness.
2.Lift side panel (#1) with fuse box and wiring harness out of the way when removing and installing driveline components that interfere.
Removal of Exhaust Heat Shield
Refer to Figure 2:
1.Remove existing #8 x 1/2" hex screws (#3) and exhaust heat shield (#5). Save for reattachment.
Removal of Air Hoses & Outer Enclosure
The following removed components will not be reused in assembly of the new CVT drive.
Refer to Figure 2:
1.Loosen hose clamp (#1A) and remove exhaust air hose (#7).
2.Loosen hose clamp (#1B). Remove 1/4" Phillips head
3.Remove twelve 1/4" x 3/4" Phillips head screws (#2) and outer enclosure (#6).
22416 |
Side Panel Removal
Figure 1
CVT Venting Removal
Figure 2
2 | Manual No. | ■ 3/20/07 |