Table of Contents
Section 3 Adjustments
Land Pride
!DANGER!
Engage parking brake, disengage PTO, shut off tractor and re- move key before proceeding. Ensure that all moving parts have come to a complete stop before dismounting from the tractor.
c.Adjust the tailwheel up or down to the desired cut- ting height and replace the attaching hardware.
d.Lower the
! CAUTION!
Wear a pair of gloves when performing this operation. Go to the back of the cutter and carefully rotate each blade to the position shown in Figure
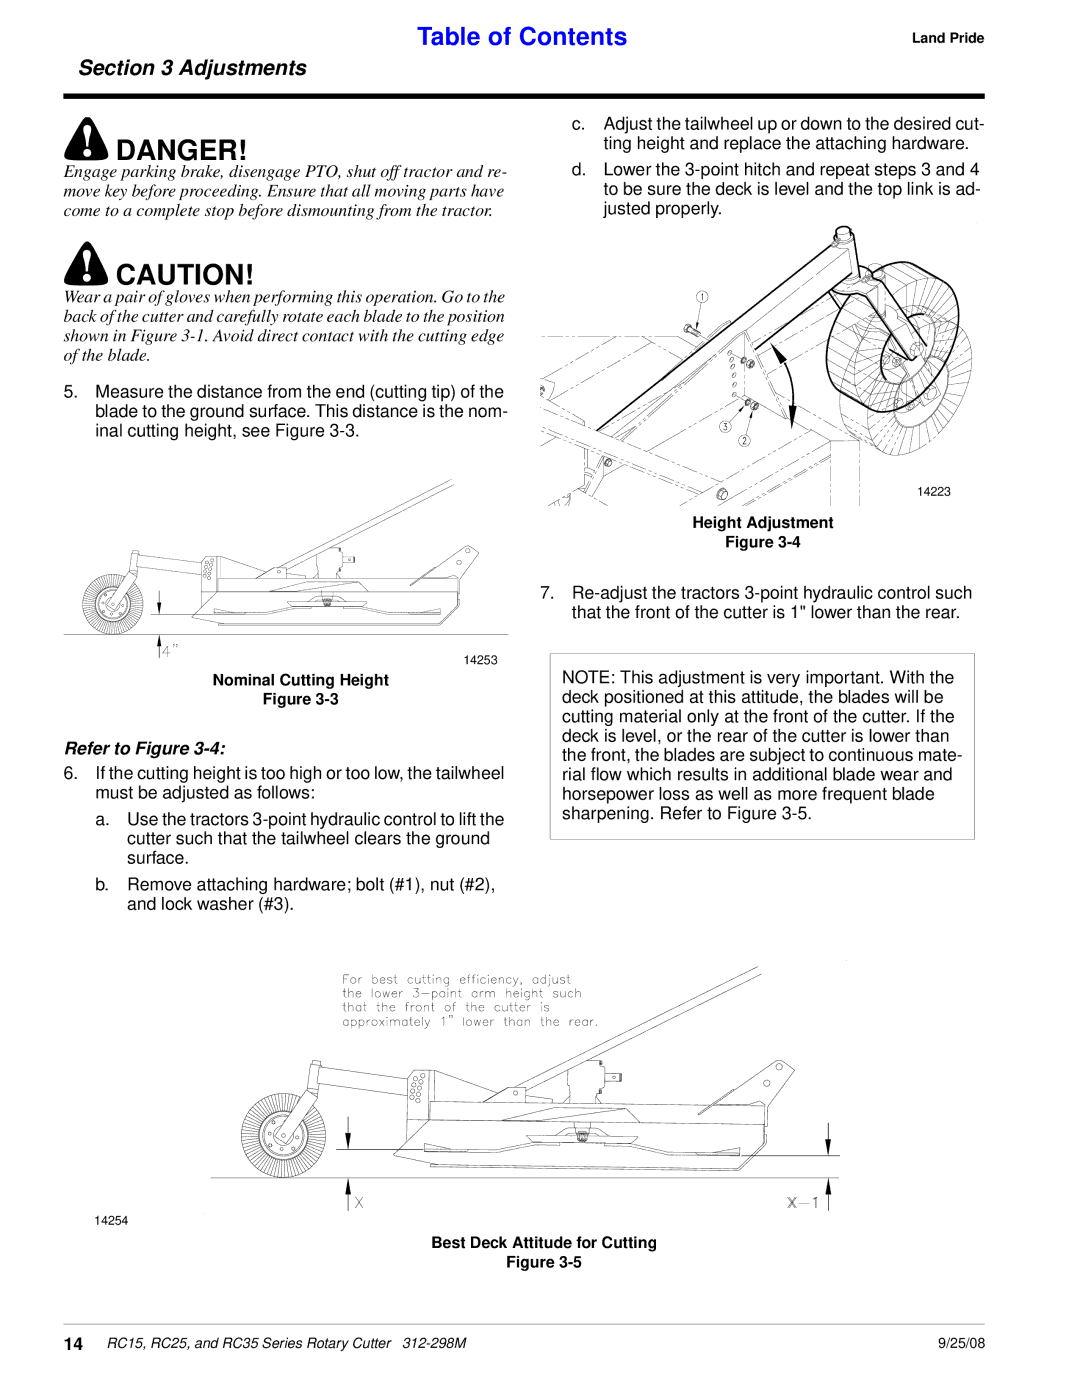
5. Measure the distance from the end (cutting tip) of the blade to the ground surface. This distance is the nom- inal cutting height, see Figure
14223
Height Adjustment
Figure
7.
14253
Nominal Cutting Height
Figure
Refer to Figure 3-4:
6.If the cutting height is too high or too low, the tailwheel must be adjusted as follows:
a.Use the tractors
b.Remove attaching hardware; bolt (#1), nut (#2), and lock washer (#3).
NOTE: This adjustment is very important. With the deck positioned at this attitude, the blades will be cutting material only at the front of the cutter. If the deck is level, or the rear of the cutter is lower than the front, the blades are subject to continuous mate- rial flow which results in additional blade wear and horsepower loss as well as more frequent blade sharpening. Refer to Figure
14254
Best Deck Attitude for Cutting
Figure
14 RC15, RC25, and RC35 Series Rotary Cutter | 9/25/08 |
