INSTALLATION
POSITIVE FLUE CONNECTION FOR MASONRY
FIREPLACE (continued)
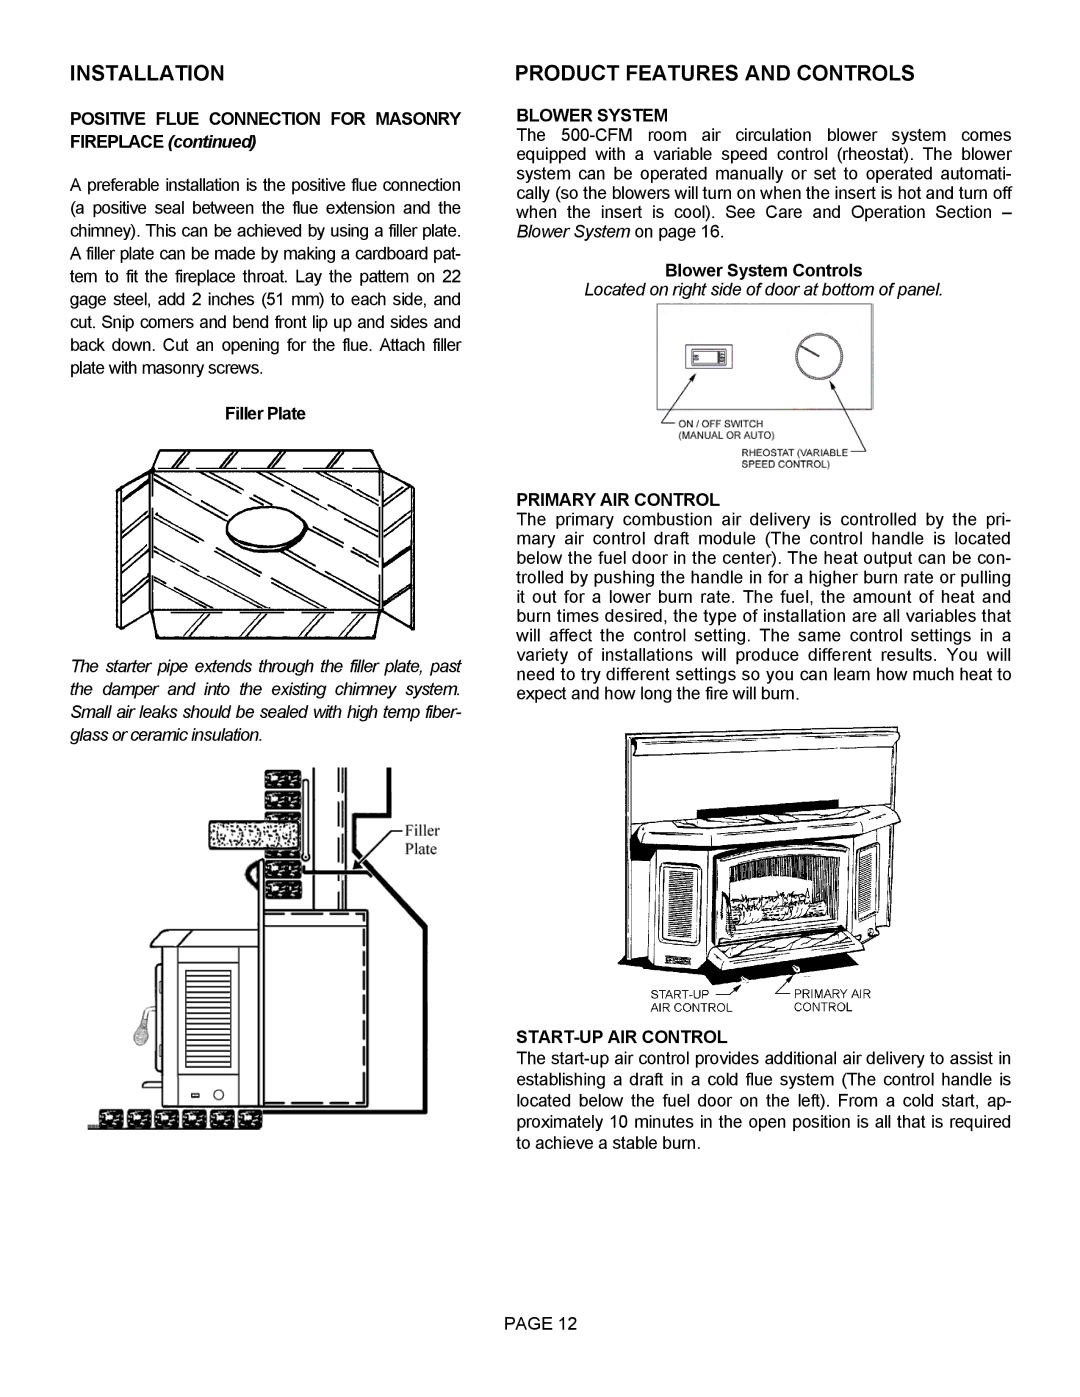
A preferable installation is the positive flue connection (a positive seal between the flue extension and the chimney). This can be achieved by using a filler plate. A filler plate can be made by making a cardboard pat- tern to fit the fireplace throat. Lay the pattern on 22 gage steel, add 2 inches (51 mm) to each side, and cut. Snip corners and bend front lip up and sides and back down. Cut an opening for the flue. Attach filler plate with masonry screws.
Filler Plate
The starter pipe extends through the filler plate, past the damper and into the existing chimney system. Small air leaks should be sealed with high temp fiber- glass or ceramic insulation.
PRODUCT FEATURES AND CONTROLS
BLOWER SYSTEM
The
Blower System Controls
Located on right side of door at bottom of panel.
PRIMARY AIR CONTROL
The primary combustion air delivery is controlled by the pri- mary air control draft module (The control handle is located below the fuel door in the center). The heat output can be con- trolled by pushing the handle in for a higher burn rate or pulling it out for a lower burn rate. The fuel, the amount of heat and burn times desired, the type of installation are all variables that will affect the control setting. The same control settings in a variety of installations will produce different results. You will need to try different settings so you can learn how much heat to expect and how long the fire will burn.
START-UP AIR CONTROL
The
PAGE 12
