INSTALLATION
SURROUND ASSEMBLY
IMPORTANT: Do not face seal over chimney cooling air system on superior brand or any brand fireplace which is designed with the chimney cooling air system.
13.Pull the insert slightly forward to its desired position; attach the face shield using the sur- round clips and hardware as shown. The fi- berglass insulation strips should be secured along the top and sides (step 3). Assemble the
Push the appliance back until face shield insula- tion is compressed against the fireplace front, forming a tight seal. Test for air leaks by hold- ing a candle around edge of face shield to see if smoke is pulled into fireplace.
*Note: Preferred method of attaching connector to flue outlet is to install two
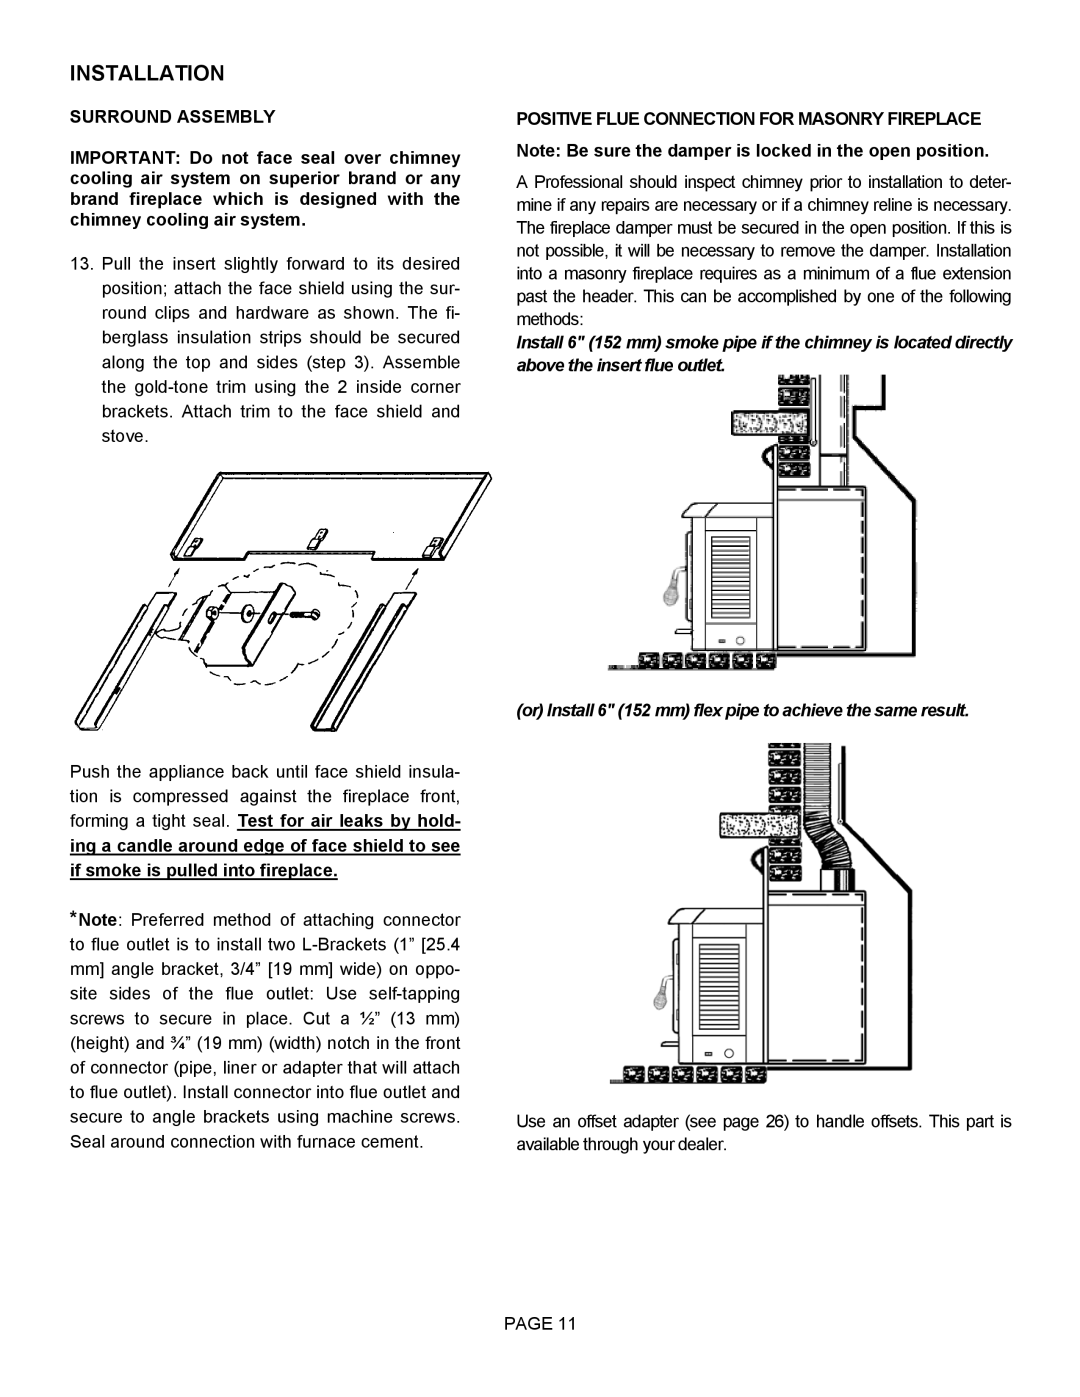
POSITIVE FLUE CONNECTION FOR MASONRY FIREPLACE Note: Be sure the damper is locked in the open position.
A Professional should inspect chimney prior to installation to deter- mine if any repairs are necessary or if a chimney reline is necessary. The fireplace damper must be secured in the open position. If this is not possible, it will be necessary to remove the damper. Installation into a masonry fireplace requires as a minimum of a flue extension past the header. This can be accomplished by one of the following methods:
Install 6" (152 mm) smoke pipe if the chimney is located directly above the insert flue outlet.
(or) Install 6" (152 mm) flex pipe to achieve the same result.
Use an offset adapter (see page 26) to handle offsets. This part is available through your dealer.
PAGE 11