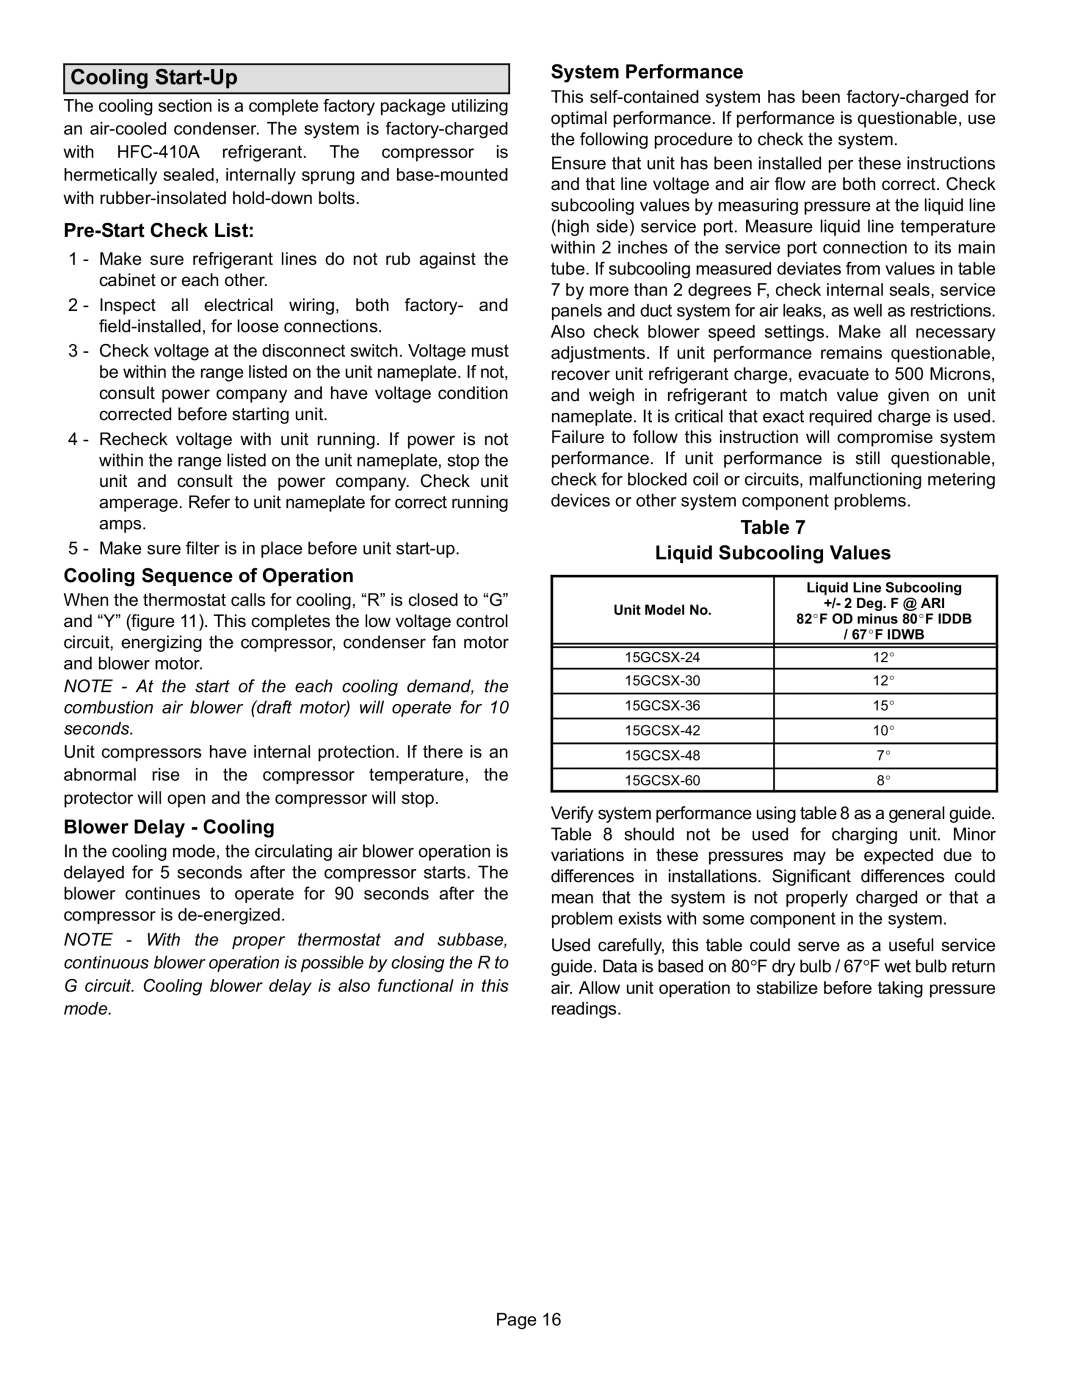
Gas Packaged Units, 15GCSX specifications
Lennox International Inc. is a leading name in the HVAC industry, renowned for its innovative and energy-efficient products. Among its featured offerings are the 15GCSX Gas Packaged Units, specifically designed to provide reliable heating and cooling performance for residential and light commercial applications.The 15GCSX models stand out with their impressive efficiency ratings, achieving up to 14 SEER (Seasonal Energy Efficiency Ratio) for cooling and 81% AFUE (Annual Fuel Utilization Efficiency) for heating. This ensures that users can enjoy a comfortable indoor environment while also managing energy costs, making them an environmentally friendly choice.
One of the key features of the 15GCSX is its compact design, allowing for easy installation in tight spaces. This is particularly beneficial for urban settings where space can be at a premium. The unit’s all-in-one design integrates both heating and cooling capabilities, eliminating the need for separate systems and simplifying maintenance.
The 15GCSX Gas Packaged Units utilize advanced technologies to optimize performance. Equipped with Lennox’s proprietary iComfort technology, these units can connect to smart thermostats, allowing users to monitor and adjust settings remotely. This innovation enhances energy savings and provides users with full control over their indoor climate, contributing to enhanced comfort levels.
In terms of durability, the 15GCSX models feature a robust construction, complete with weather-resistant cabinet materials designed to withstand the elements. The unit’s stainless steel heat exchanger is built for longevity and efficiency, further enhancing the overall reliability of the system.
Noise reduction is another critical consideration in the design of the 15GCSX units. They come equipped with a specially designed, quiet-running fan and compressor that help to minimize operational sound levels, ensuring a peaceful indoor environment during use.
In conclusion, the Lennox 15GCSX Gas Packaged Units represent a high-quality solution for efficient heating and cooling needs. With their combination of advanced technology, energy efficiency, compact design, and durability, these units are an excellent choice for homeowners and businesses seeking reliable climate control. The integration of smart features and silent operation further solidifies their position as a preferred option in the HVAC market.