
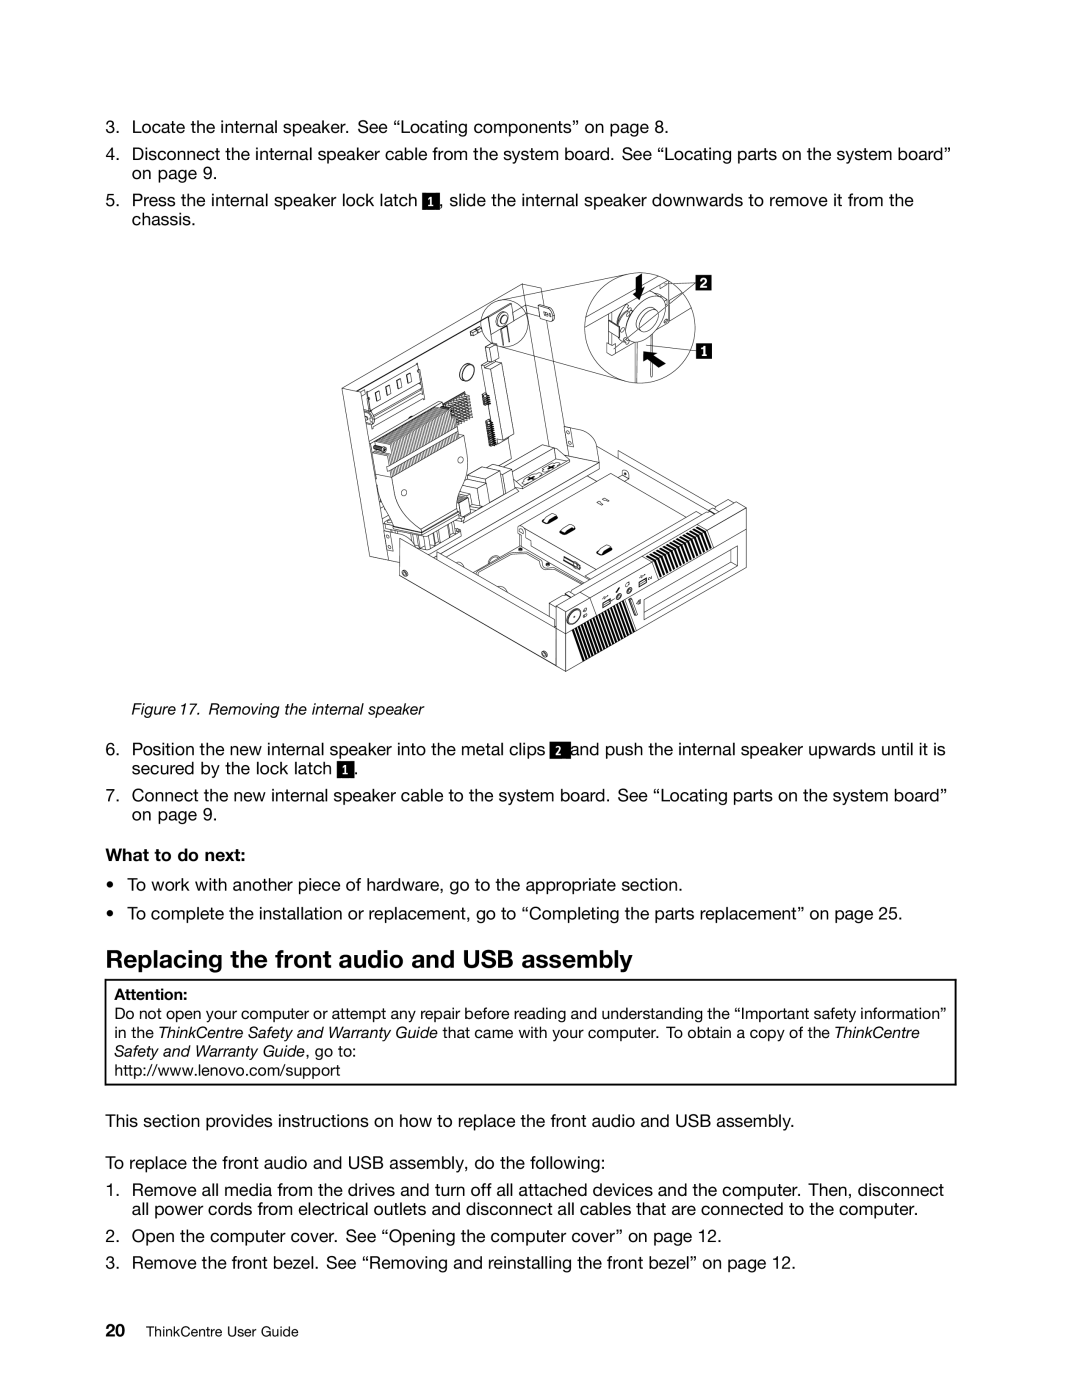
3244, 3131, 3257, 3142, 3307 specifications
Lenovo has always been a frontrunner in the computing industry, and their latest line of devices, including models 5226, 3557, 3131, 3257, and 3244, showcases their commitment to innovation, performance, and user-centric design. Each model is tailored to meet varying needs ranging from business professionals to casual users seeking reliable computing solutions.The Lenovo 5226 is engineered with business users in mind. Its sleek design integrates powerful processing capabilities with security features like a fingerprint reader and TPM 2.0 for enhanced data protection. Equipped with the latest Intel Core processors, the 5226 ensures efficient performance, making multitasking seamless. Additionally, the display quality is top-notch, featuring a high-resolution screen that delivers vivid colors and sharp details, ideal for presentations and video conferencing.
Next, the Lenovo 3557 combines portability with functionality. Weighing less than its peers, this model is perfect for users on the go. The efficient battery life allows for extended use without needing a recharge, making it a suitable choice for students and professionals alike. The 3557 also features Lenovo's proprietary Rapid Charge technology, enabling quick recharges when time is of the essence.
The 3131 model stands out with its robust build and durability. Designed to withstand the rigors of daily use, this laptop features a spill-resistant keyboard and reinforced chassis, ensuring it can handle accidental drops or spills. With ample storage options and expansive RAM, it caters to users who require significant data handling, making it an excellent choice for creators and engineers.
For those looking for multimedia capabilities, the Lenovo 3257 brings a tantalizing display experience. With enhanced graphics and an immersive audio system, this model is ideal for entertainment and gaming. The inclusion of HDMI ports and multiple USB 3.0 ports facilitates easy connectivity to external devices, ensuring users can enjoy their favorite media on larger screens without hassle.
Lastly, the Lenovo 3244 focuses on providing value for money without compromising on performance. This model is equipped with a reliable processor and solid-state drive options that ensure quick boot times and fast data access. The energy-efficient design also contributes to longer battery life, making it an ideal choice for budget-conscious users who don’t want to sacrifice performance.
In summary, Lenovo's 5226, 3557, 3131, 3257, and 3244 models offer a diverse range of features that cater to different user requirements. From advanced business functionalities to entertainment options, Lenovo continues to leverage innovative technologies that enhance the overall computing experience.