Installation of Unit


 Connection
 of
of piping


1.Move the indoor tubing and drain hose to the hole
•Remove tubing holder and pull the tubing out of the chassis.
2.Replace the tubing holder into original position
3.Route the tubing and the drain hose staight backwards.
4.Insert the connecting cable into the indoor unit through the hole.
•Do not connect the cable to the indoor unit
•Make a small loop with the cable for easy connection later.
5.Tape the tubing and the connecting cable.
6.Indoor unit installation.
7.Connecting the pipings to the indoor unit.
ENGLISH
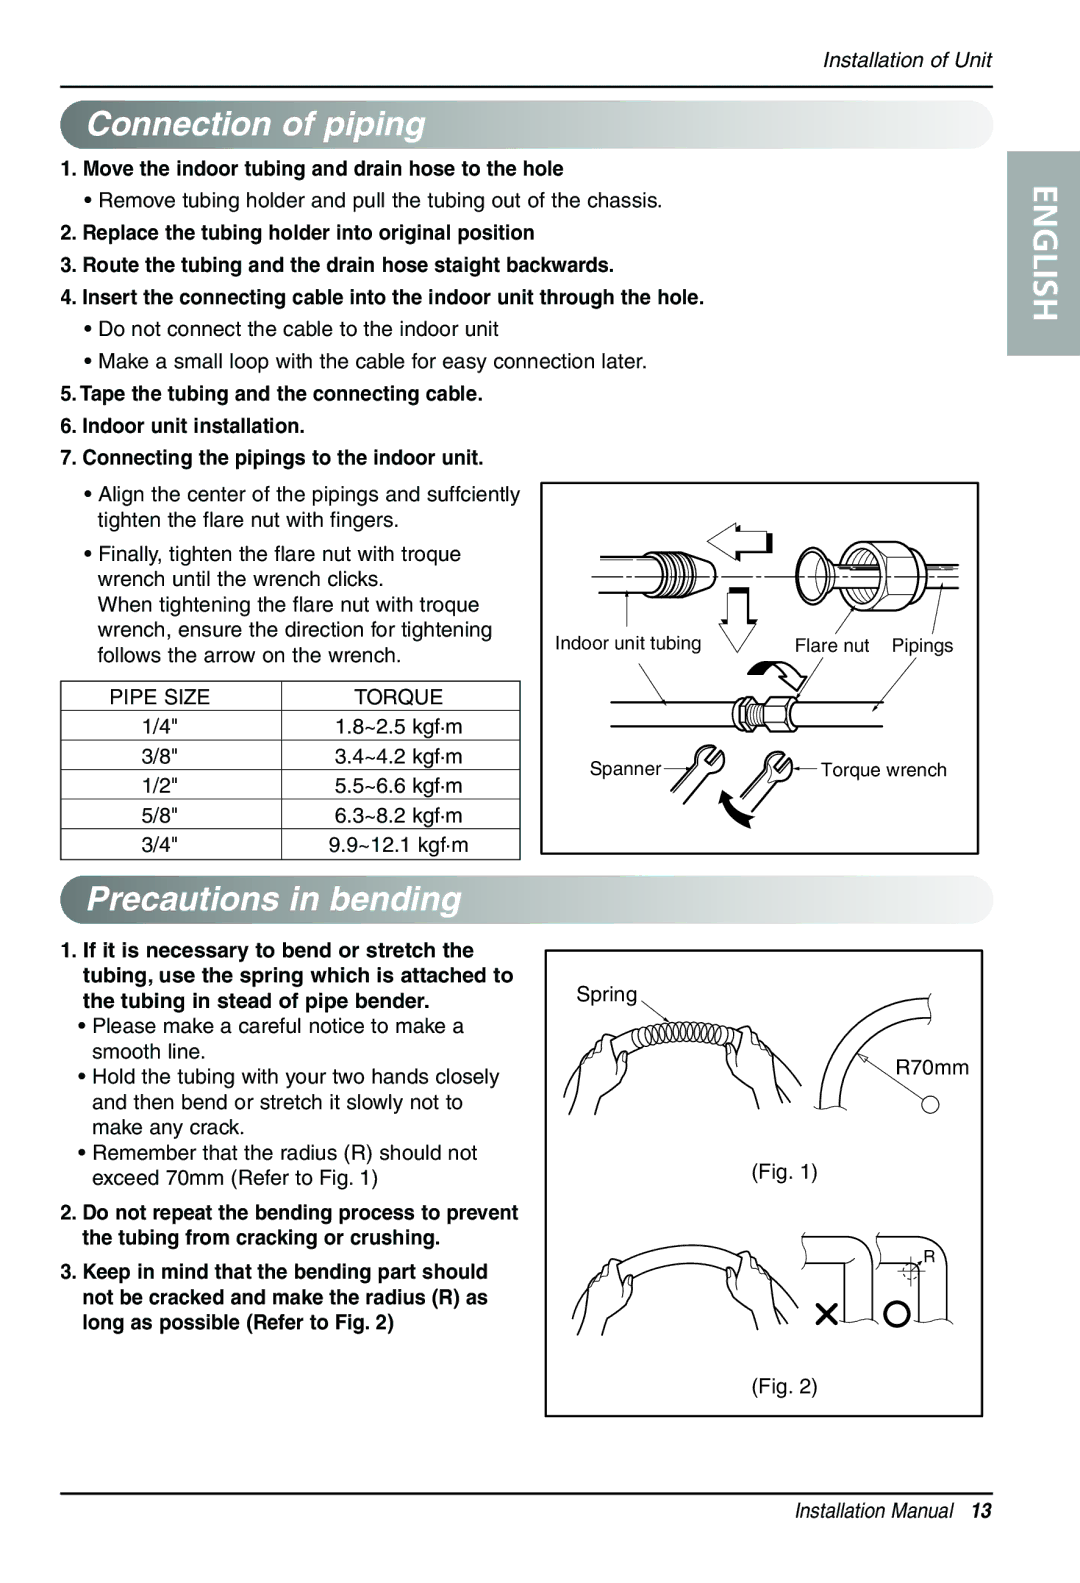
•Align the center of the pipings and suffciently tighten the flare nut with fingers.
•Finally, tighten the flare nut with troque wrench until the wrench clicks.
When tightening the flare nut with troque wrench, ensure the direction for tightening follows the arrow on the wrench.
PIPE SIZE | TORQUE |
1/4" | 1.8~2.5 kgf.m |
3/8" | 3.4~4.2 kgf.m |
1/2" | 5.5~6.6 kgf.m |
5/8" | 6.3~8.2 kgf.m |
3/4" | 9.9~12.1 kgf.m |
Indoor unit tubing | Flare nut | Pipings |
Spanner | Torque wrench | |


 Precautions
 in
in bending


1.If it is necessary to bend or stretch the tubing, use the spring which is attached to the tubing in stead of pipe bender.
•Please make a careful notice to make a smooth line.
•Hold the tubing with your two hands closely and then bend or stretch it slowly not to make any crack.
•Remember that the radius (R) should not exceed 70mm (Refer to Fig. 1)
2.Do not repeat the bending process to prevent the tubing from cracking or crushing.
3.Keep in mind that the bending part should not be cracked and make the radius (R) as long as possible (Refer to Fig. 2)
Spring
R70mm
(Fig. 1)
R
(Fig. 2)
Installation Manual 13