Installation of Unit


 Installation
 Method


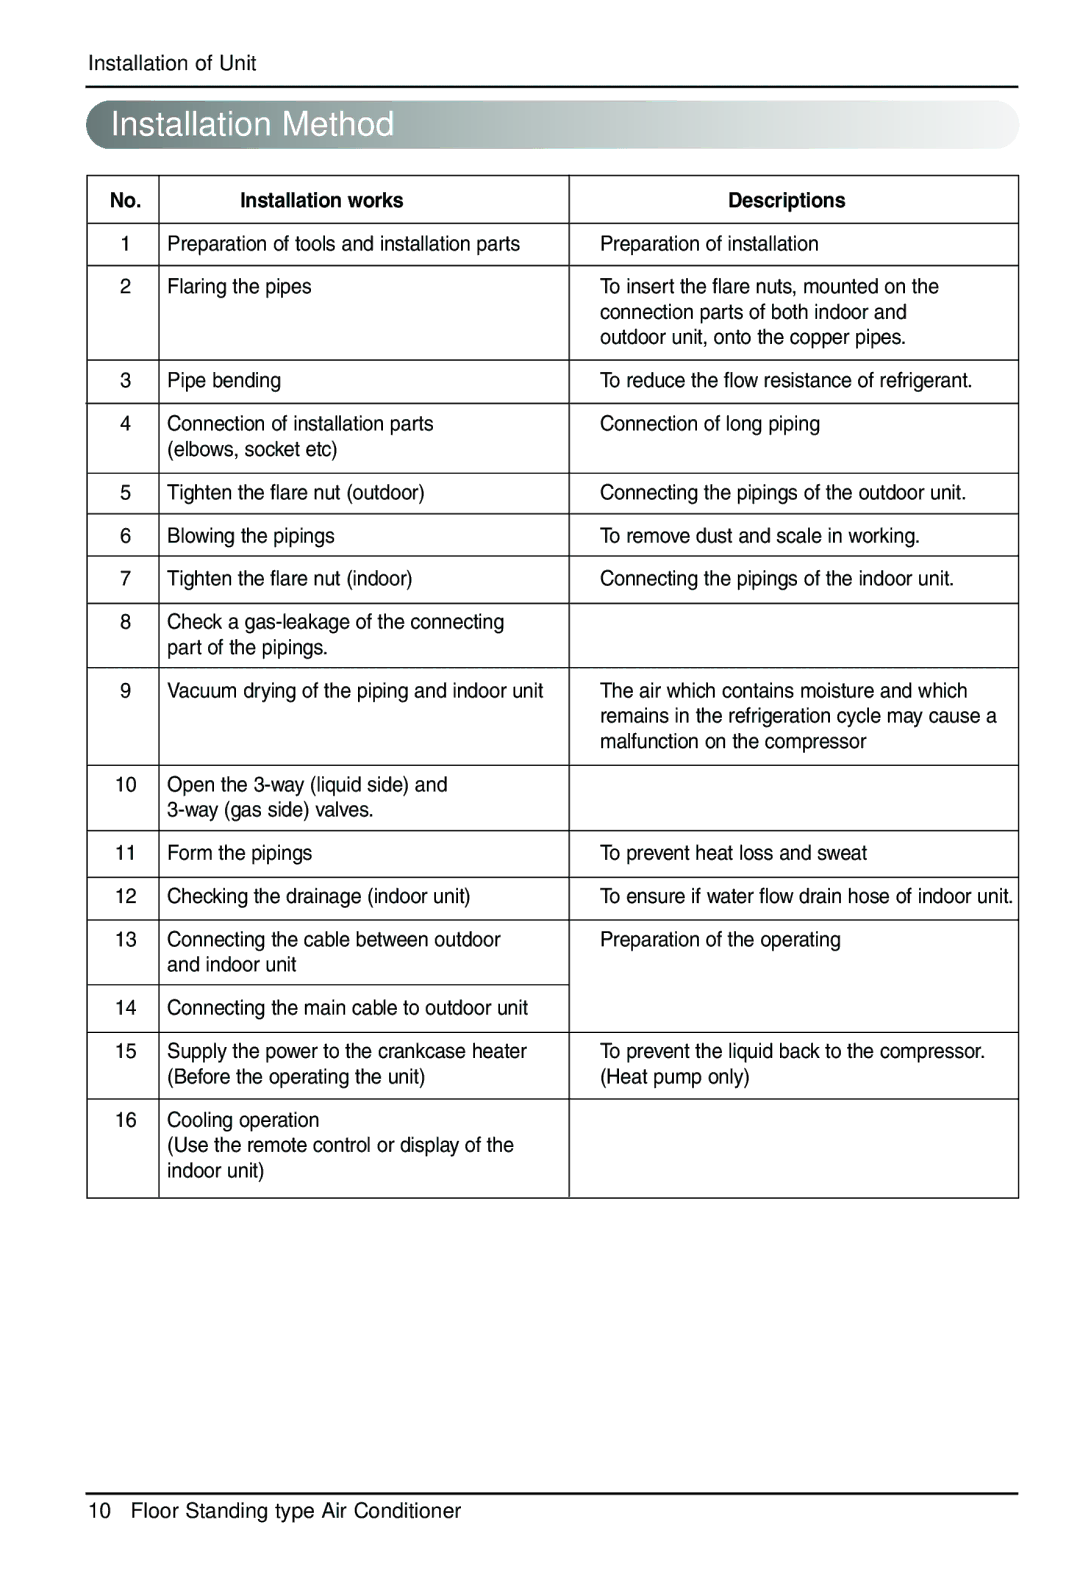
No. | Installation works | Descriptions |
|
|
|
1 | Preparation of tools and installation parts | Preparation of installation |
|
|
|
2 | Flaring the pipes | To insert the flare nuts, mounted on the |
|
| connection parts of both indoor and |
|
| outdoor unit, onto the copper pipes. |
|
|
|
3 | Pipe bending | To reduce the flow resistance of refrigerant. |
|
|
|
4 | Connection of installation parts | Connection of long piping |
| (elbows, socket etc) |
|
|
|
|
5 | Tighten the flare nut (outdoor) | Connecting the pipings of the outdoor unit. |
|
|
|
6 | Blowing the pipings | To remove dust and scale in working. |
|
|
|
7 | Tighten the flare nut (indoor) | Connecting the pipings of the indoor unit. |
|
|
|
8 | Check a |
|
| part of the pipings. |
|
|
|
|
9 | Vacuum drying of the piping and indoor unit | The air which contains moisture and which |
|
| remains in the refrigeration cycle may cause a |
|
| malfunction on the compressor |
|
|
|
10 | Open the |
|
|
| |
|
|
|
11 | Form the pipings | To prevent heat loss and sweat |
|
|
|
12 | Checking the drainage (indoor unit) | To ensure if water flow drain hose of indoor unit. |
|
|
|
13 | Connecting the cable between outdoor | Preparation of the operating |
| and indoor unit |
|
|
|
|
14 | Connecting the main cable to outdoor unit |
|
|
|
|
15 | Supply the power to the crankcase heater | To prevent the liquid back to the compressor. |
| (Before the operating the unit) | (Heat pump only) |
|
|
|
16 | Cooling operation |
|
| (Use the remote control or display of the |
|
| indoor unit) |
|
|
|
|
10Floor Standing type Air Conditioner
