Commercial Mode Setup for Master TV

This page provides an overview of a Master TV configuration.

Note: Disconnect all Aux inputs. Under certain conditions, Auto Tuning (Channel Search) is disabled if there is an Aux input active.

Commercial Mode Setup Procedure

1.Set Installer Menu Items

(Enter the TV Installer Menu—refer to the “Installer Menu” section of this document for detailed instructions.)

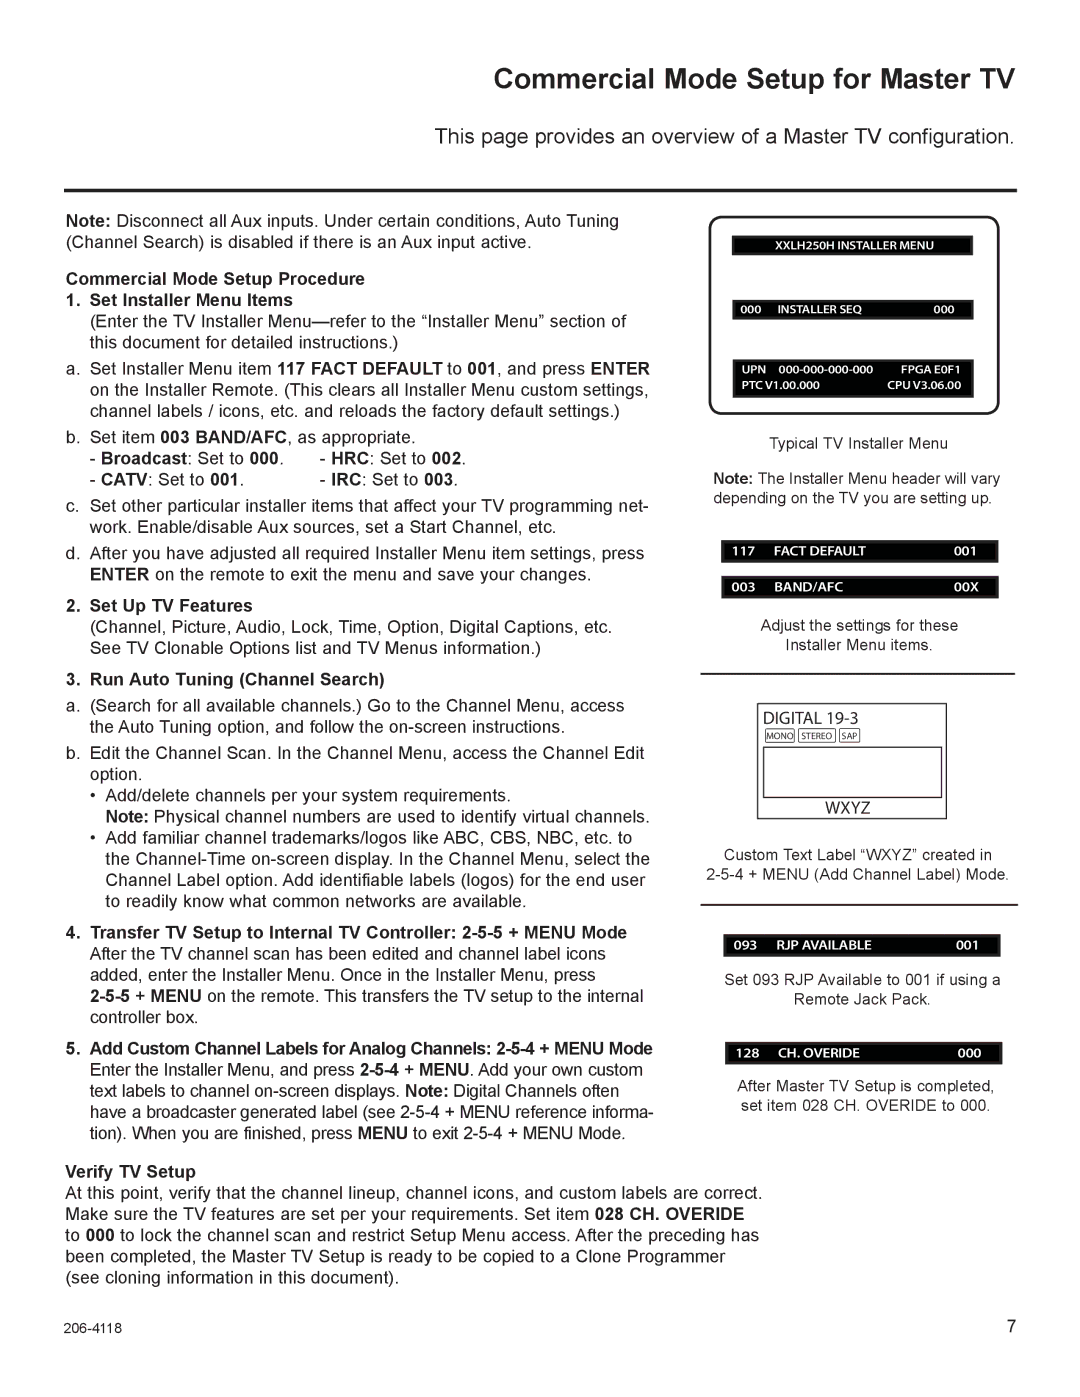
a.Set Installer Menu item 117 FACT DEFAULT to 001, and press ENTER on the Installer Remote. (This clears all Installer Menu custom settings, channel labels / icons, etc. and reloads the factory default settings.)

b.Set item 003 BAND/AFC, as appropriate.

- Broadcast: Set to

000.

- HRC: Set to 002.

- CATV: Set to 001.


- IRC: Set to 003.

c.Set other particular installer items that affect your TV programming net- work. Enable/disable Aux sources, set a Start Channel, etc.

d.After you have adjusted all required Installer Menu item settings, press ENTER on the remote to exit the menu and save your changes.

2.Set Up TV Features

(Channel, Picture, Audio, Lock, Time, Option, Digital Captions, etc. See TV Clonable Options list and TV Menus information.)

3.Run Auto Tuning (Channel Search)

a.(Search for all available channels.) Go to the Channel Menu, access the Auto Tuning option, and follow the on-screen instructions.

b.Edit the Channel Scan. In the Channel Menu, access the Channel Edit option.

Add/delete channels per your system requirements.

Note: Physical channel numbers are used to identify virtual channels.

Add familiar channel trademarks/logos like ABC, CBS, NBC, etc. to the Channel-Time on-screen display. In the Channel Menu, select the Channel Label option. Add identifiable labels (logos) for the end user to readily know what common networks are available.

4.Transfer TV Setup to Internal TV Controller: 2-5-5 + MENU Mode After the TV channel scan has been edited and channel label icons added, enter the Installer Menu. Once in the Installer Menu, press

2-5-5+ MENU on the remote. This transfers the TV setup to the internal controller box.

5.Add Custom Channel Labels for Analog Channels: 2-5-4 + MENU Mode Enter the Installer Menu, and press 2-5-4 + MENU. Add your own custom text labels to channel on-screen displays. Note: Digital Channels often have a broadcaster generated label (see 2-5-4 + MENU reference informa- tion). When you are finished, press MENU to exit 2-5-4 + MENU Mode.

XXLH250H INSTALLER MENU

000 INSTALLER SEQ

000


UPN 000-000-000-000

FPGA E0F1

PTC V1.00.000

CPU V3.06.00


Typical TV Installer Menu

Note: The Installer Menu header will vary depending on the TV you are setting up.

117

FACT DEFAULT

001


003

BAND/AFC

00X

Adjust the settings for these

Installer Menu items.

DIGITAL 19-3

MONO STEREO SAP

WXYZ

Custom Text Label “WXYZ” created in

2-5-4 + MENU (Add Channel Label) Mode.

093 RJP AVAILABLE

001

Set 093 RJP Available to 001 if using a

Remote Jack Pack.

128 CH. OVERIDE

000

After Master TV Setup is completed, set item 028 CH. OVERIDE to 000.

Verify TV Setup

At this point, verify that the channel lineup, channel icons, and custom labels are correct. Make sure the TV features are set per your requirements. Set item 028 CH. OVERIDE to 000 to lock the channel scan and restrict Setup Menu access. After the preceding has been completed, the Master TV Setup is ready to be copied to a Clone Programmer (see cloning information in this document).

206-4118

7

Page 7
Image 7
LG Electronics 32LH250H Commercial Mode Setup for Master TV, Commercial Mode Setup Procedure Set Installer Menu Items, 000

42LH250H, 37LH255H, 42LH260H, 42LH255H, 32LH255H specifications

LG Electronics is renowned for its innovative television technology, and models such as the SAC34026004, 42LH260H, 37LH255H, 32LH250H, and 32LH255H embody this legacy. Each of these models comes equipped with features and technologies that provide an immersive viewing experience.

The SAC34026004 model serves as a versatile option for consumers looking for an efficient entertainment solution. This television integrates advanced LED technology, which enhances brightness and color accuracy, making it suitable for various lighting conditions. Additionally, it offers smart features that facilitate seamless access to streaming services, allowing viewers to enjoy their favorite content with ease.

Turning to the 42LH260H, this television boasts a 42-inch screen that strikes an ideal balance between size and functionality. With a Full HD resolution of 1920 x 1080 pixels, it ensures clarity and vibrant colors in all types of media. The model is equipped with HDMI inputs, granting users the ability to connect multiple devices effortlessly. Its sleek design also makes it an attractive addition to any room.

The 37LH255H model presents an excellent choice for consumers who prefer a slightly smaller screen. With a 37-inch display, it maintains high-quality visuals with a sharp and vivid picture. The model includes both digital and analog tuners, offering flexibility in content viewing. Its energy-efficient features allow consumers to enjoy high-performance viewing without increasing energy costs significantly.

The 32LH250H and 32LH255H models cater to those seeking compact alternatives without compromising quality. Both models include a 32-inch display that fits comfortably in smaller spaces, making them ideal for bedrooms or kitchens. Like their larger counterparts, these televisions utilize LED technology to provide exceptional picture quality.

In summary, the LG Electronics SAC34026004, 42LH260H, 37LH255H, 32LH250H, and 32LH255H models showcase a commitment to quality, innovation, and user-friendly features. Each television integrates advanced technologies designed to enhance the home viewing experience, making them suitable for a variety of environments and preferences. Whether it is through sharp visuals, energy efficiency, or smart capabilities, LG continues to set the standard in the television market.