Hooking up the unit
Audio and Video Connection
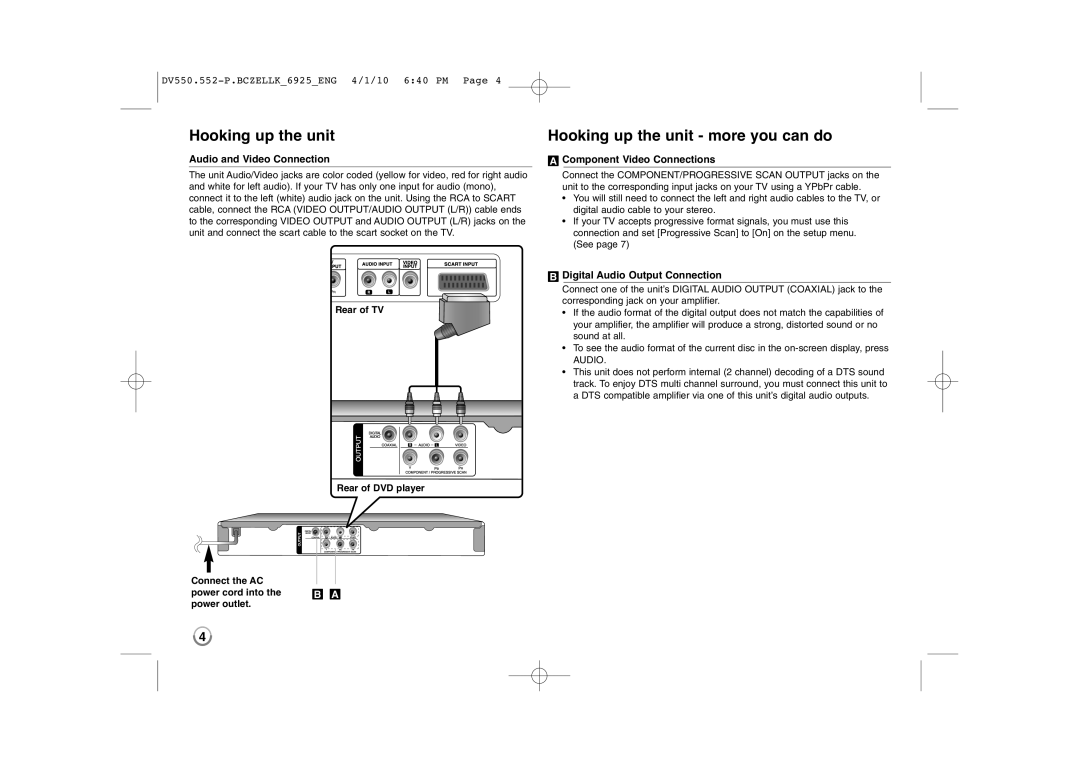
The unit Audio/Video jacks are color coded (yellow for video, red for right audio and white for left audio). If your TV has only one input for audio (mono), connect it to the left (white) audio jack on the unit. Using the RCA to SCART cable, connect the RCA (VIDEO OUTPUT/AUDIO OUTPUT (L/R)) cable ends to the corresponding VIDEO OUTPUT and AUDIO OUTPUT (L/R) jacks on the unit and connect the scart cable to the scart socket on the TV.
Hooking up the unit - more you can do
AComponent Video Connections
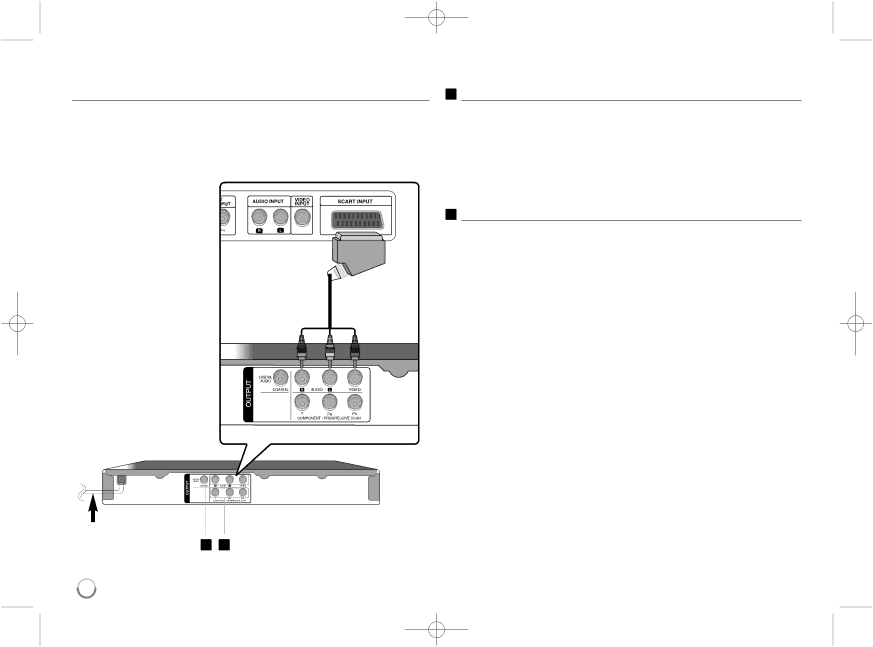
Connect the COMPONENT/PROGRESSIVE SCAN OUTPUT jacks on the unit to the corresponding input jacks on your TV using a YPbPr cable.
•You will still need to connect the left and right audio cables to the TV, or digital audio cable to your stereo.
•If your TV accepts progressive format signals, you must use this connection and set [Progressive Scan] to [On] on the setup menu. (See page 7)
Connect the AC power cord into the power outlet.
Rear of TV
Rear of DVD player
B A
BDigital Audio Output Connection
Connect one of the unit’s DIGITAL AUDIO OUTPUT (COAXIAL) jack to the corresponding jack on your amplifier.
•If the audio format of the digital output does not match the capabilities of your amplifier, the amplifier will produce a strong, distorted sound or no sound at all.
•To see the audio format of the current disc in the
AUDIO.
•This unit does not perform internal (2 channel) decoding of a DTS sound track. To enjoy DTS multi channel surround, you must connect this unit to a DTS compatible amplifier via one of this unit’s digital audio outputs.
4