Manuals
/
LG Electronics
/
Computer Equipment
/
Computer Monitor
LG Electronics
M4720C, M5520C owner manual Install in Portrait Mode
Models:
M5520C
M4720C
1
8
91
91
Download
91 pages
5.62 Kb
5
6
7
8
9
10
11
12
<
>
Troubleshooting
Specifications
Install
Dimension
RS-232C Configurations
Connecting the Stand
Preset mode
Network Setup
Command Reference List
Return Picture Mode to the default factory
Page 8
Image 8
Install in Portrait Mode
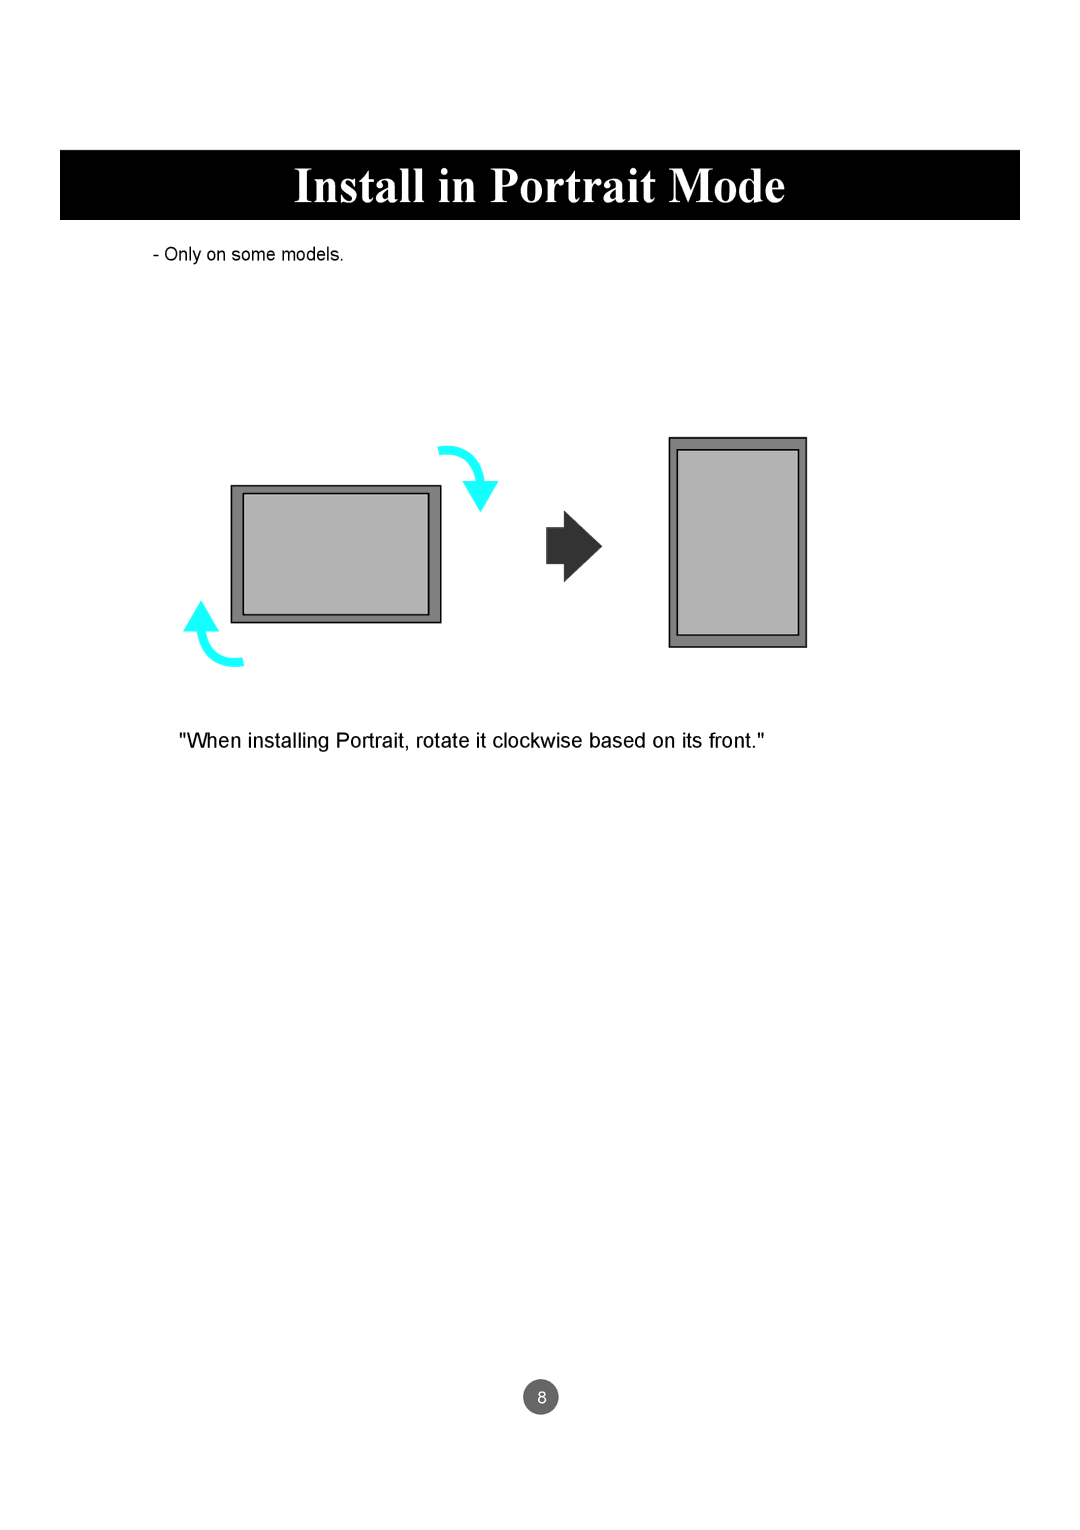
- Only on some models.
"When installing Portrait, rotate it clockwise based on its front."
8
Page 7
Page 9
Page 8
Image 8
Page 7
Page 9
Contents
MONITOR SIGNAGE
OWNER’S MANUAL
ENGLISH
MONITOR SIGNAGE MODELS M4720C M5520C
Table of Contents
Accessories
Accessories
Separate purchase
Stand kit
Parts
Connecting the Stand
M4720C
Parts
M5520C
Connecting the Stand
Connecting the Speakers
M4720C
Connecting the Speakers
M5520C
Install in Portrait Mode
When installing Portrait, rotate it clockwise based on its front
Using the Remote Control
Name of the Remote Control Buttons
1 Power On / Off Button
5 Volume Up/Down Button
Inserting batteries into remote control
Using the Remote Control
14 Energy Saving Button
15 INPUT Select Button
Name and Function of the Parts
Rear View
Power Connector
Connect the power cord
Connecting to External Devices
When Connecting to your PC
INPUT → → AUTO/SET
Connecting to External Devices
INPUT → → OK
When using the LAN
Connecting to External Devices
Daisy Chain Monitors
Connecting to External Devices
VESA FDMI wall Mounting
Connecting to External Devices
M4720C
M5520C
Video Input
Connecting to External Devices
INPUT → → OK
INPUT → → AUTO/SET
Component Input 480i/480p/576i/576p/720p/1080i/1080p
Connecting to External Devices
Preset mode
INPUT → → OK
HDMI Input 480p/576p/720p/1080i/1080p
Connecting to External Devices
INPUT → → OK
INPUT → → AUTO/SET
Screen Adjustment options
User Menus
Press this button to turn on the power. Press this button
Adjust Button
Screen Adjustment options
For PC Analog signal
When XGA Mode is active and 1920 x 1080 is selected
Auto in progress For optimal display change resolution to 1920 x
OSD Menu
Adjusts screen brightness, contrast and color
Adjusts the audio options
Adjusts the timer options
How to adjust the OSD On Screen Display screen
How to adjust the screen automatically
User Menus
MENU
Aspect Ratio
Adjusting the display image
User Menus
Adjusting the display image
User Menus
Energy Saving
Level 1 80% light Level 2 60% light Level 3 40% light
User Menus
Adjusting the display image
Picture Mode
Adjusting the display image
Picture Mode
User Menus
Backlight
Adjusting the display image
Color Temperature Color Settings
User Menus
Advanced Control
Adjusting the display image
Picture Reset
Return Picture Mode to the default factory
settings
Adjusting the audio function
Auto Volume
Sound Mode
User Menus
Adjusting the timer function
Sleep timer
Power on delay
User Menus
Selecting the options
User Menus
Language
Input Label
Power Indicator
Network Setup
Factory Reset
User Menus
Adjusts the tile options
Tile Mode
User Menus
TILE
Adjusts the tile options
Tile ID Select the location of the Tile by setting an ID
User Menus
ID10
Adjusts the USB options
When connecting the USB device
User Menus
2. Select PHOTO LIST, MUSIC LIST or MOVIE LIST
User Menus
Adjusts the USB options
Precautions when using the USB device
Adjusts the USB options
User Menus
Screen Components
Photo List
Adjusts the USB options
User Menus
Photo Selection and PopUp Menu
Photo List
Adjusts the USB options
How to view photo
User Menus
Slideshow
Adjusts the USB options
User Menus
Screen Components
Music List
Adjusts the USB options
User Menus
Music Selection and PopUp Menu
Play During stop Play the selected
The ‘Screen Saver’?
Adjusts the USB options
User Menus
Movie List
Adjusts the USB options
User Menus
Adjusts the USB options
User Menus
Screen Components
Movie List
Adjusts the USB options
Using the remote control
User Menus
Movie Selection and PopUp Menu
Adjusts the USB options
When you select the Movie Option
User Menus
Picture Size Sets to Full Screen or Original Size
Adjusts the USB options
User Menus
Close
DivX Registration Code
Adjusts the USB options
User Menus
Deactivation
YesNo
Troubleshooting
No image is displayed
UnknownProductmessageappearswhentheproductisconnected
Key Lock On message appears
Troubleshooting
The screen image looks abnormal
After-image appears on the product
After-image appears when the product is turned off
The audio function does not work
Screen color is abnormal
The operation does not work normally
Troubleshooting
Specifications
Dimensions & Weight
Power
Power Consumption
Specifications
Dimensions & Weight
Power
Power Consumption
Specifications
Video Signal
Input Connector
Max. Resolution
Specifications
Preset mode
Preset mode
31.469
Connecting the cable
RS-232C Configurations
Controlling the Multiple Product
RS-232C
RS-232C
Command Reference List
Controlling the Multiple Product
RS-232C
RS-232C
Transmission / Receiving Protocol
Controlling the Multiple Product
Transmission / Receiving Protocol
Controlling the Multiple Product
RS-232C
Controlling the Multiple Product
RS-232C
Transmission / Receiving Protocol
Transmission kc Set ID DataCr
05. Volume MuteCommand e To control On/Off of the Volume Mute
Controlling the Multiple Product
RS-232C
Transmission / Receiving Protocol
07. ContrastCommand g To adjust screen contrast
Controlling the Multiple Product
RS-232C
Transmission / Receiving Protocol
Controlling the Multiple Product
RS-232C
Transmission / Receiving Protocol
Red 00H to Green 64H
Transmission / Receiving Protocol
Controlling the Multiple Product
RS-232C
14 BalanceCommand t To adjust the sound balance. Transmission
Controlling the Multiple Product
RS-232C
Transmission / Receiving Protocol
16. Abnormal state Command z
Controlling the Multiple Product
RS-232C
Transmission / Receiving Protocol
18. Auto ConfigureCommand j u
Controlling the Multiple Product
RS-232C
Transmission / Receiving Protocol
20. Tile ModeCommand d d Change a Tile Mode. Transmission
Tile mode is off
1 x 3 mode
1 x 4 mode
Transmission / Receiving Protocol
Controlling the Multiple Product
RS-232C
Transmission / Receiving Protocol
Controlling the Multiple Product
RS-232C
25. Tile ID SetCommand d
Controlling the Multiple Product
RS-232C
Transmission / Receiving Protocol
Controlling the Multiple Product
RS-232C
Transmission / Receiving Protocol
DataHex
30. Elapsed time returnCommand d l To read the elapsed time
Controlling the Multiple Product
RS-232C
Transmission / Receiving Protocol
33. Auto volume Command d u
Automatically adjust the volume level. Transmission duSet IDDatax
34. Speaker Command d v Turn the speaker on or off Transmission
Controlling the Multiple Product
35. Time Command f a Set the current time Transmission
Controlling the Multiple Product
RS-232C
Transmission / Receiving Protocol
36. On Timer On/Off Timer Time Command f d Set On Timer
Controlling the Multiple Product
RS-232C
Transmission / Receiving Protocol
Controlling the Multiple Product
RS-232C
Controlling the Multiple Product
RS-232C
Transmission / Receiving Protocol
Transmission fuSet IDData1Data2Cr Data
39. Sleep Time Command f f Set Sleep Time Transmission
40. Auto Sleep Command f g Set Auto Sleep Transmission
Controlling the Multiple Product
RS-232C
41. Power On Delay Command f h
Controlling the Multiple Product
RS-232C
Transmission / Receiving Protocol
43. DPM Select Command f j
Controlling the Multiple Product
RS-232C
Transmission / Receiving Protocol
45. Power savingCommand f I To set the Power saving mode
46. Power Indicator Command f o To set the LED for Power Indicator
Controlling the Multiple Product
RS-232C
47. Serial no.Check Command f y To read the serial numbers
Controlling the Multiple Product
RS-232C
Transmission / Receiving Protocol
48. S/W Version Command f z Check the software version. Transmission
Controlling the Multiple Product
RS-232C
Transmission / Receiving Protocol
IR Codes
Remote Control IR Code
Configuration of frame
RS-232C
IR Codes
RS-232C
CodeHex
Function
IR Codes
RS-232C
Page
Make sure to read the Safety Precautions before using the product