FIGURE 7 | 16 | 13 |
| 4 |
|
| 31 |
|
| 30 |
|
UPRIGHT |
| 27 |
| 31 | |
|
| |
13 |
| 15 |
| 1 | |
|
| |
| UPPER CROSS | 32 3/8 X |
|
| |
| SUPPORT |
|
| 30 | 6 |
|
| |
| 38 3/8 X 4” |
|
STEP 7: |
|
|
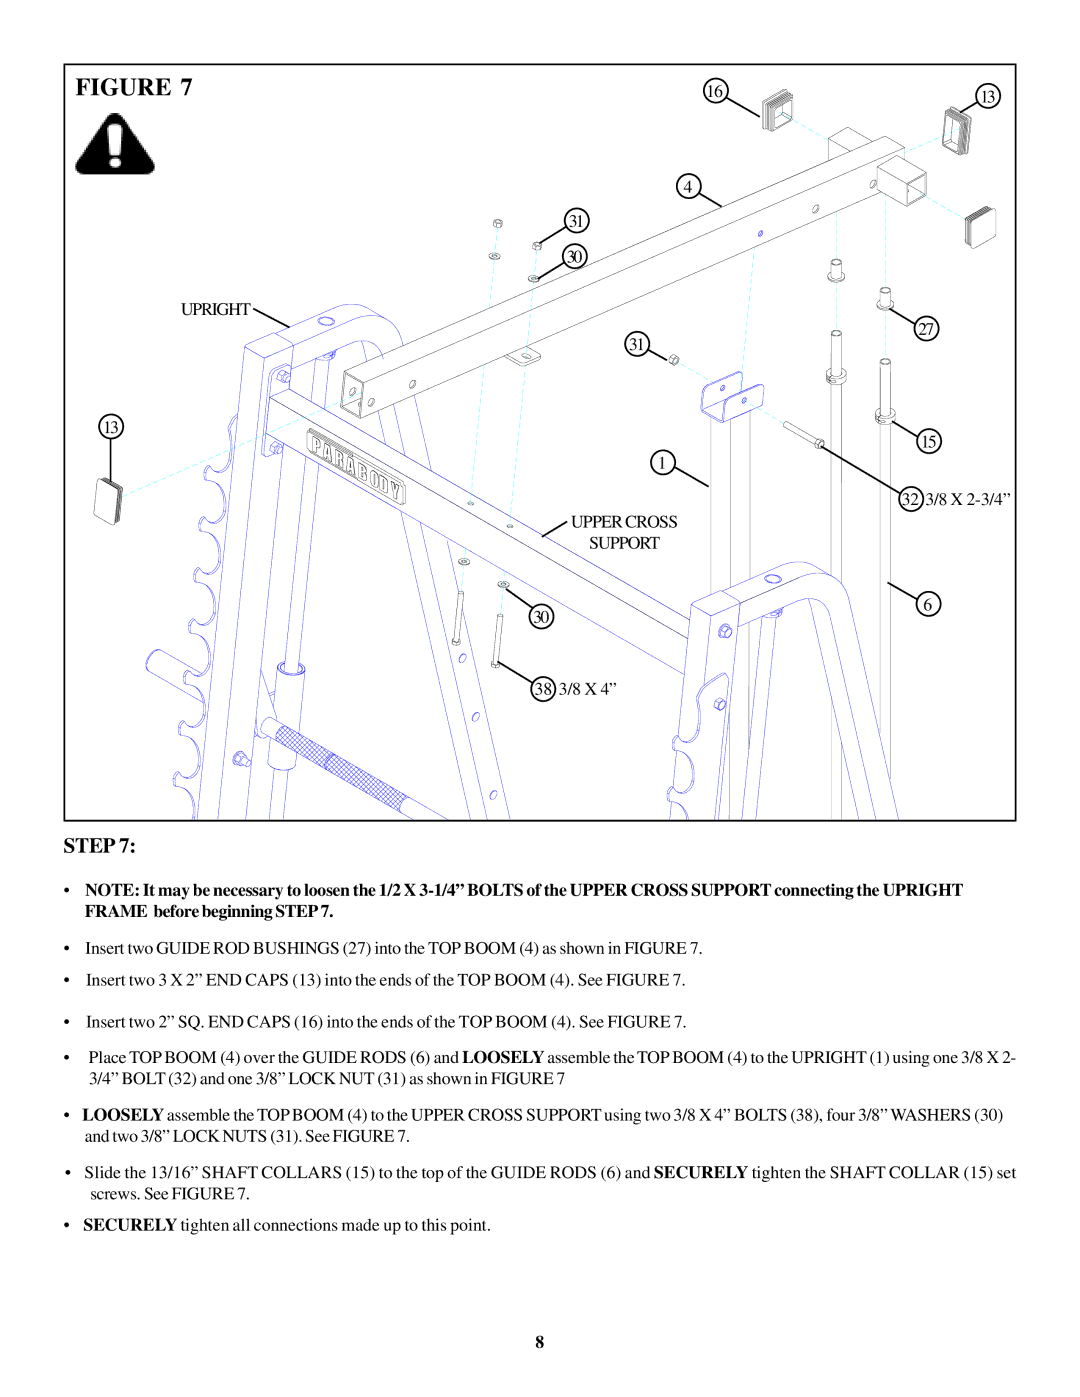
•NOTE: It may be necessary to loosen the 1/2 X
•Insert two GUIDE ROD BUSHINGS (27) into the TOP BOOM (4) as shown in FIGURE 7.
•Insert two 3 X 2” END CAPS (13) into the ends of the TOP BOOM (4). See FIGURE 7.
•Insert two 2” SQ. END CAPS (16) into the ends of the TOP BOOM (4). See FIGURE 7.
•Place TOP BOOM (4) over the GUIDE RODS (6) and LOOSELY assemble the TOP BOOM (4) to the UPRIGHT (1) using one 3/8 X 2- 3/4” BOLT (32) and one 3/8” LOCK NUT (31) as shown in FIGURE 7
•LOOSELY assemble the TOP BOOM (4) to the UPPER CROSS SUPPORT using two 3/8 X 4” BOLTS (38), four 3/8” WASHERS (30) and two 3/8” LOCK NUTS (31). See FIGURE 7.
•Slide the 13/16” SHAFT COLLARS (15) to the top of the GUIDE RODS (6) and SECURELY tighten the SHAFT COLLAR (15) set screws. See FIGURE 7.
•SECURELY tighten all connections made up to this point.
8
