3.2PACKAGING
Parts: None
Remove all packaging and place main components to the side of the box. Break box down in each of the four corners.
3.3ASSEMBLE THE REAR STABILIZER
Parts: Hardware Bag #1 | (2, 50mm Button Head Screws) |
| (2, 15mm Button Head Screws) |
Tools: 5mm Hex Head Wrench |
|
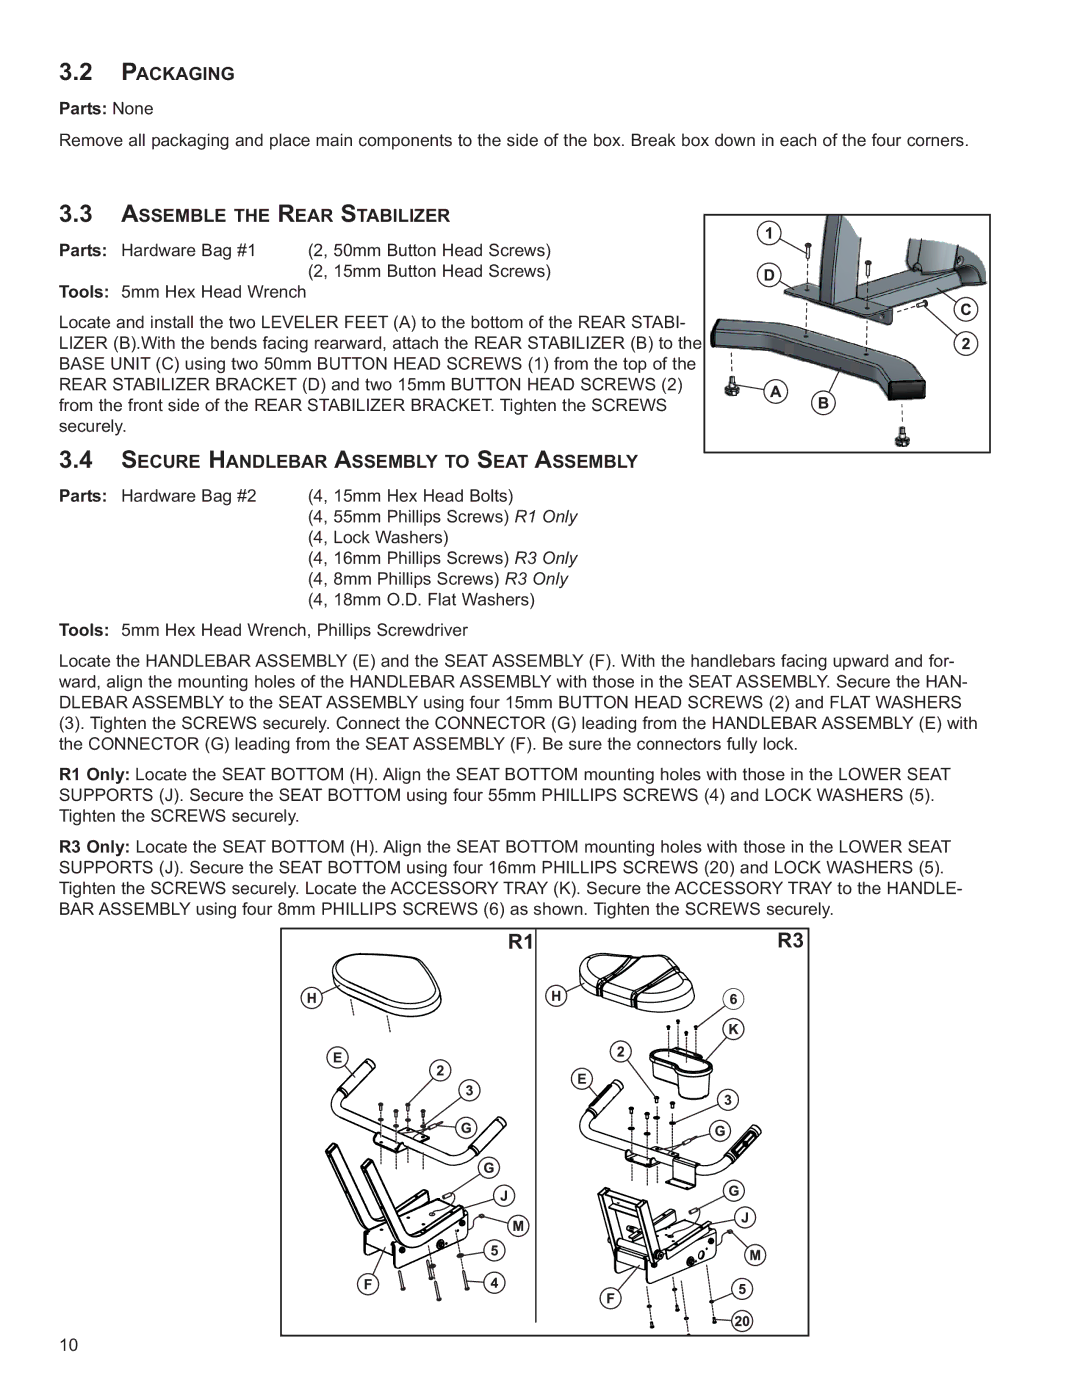
Locate and install the two LEVELER FEET (A) to the bottom of the REAR STABI- LIZER (B).With the bends facing rearward, attach the REAR STABILIZER (B) to the BASE UNIT (C) using two 50mm BUTTON HEAD SCREWS (1) from the top of the REAR STABILIZER BRACKET (D) and two 15mm BUTTON HEAD SCREWS (2) from the front side of the REAR STABILIZER BRACKET. Tighten the SCREWS securely.
3.4SECURE HANDLEBAR ASSEMBLY TO SEAT ASSEMBLY
Parts: Hardware Bag #2 | (4, 15mm Hex Head Bolts) |
| (4, 55mm Phillips Screws) R1 Only |
| (4, Lock Washers) |
| (4, 16mm Phillips Screws) R3 Only |
| (4, 8mm Phillips Screws) R3 Only |
| (4, 18mm O.D. Flat Washers) |
Tools: 5mm Hex Head Wrench, Phillips Screwdriver
Locate the HANDLEBAR ASSEMBLY (E) and the SEAT ASSEMBLY (F). With the handlebars facing upward and for- ward, align the mounting holes of the HANDLEBAR ASSEMBLY with those in the SEAT ASSEMBLY. Secure the HAN- DLEBAR ASSEMBLY to the SEAT ASSEMBLY using four 15mm BUTTON HEAD SCREWS (2) and FLAT WASHERS
(3). Tighten the SCREWS securely. Connect the CONNECTOR (G) leading from the HANDLEBAR ASSEMBLY (E) with the CONNECTOR (G) leading from the SEAT ASSEMBLY (F). Be sure the connectors fully lock.
R1 Only: Locate the SEAT BOTTOM (H). Align the SEAT BOTTOM mounting holes with those in the LOWER SEAT SUPPORTS (J). Secure the SEAT BOTTOM using four 55mm PHILLIPS SCREWS (4) and LOCK WASHERS (5). Tighten the SCREWS securely.
R3 Only: Locate the SEAT BOTTOM (H). Align the SEAT BOTTOM mounting holes with those in the LOWER SEAT SUPPORTS (J). Secure the SEAT BOTTOM using four 16mm PHILLIPS SCREWS (20) and LOCK WASHERS (5). Tighten the SCREWS securely. Locate the ACCESSORY TRAY (K). Secure the ACCESSORY TRAY to the HANDLE- BAR ASSEMBLY using four 8mm PHILLIPS SCREWS (6) as shown. Tighten the SCREWS securely.
R1 | R3 |
10