TAKING YOUR BLOOD PRESSURE
 Now you are ready. Follow these simple steps:
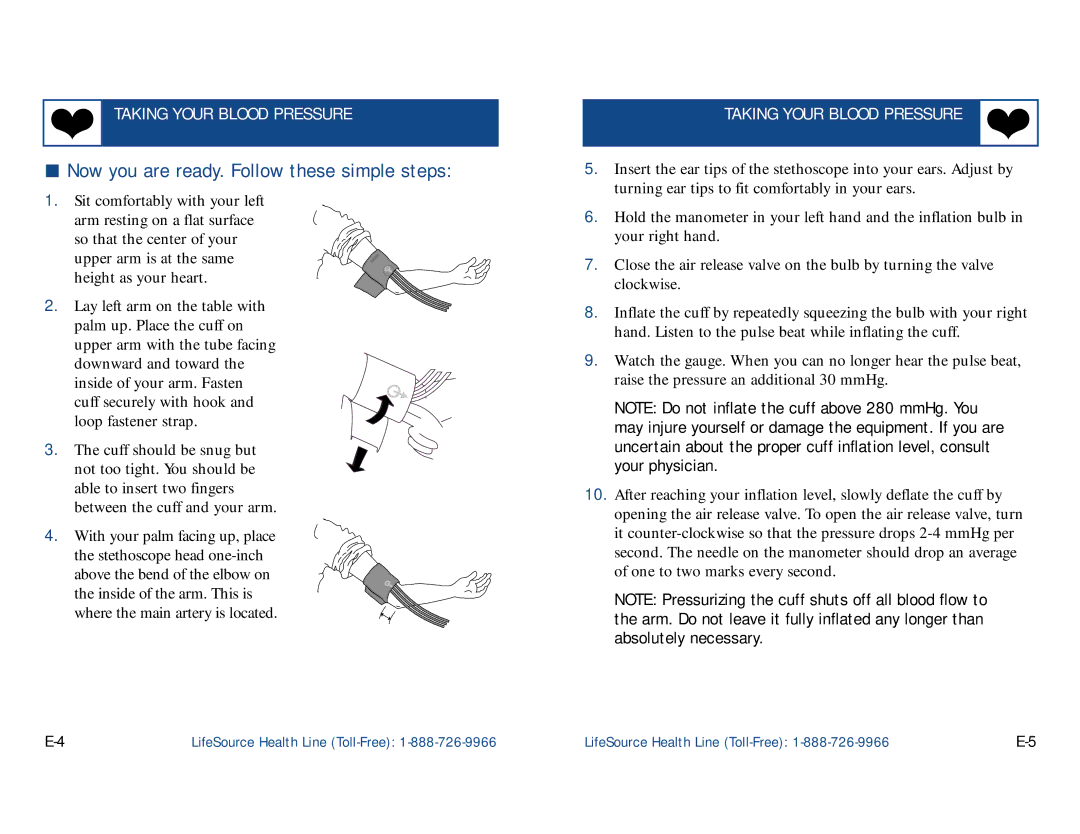
1.Sit comfortably with your left arm resting on a flat surface so that the center of your
upper arm is at the same height as your heart.
2.Lay left arm on the table with palm up. Place the cuff on upper arm with the tube facing downward and toward the
inside of your arm. Fasten cuff securely with hook and loop fastener strap.
3.The cuff should be snug but not too tight. You should be able to insert two fingers between the cuff and your arm.
4.With your palm facing up, place the stethoscope head
the inside of the arm. This is where the main artery is located.
TAKING YOUR BLOOD PRESSURE
5.Insert the ear tips of the stethoscope into your ears. Adjust by turning ear tips to fit comfortably in your ears.
6.Hold the manometer in your left hand and the inflation bulb in your right hand.
7.Close the air release valve on the bulb by turning the valve clockwise.
8.Inflate the cuff by repeatedly squeezing the bulb with your right hand. Listen to the pulse beat while inflating the cuff.
9.Watch the gauge. When you can no longer hear the pulse beat, raise the pressure an additional 30 mmHg.
NOTE: Do not inflate the cuff above 280 mmHg. You may injure yourself or damage the equipment. If you are uncertain about the proper cuff inflation level, consult your physician.
10.After reaching your inflation level, slowly deflate the cuff by opening the air release valve. To open the air release valve, turn it
NOTE: Pressurizing the cuff shuts off all blood flow to the arm. Do not leave it fully inflated any longer than absolutely necessary.
LifeSource Health Line | LifeSource Health Line |
