C6AICLV, C4AICLV specifications
Lightolier, a recognized leader in the lighting industry, offers innovative solutions for both residential and commercial applications. Among its standout offerings are the C4AICLV and C6AICLV recessed lighting fixtures, designed to elevate the quality and efficiency of illumination in diverse settings.The Lightolier C4AICLV and C6AICLV are initial LED downlights featuring the latest in lighting technology. One of their primary characteristics is the commitment to energy efficiency. Both models utilize LED technology that not only reduces power consumption compared to traditional incandescent or halogen bulbs but also extends the lifespan of the lighting fixture. This longevity means fewer replacements, resulting in lower maintenance costs.
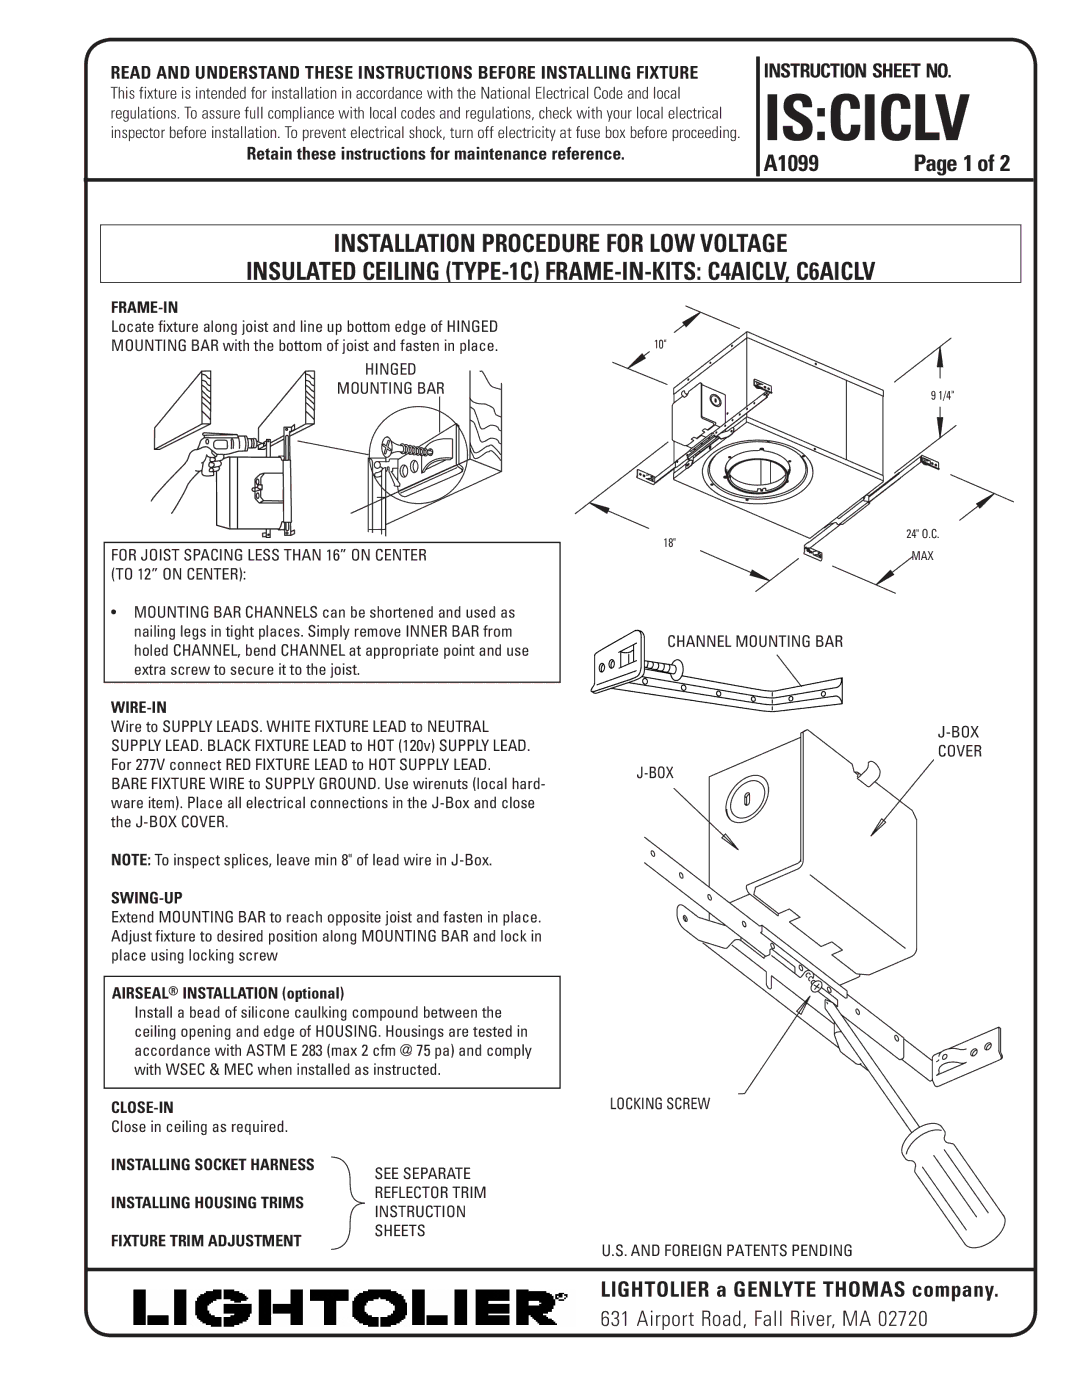
Each fixture is designed for easy installation with a compact housing that allows for flexibility in ceiling designs. The C4AICLV measures four inches, while the C6AICLV boasts a six-inch design, making them versatile options for a range of spaces. Their shallow profile accounts for limited ceiling spaces, and their compatibility with both new construction and remodeling projects provides added convenience for installers.
A hallmark of these fixtures is their impressive light quality. Both models produce a high lumen output, resulting in vibrant and consistent lighting across any area. This is complemented by the availability of various color temperatures, allowing users to choose between warm, neutral, and cool light outputs to suit their specific ambiance needs. Enhanced dimming capabilities offer further control, permitting smooth transitions from bright task lighting to softer, ambient settings.
Additionally, the C4AICLV and C6AICLV fixtures are designed with advanced thermal management to ensure performance stability. Integrated heat sinks help regulate temperature, minimizing the risk of overheating and therefore enhancing the reliability and efficiency of the fixtures.
Incorporating these recessed lights into any project not only creates a beautifully illuminated environment but also aligns with modern sustainability goals. The Lightolier C4AICLV and C6AICLV models exemplify a blend of innovation, efficiency, and aesthetic appeal, making them excellent choices for anyone looking to upgrade their lighting solutions. With these fixtures, users can experience both the practicality and elegance of contemporary recessed lighting technology.