READ AND UNDERSTAND THESE INSTRUCTIONS BEFORE INSTALLING FIXTURE | INSTRUCTION SHEET NO. |
This fixture is intended for installation in accordance with the National Code and local regulations. | SH20330 |
before installation. To prevent electrical shock, turn off electricity at fuse box before proceeding. | |
To assure full compliance with local codes and regulations, check with your local electrical inspector |
|
Retain these instructions for maintenance reference. | Page 2 0f 2 |
INSTRUCTIONS FOR INSTALLATION OF AGILI-T FIXTURES
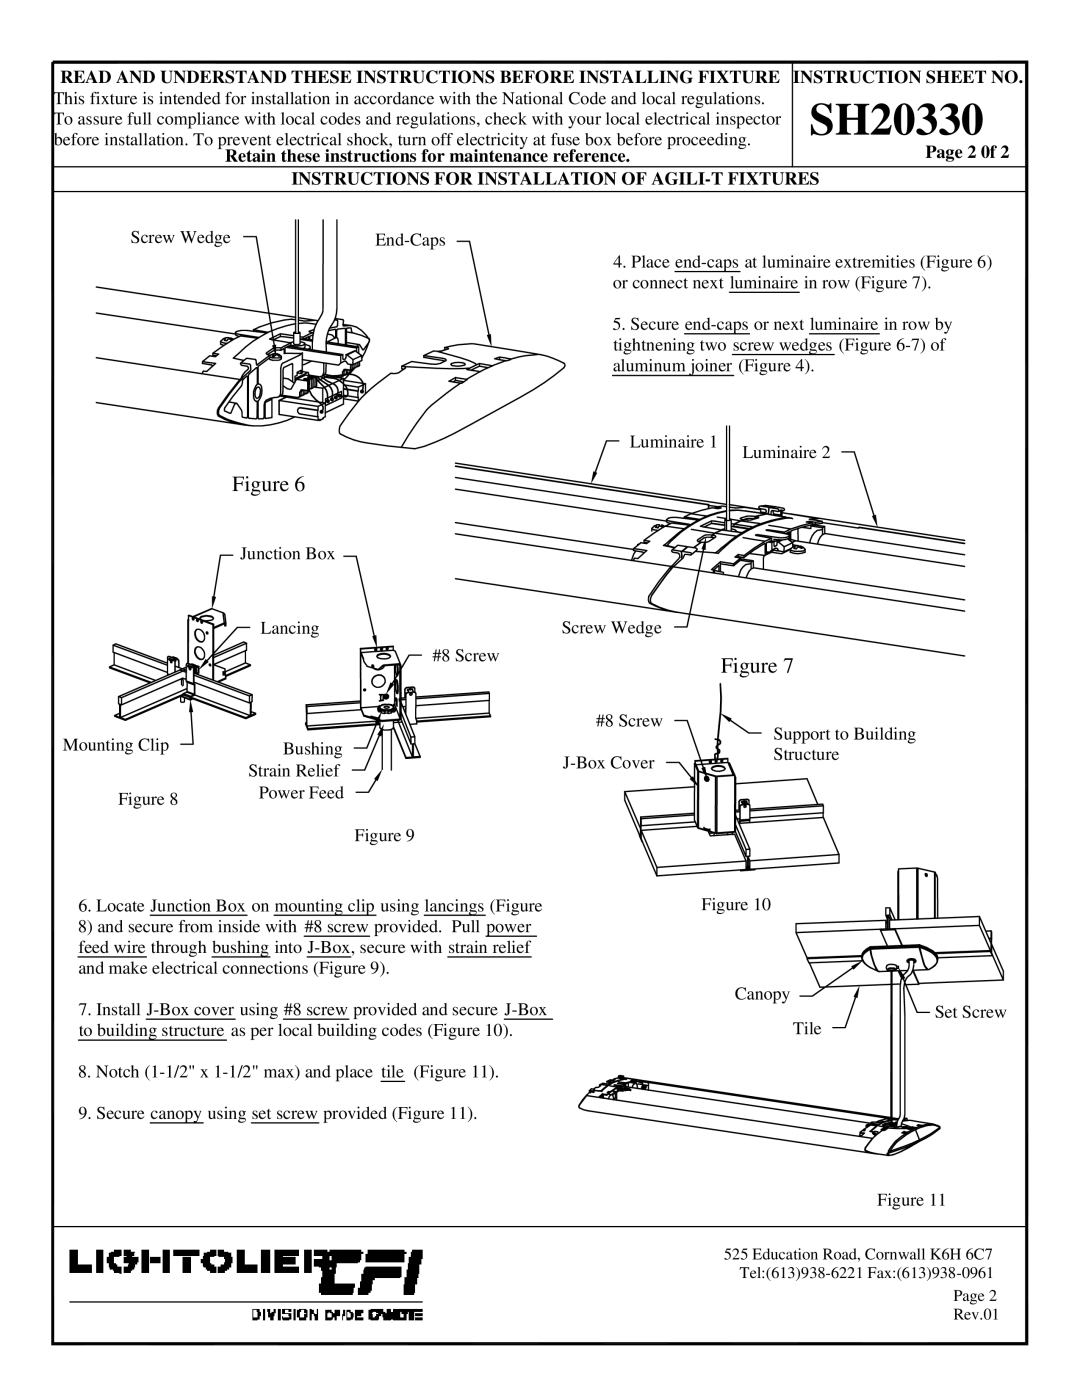
Screw Wedge
4. Place
5. Secure
Luminaire 1
Figure 6
Junction Box
Luminaire 2
Lancing
Mounting Clip | Bushing |
| Strain Relief |
Figure 8 | Power Feed |
|
Figure 9
Screw Wedge
#8 Screw |
| Figure 7 |
|
| |
| #8 Screw | Support to Building |
|
| |
| Structure | |
|
|
6.Locate Junction Box on mounting clip using lancings (Figure
8) and secure from inside with #8 screw provided. Pull power feed wire through bushing into
7.Install
8.Notch
9.Secure canopy using set screw provided (Figure 11).
Figure 10
Canopy ![]()
Tile
![]() Set Screw
Set Screw
Figure 11
525 Education Road, Cornwall K6H 6C7
Page 2
Rev.01