|
|
STEP 8
Tighten all eleven screws (7 inserted by the customer, 4 inserted at the factory) used to hold the Utility Cart together.
STEP 9 (SEE FIGURE 6)
Stand the Utility Cart on its front. Slide the Rear Axle through the mounting holes provided. Place the inside washers, then the Wheels, then the outside washers. Secure the wheels in place with cotter keys in the holes provided and bend the ends to secure them in place. Place the Utility Cart in the upright position.
FIGURE 6
STEP 10
The front casters are installed at the factory.
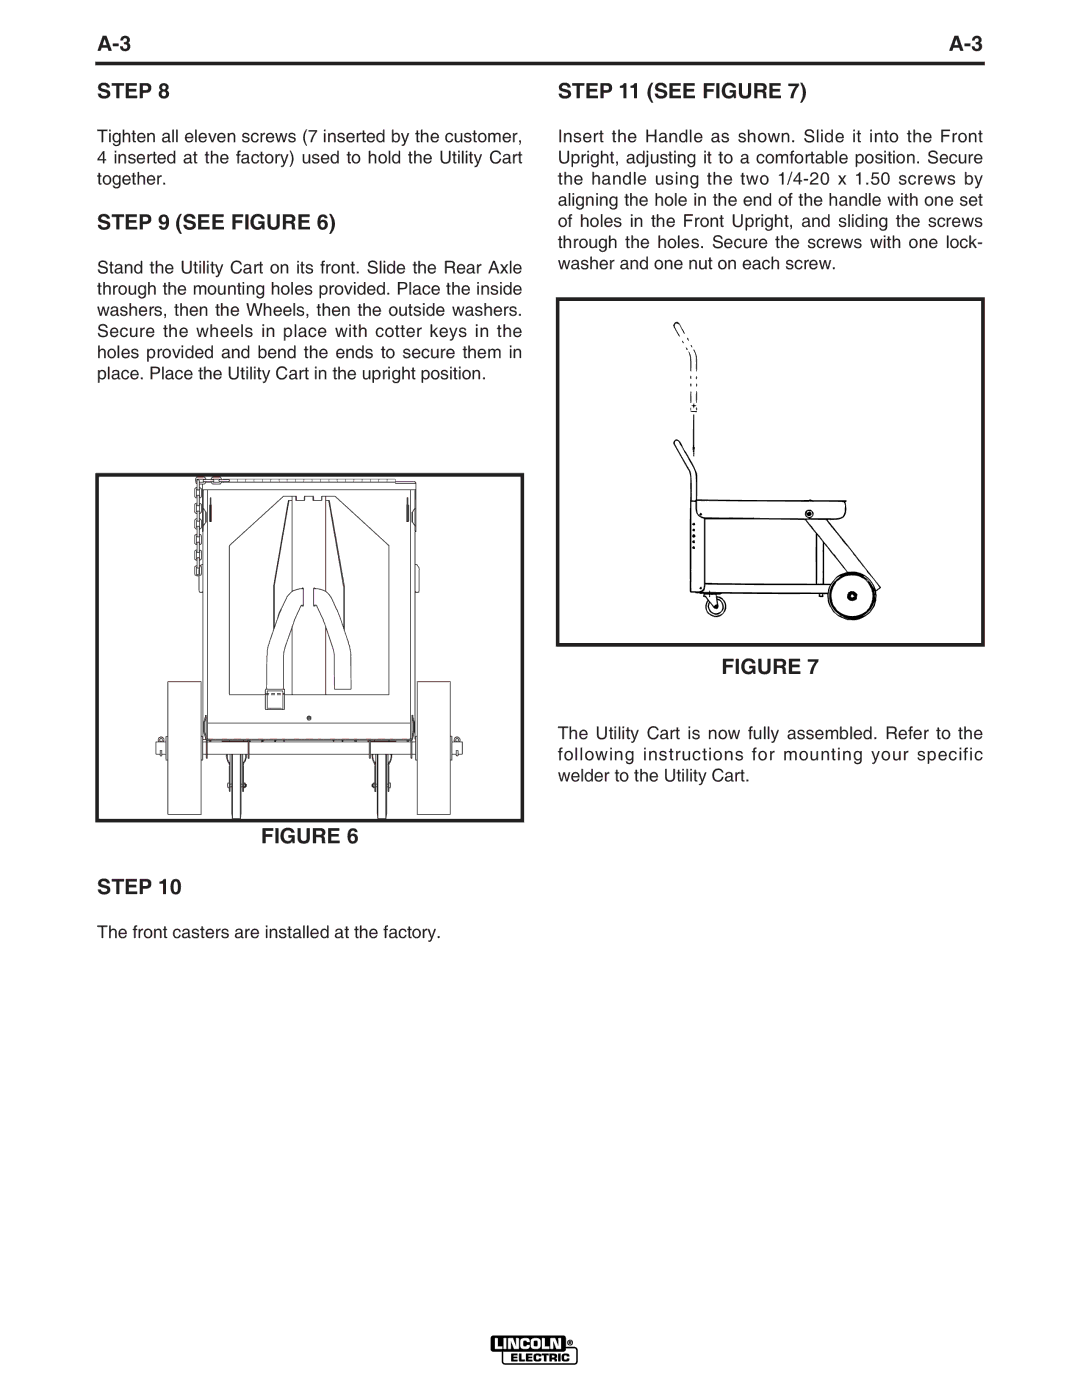
STEP 11 (SEE FIGURE 7)
Insert the Handle as shown. Slide it into the Front Upright, adjusting it to a comfortable position. Secure the handle using the two
FIGURE 7
The Utility Cart is now fully assembled. Refer to the following instructions for mounting your specific welder to the Utility Cart.