OPERATION | ||
|
|
|
LIMITATIONS
Do not exceed output current and duty cycle rating of machine. Do not use the
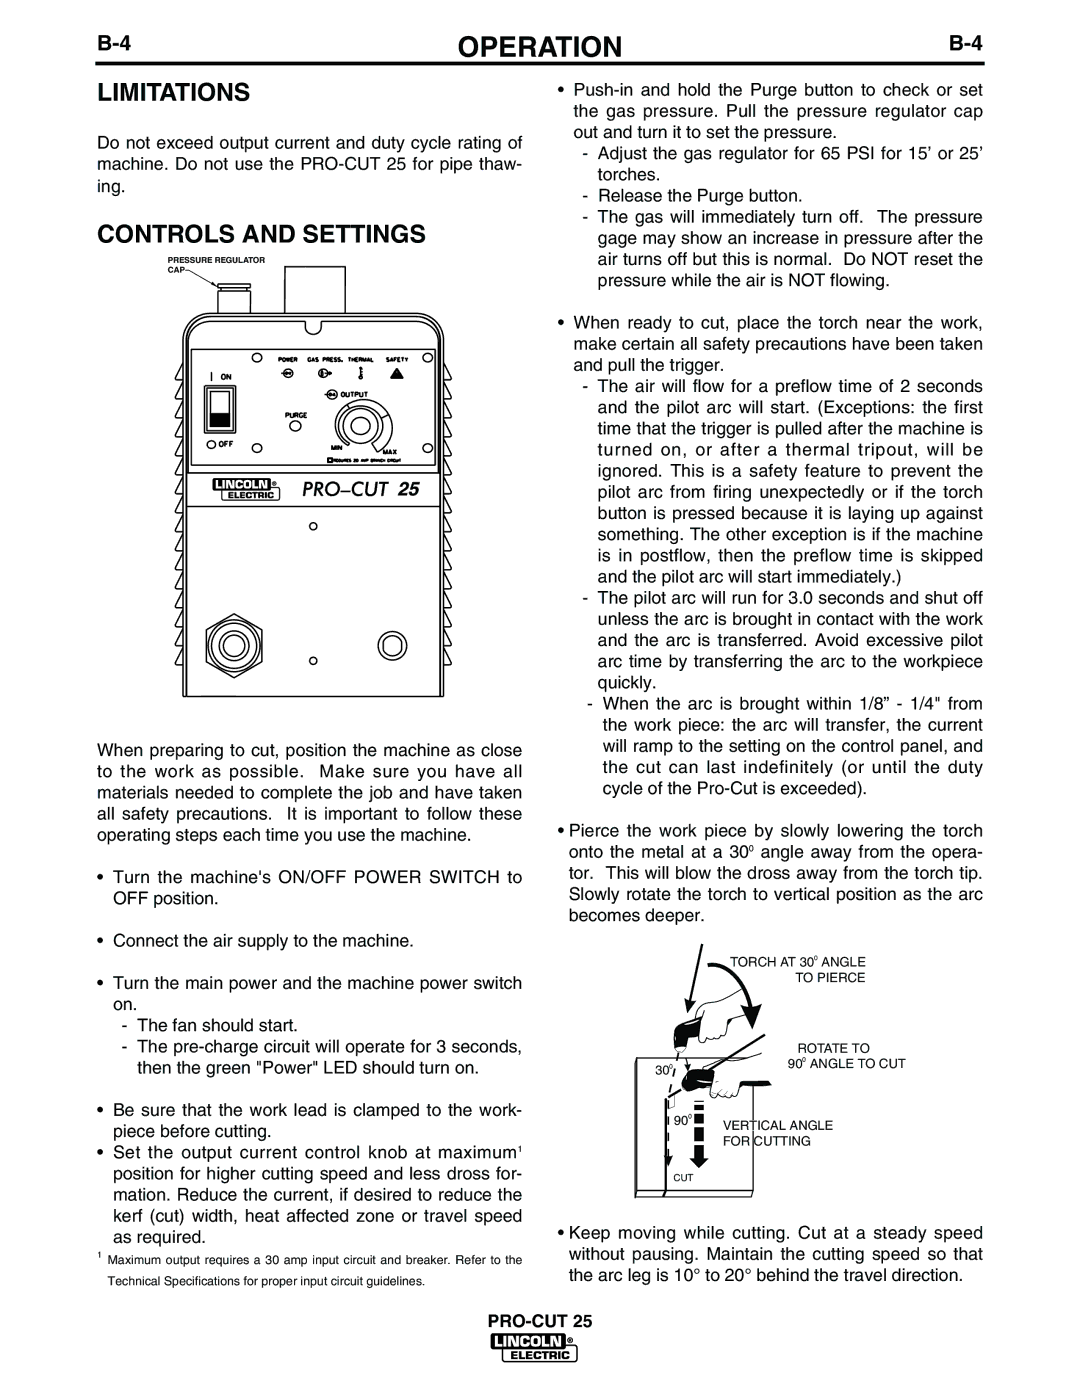
CONTROLS AND SETTINGS
PRESSURE REGULATOR
CAP![]()
When preparing to cut, position the machine as close to the work as possible. Make sure you have all materials needed to complete the job and have taken all safety precautions. It is important to follow these operating steps each time you use the machine.
•Turn the machine's ON/OFF POWER SWITCH to OFF position.
•Connect the air supply to the machine.
•Turn the main power and the machine power switch on.
-The fan should start.
-The
•Be sure that the work lead is clamped to the work- piece before cutting.
•Set the output current control knob at maximum1 position for higher cutting speed and less dross for- mation. Reduce the current, if desired to reduce the kerf (cut) width, heat affected zone or travel speed
as required.
1 Maximum output requires a 30 amp input circuit and breaker. Refer to the
Technical Specifications for proper input circuit guidelines.
•
-Adjust the gas regulator for 65 PSI for 15’ or 25’ torches.
-Release the Purge button.
-The gas will immediately turn off. The pressure gage may show an increase in pressure after the air turns off but this is normal. Do NOT reset the pressure while the air is NOT flowing.
•When ready to cut, place the torch near the work, make certain all safety precautions have been taken and pull the trigger.
-The air will flow for a preflow time of 2 seconds and the pilot arc will start. (Exceptions: the first time that the trigger is pulled after the machine is turned on, or after a thermal tripout, will be ignored. This is a safety feature to prevent the pilot arc from firing unexpectedly or if the torch button is pressed because it is laying up against something. The other exception is if the machine is in postflow, then the preflow time is skipped and the pilot arc will start immediately.)
-The pilot arc will run for 3.0 seconds and shut off unless the arc is brought in contact with the work and the arc is transferred. Avoid excessive pilot arc time by transferring the arc to the workpiece quickly.
-When the arc is brought within 1/8” - 1/4" from the work piece: the arc will transfer, the current will ramp to the setting on the control panel, and the cut can last indefinitely (or until the duty cycle of the
•Pierce the work piece by slowly lowering the torch onto the metal at a 300 angle away from the opera- tor. This will blow the dross away from the torch tip. Slowly rotate the torch to vertical position as the arc becomes deeper.
| TORCH AT 300 ANGLE |
| TO PIERCE |
| ROTATE TO |
300 | 900 ANGLE TO CUT |
| 900 |
| VERTICAL ANGLE |
| FOR CUTTING |
| CUT |
•Keep moving while cutting. Cut at a steady speed without pausing. Maintain the cutting speed so that the arc leg is 10° to 20° behind the travel direction.