Linksys E1550

Back view

Product overview

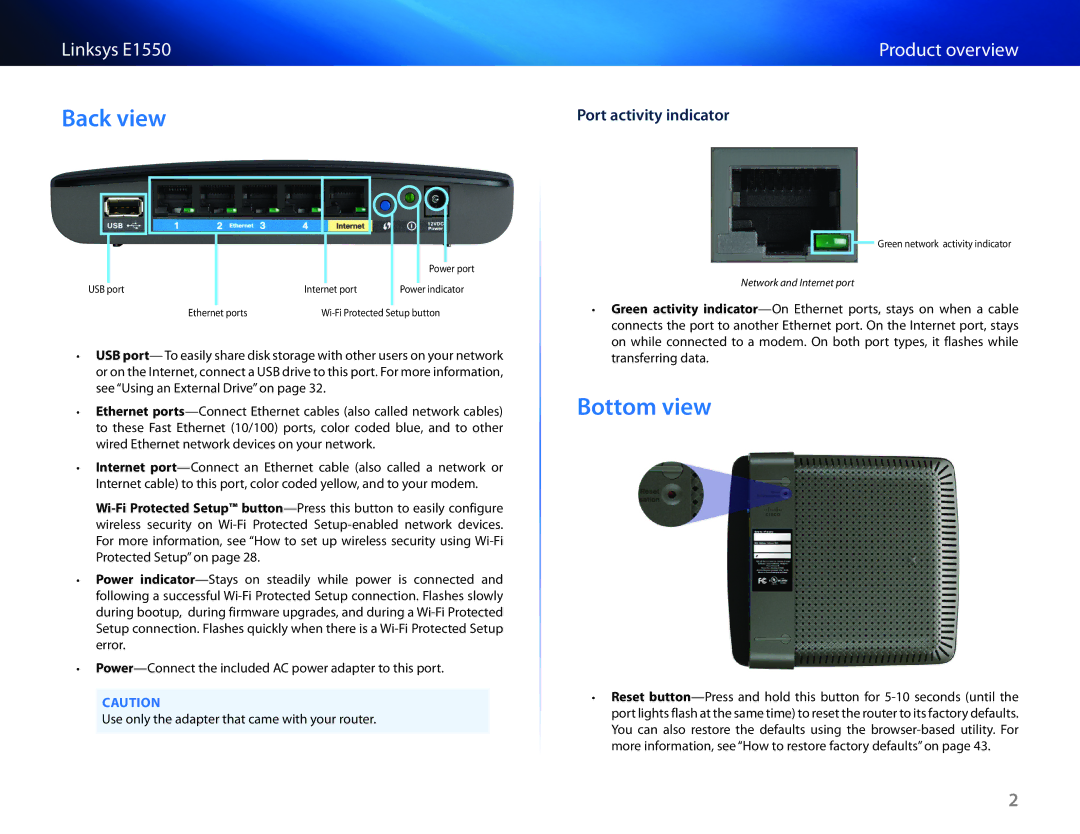
Port activity indicator


Power port

USB port

Internet port

Power indicator

Ethernet ports

Wi-Fi Protected Setup button

••USB port— To easily share disk storage with other users on your network or on the Internet, connect a USB drive to this port. For more information, see “Using an External Drive” on page 32.

••Ethernet ports—Connect Ethernet cables (also called network cables) to these Fast Ethernet (10/100) ports, color coded blue, and to other wired Ethernet network devices on your network.

••Internet port—Connect an Ethernet cable (also called a network or Internet cable) to this port, color coded yellow, and to your modem.

Wi-Fi Protected Setup™ button—Press this button to easily configure wireless security on Wi-Fi Protected Setup-enabled network devices. For more information, see “How to set up wireless security using WiFi Protected Setup” on page 28.

••Power indicator—Stays on steadily while power is connected and following a successful Wi-Fi Protected Setup connection. Flashes slowly during bootup, during firmware upgrades, and during a WiFi Protected Setup connection. Flashes quickly when there is a WiFi Protected Setup error.

••Power—Connect the included AC power adapter to this port.

CAUTION

Use only the adapter that came with your router.

Green network activity indicator

Network and Internet port

••Green activity indicator—On Ethernet ports, stays on when a cable connects the port to another Ethernet port. On the Internet port, stays on while connected to a modem. On both port types, it flashes while transferring data.

Bottom view

••Reset button—Press and hold this button for 5-10 seconds (until the port lights flash at the same time) to reset the router to its factory defaults. You can also restore the defaults using the browser-based utility. For more information, see “How to restore factory defaults” on page 43.

2

Page 5
Image 5
Linksys E1550 manual Back view, Bottom view