This Quick Installation is meant to help you install the 10/100 Managed Network Adapter quickly and easily. For detailed instructions on installation, configuration, and further setup options, please consult the User Guide.
Installing the EtherFast®
10/100 Managed Network Adapter
Each Adapter is equipped with an
The Adapter should only be used with
A. Power off your PC and any peripheral equipment attached to it. Unplug your PC’s power | |
cable. |
|
B. Remove your computer's outside cover. | |
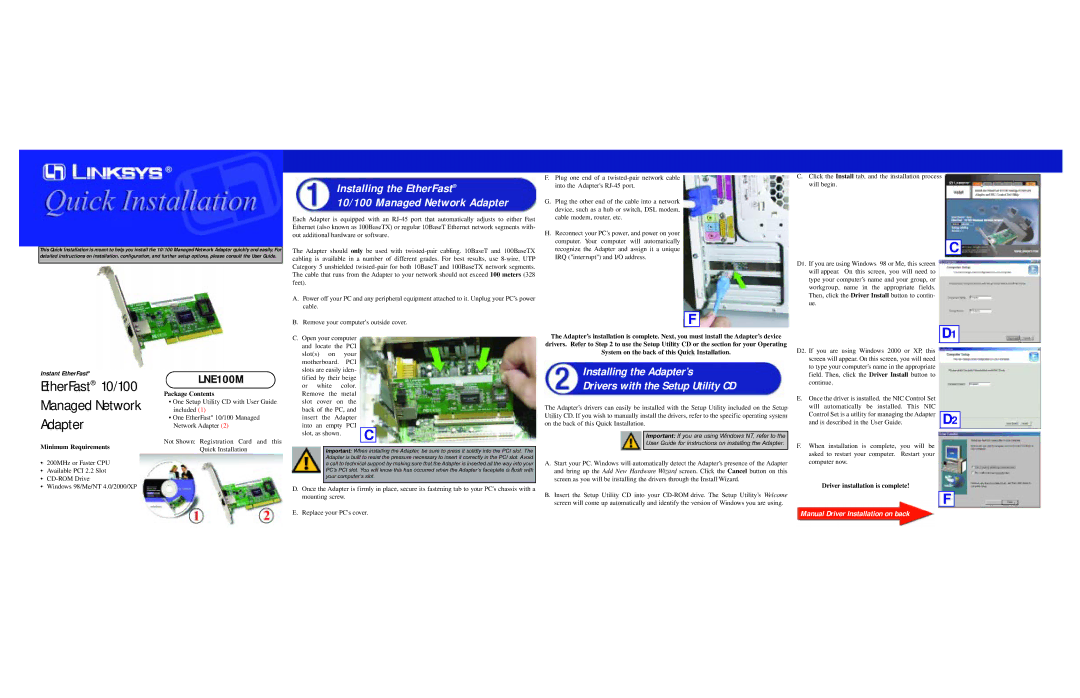
C. Open your computer | |
and locate the | PCI |
slot(s) on | your |
motherboard. | PCI |
F.Plug one end of a
G.Plug the other end of the cable into a network device, such as a hub or switch, DSL modem, cable modem, router, etc.
H.Reconnect your PC’s power, and power on your computer. Your computer will automatically recognize the Adapter and assign it a unique IRQ ("interrupt") and I/O address.
F
The Adapter’s installation is complete. Next, you must install the Adapter’s device drivers. Refer to Step 2 to use the Setup Utility CD or the section for your Operating System on the back of this Quick Installation.
C.Click the Install tab, and the installation process will begin.
C
D1. If you are using Windows 98 or Me, this screen will appear. On this screen, you will need to type your computer’s name and your group, or workgroup, name in the appropriate fields. Then, click the Driver Install button to contin- ue.
D1
D2. If you are using Windows 2000 or XP, this |
screen will appear. On this screen, you will need |
to type your computer’s name in the appropriate |
Instant EtherFast®
EtherFast® 10/100
Managed Network
Adapter
Minimum Requirements
•200MHz or Faster CPU
•Available PCI 2.2 Slot
•
•Windows 98/Me/NT 4.0/2000/XP
LNE100M
Package Contents
•One Setup Utility CD with User Guide included (1)
•One EtherFast® 10/100 Managed Network Adapter (2)
Not Shown: Registration Card and this
Quick Installation
slots are easily iden- | ||
tified by their beige | ||
or | white | color. |
Remove the metal | ||
slot | cover | on the |
back of the PC, and | ||
insert the | Adapter | |
into | an empty PCI | |
slot, as shown. | C |
| |
|
|
Important: When installing the Adapter, be sure to press it solidly into the PCI slot. The Adapter is built to resist the pressure necessary to insert it correctly in the PCI slot. Avoid a call to technical support by making sure that the Adapter is inserted all the way into your PC’s PCI slot. You will know this has occurred when the Adapter’s faceplate is flush with your computer’s slot.
D.Once the Adapter is firmly in place, secure its fastening tab to your PC's chassis with a mounting screw.
E.Replace your PC's cover.
Installing the Adapter’s
Drivers with the Setup Utility CD
The Adapter’s drivers can easily be installed with the Setup Utility included on the Setup Utility CD. If you wish to manually install the drivers, refer to the specific operating system on the back of this Quick Installation.
Important: If you are using Windows NT, refer to the
User Guide for instructions on installing the Adapter.
A.Start your PC. Windows will automatically detect the Adapter’s presence of the Adapter and bring up the Add New Hardware Wizard screen. Click the Cancel button on this screen as you will be installing the drivers through the Install Wizard.
B.Insert the Setup Utility CD into your
field. Then, click the Driver Install button to |
|
continue. |
|
E. Once the driver is installed, the NIC Control Set |
|
will automatically be installed. This NIC | D2 |
Control Set is a utility for managing the Adapter | |
and is described in the User Guide. |
F.When installation is complete, you will be asked to restart your computer. Restart your computer now.
Driver installation is complete!
F