
WAP2000 specifications
The Linksys WAP2000 is a robust wireless access point designed to enhance connectivity for both home and small business environments. This device provides a reliable solution for extending the reach of your existing network, ensuring that users can access high-speed internet with minimal interruptions.One of the main features of the Linksys WAP2000 is its dual-band capability, which operates on both the 2.4 GHz and 5 GHz frequency bands. This dual-band technology allows for greater flexibility and less interference, accommodating more devices while maintaining optimal performance. Users can connect to the 5 GHz band for bandwidth-intensive activities, such as streaming and online gaming, while the 2.4 GHz band serves well for general browsing and connecting older devices.
The WAP2000 is equipped with the latest 802.11n wireless standard, offering speeds of up to 300 Mbps. This high throughput makes it an efficient choice for businesses that require swift data transfers and reliable connections. Additionally, the device supports Multiple Input Multiple Output (MIMO) technology, which uses multiple antennas to send and receive more data simultaneously, further enhancing its performance and range.
For ease of installation, the Linksys WAP2000 features Power over Ethernet (PoE) support. This allows the device to receive power through the Ethernet cable, eliminating the need for separate power adapters and simplifying the setup process. Additionally, its browser-based setup utility provides a user-friendly interface for configuration, enabling users to customize settings easily.
Security is a critical concern for any network, and the Linksys WAP2000 addresses this with various security features. It supports WPA/WPA2 encryption protocols, protecting data transmitted over the network from unauthorized access. Furthermore, the device includes MAC address filtering, which allows users to control which devices can connect to the network.
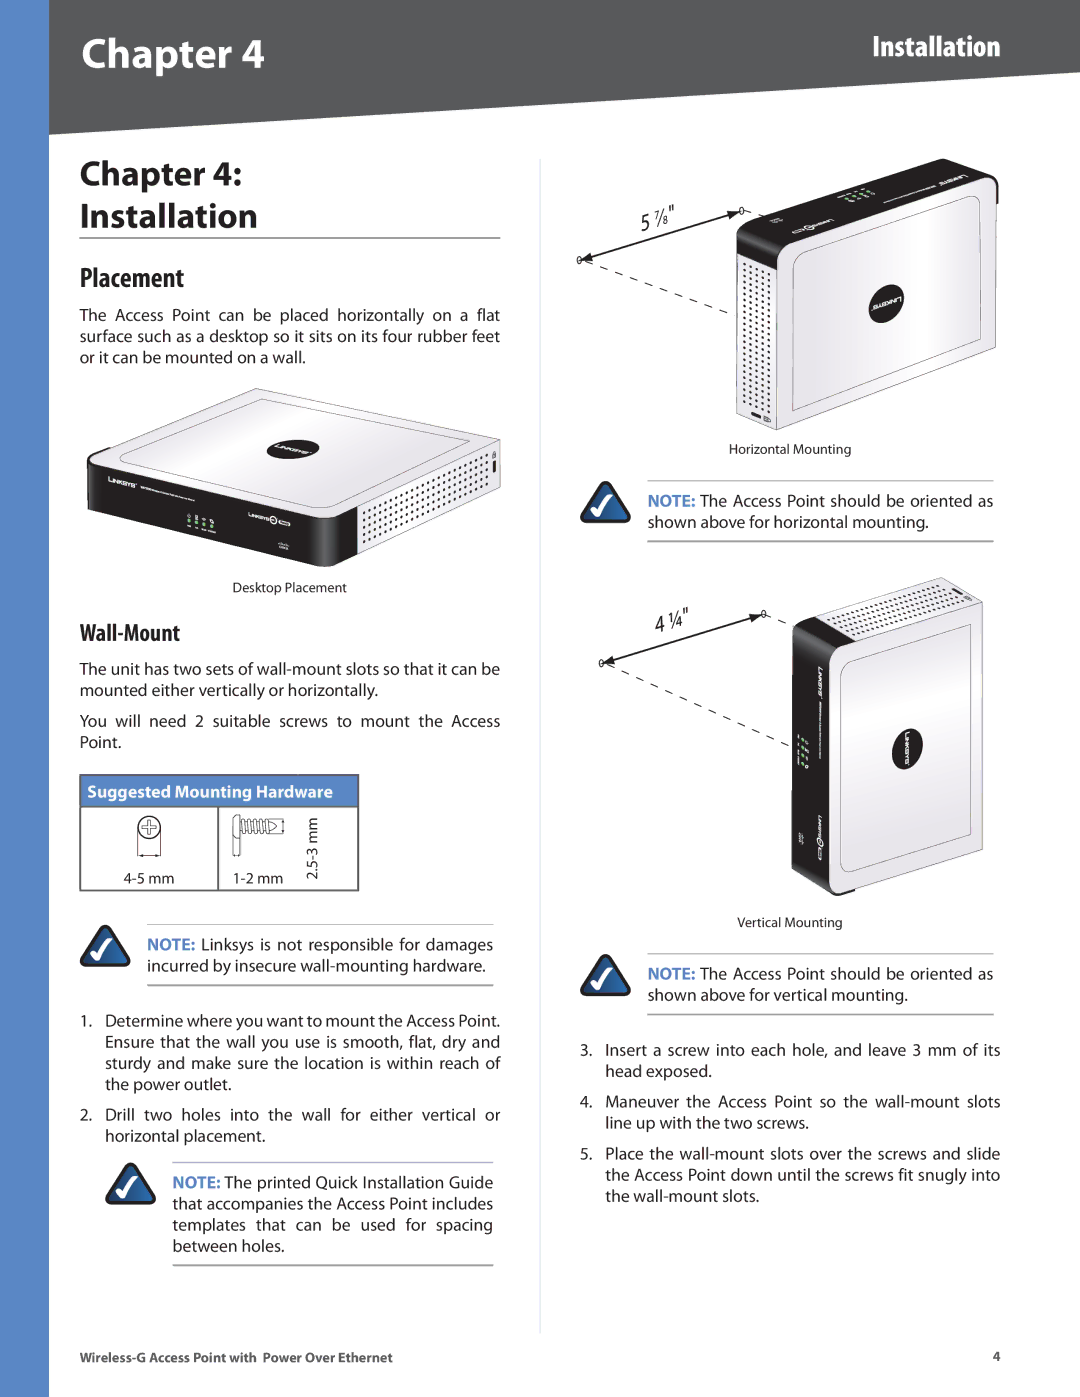
With a sturdy design and compact form factor, the Linksys WAP2000 is suitable for a variety of deployment scenarios, whether mounted on walls or placed on desks. Its versatility and performance make it an excellent choice for users looking to improve their wireless connectivity, ensuring that both guests and employees can enjoy a seamless online experience. Overall, the Linksys WAP2000 is an essential addition to any network, providing high-speed internet access and robust security features to keep users connected and safe.