Basic Installation Guide
Time | Hardware | Skills - Intermediate |
Under 30 Minutes*
*Installation time may vary based on application
Computer & Router*
*Minimum System Requirement: Windows XP, Pentium IV, 256MB Ram (512MB Recommended), 200MB Stor- age, Internet, DSL or Cable modem
Plug & Play connectors, On screen set up
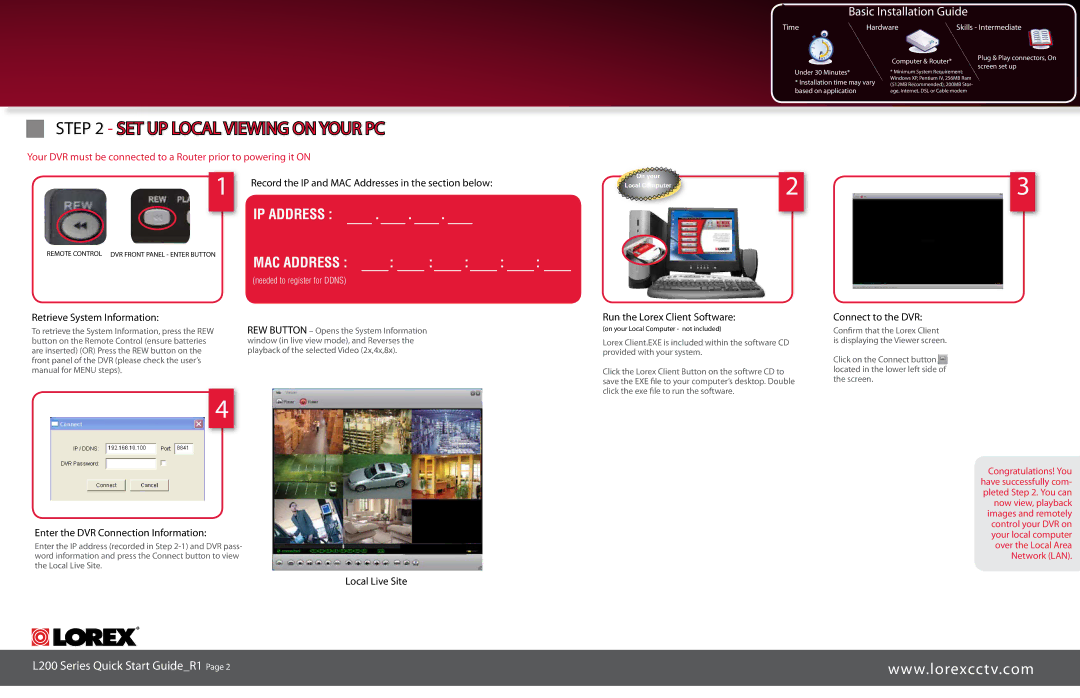
STEP 2 - SET UP LOCAL
 VIEWING ON YOUR PC
Your DVR must be connected to a Router prior to powering it ON
Record the IP and MAC Addresses in the section below: |
![]()
![]() On your
On your
1 |
|
|
|
|
|
|
| IP ADDRESS : | . | . | . |
|
|
REMOTE CONTROL DVR FRONT PANEL - ENTER BUTTON | MAC ADDRESS : | : | : | : | : | : |
|
(needed to register for DDNS)
![]() Local Computer
Local Computer ![]()
23
Retrieve System Information: | Run the Lorex Client Software: | Connect to the DVR: |
To retrieve the System Information, press the REW | REW BUTTON – Opens the System Information |
button on the Remote Control (ensure batteries | window (in live view mode), and Reverses the |
are inserted) (OR) Press the REW button on the | playback of the selected Video (2x,4x,8x). |
front panel of the DVR (please check the user’s |
|
manual for MENU steps). |
|
4
Enter the DVR Connection Information:
Enter the IP address (recorded in Step
(on your Local Computer - not included)
Lorex Client.EXE is included within the software CD provided with your system.
Click the Lorex Client Button on the softwre CD to save the EXE file to your computer’s desktop. Double click the exe file to run the software.
Confirm that the Lorex Client is displaying the Viewer screen.
Click on the Connect button![]() located in the lower left side of the screen.
located in the lower left side of the screen.
Congratulations! You have successfully com- pleted Step 2. You can now view, playback images and remotely control your DVR on your local computer over the Local Area Network (LAN).
Local Live Site
L200 Series Quick Start Guide_R1 Page | www.lorexcctv.com |
|
|