Remote Viewing Installation Guide
Time | Hardware | Skills - Intermediate |
Under 60 Minutes*
*Installation time may vary based on application
Computer & Router*
*Minimum System Requirement: Windows XP, Pentium IV, 256MB Ram (512MB Recommended), 200MB Stor- age, Internet, DSL or Cable Modem
Basic Computer Skills, Router Port Forwaring Skills
STEP 3 - SET UP INTERNET REMOTE SECURITY MONITORING |
| |
1 | 2 | 3 |
| http://ddns.strategicvista.net |
|
Router - not included
4
1 3 2
Port Forward your Router:
Port forward your router first before proceeding with the
All routers are different. To port forward your router, please refer to your router’s user manual.
A router configuration guide is available on your Lorex Client Software CD and also on www.lorexcctv.com/ support in the Consumer’s Guide Section.
DDNS Set-up:
Open your web browser (Internet Explorer by default) and enter http://ddns.strategicvista.net in the address bar.
Create Account:
From the http://ddns.strategicvista.net website, click the CREATE ACCOUNT option.
Complete New Account Information:
1.FOR PRODUCT LICENSE select the L200 Series option from the drop down menu.
2.FOR PRODUCT CODE enter the Monitor’s MAC address (recorded in step
3.FOR URL REQUEST enter a unique URL name (e.g. myurl). NOTE: URL name should not be more than 15 characters.
5
Service Provider: dns1.strategicvista.net
Domain Name: myurl.strategicvista.net
User ID: tomsmith1
Password: (your password)
Registration Email:
An automated REGISTRATION CONFIRMATION EMAIL will be sent to your email. Print and Save this confirmation. You will need this information to access your System remotely.
L200 Series Quick Start Guide_R1 Page
6
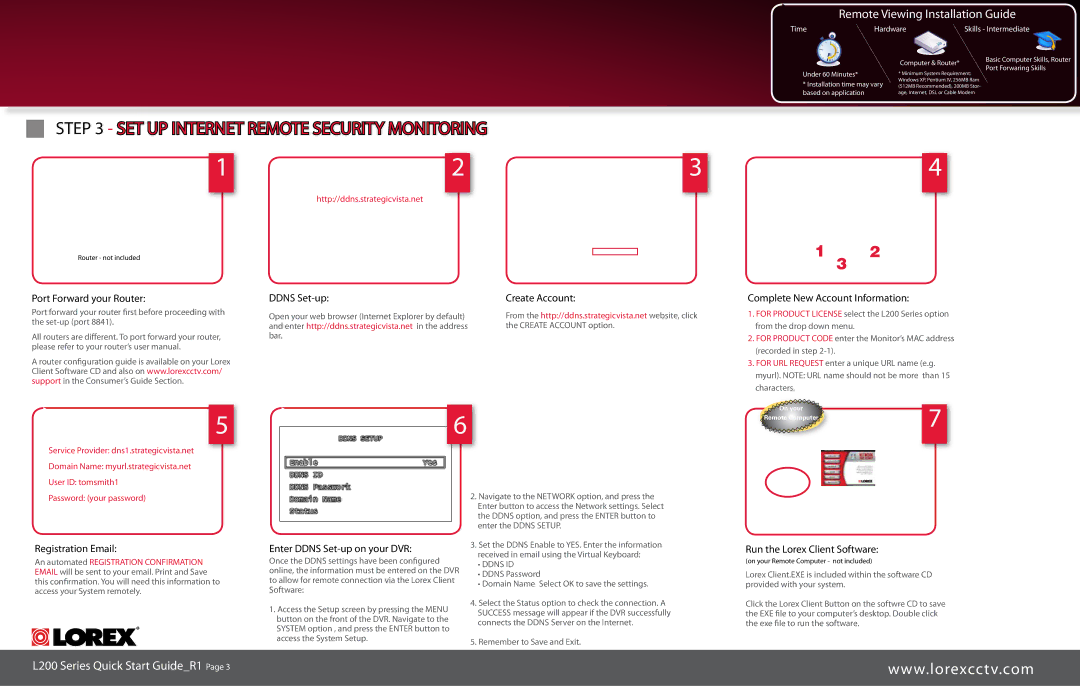
Enter DDNS Set-up on your DVR:
Once the DDNS settings have been configured online, the information must be entered on the DVR to allow for remote connection via the Lorex Client Software:
1.Access the Setup screen by pressing the MENU button on the front of the DVR. Navigate to the SYSTEM option , and press the ENTER button to access the System Setup.
2.Navigate to the NETWORK option, and press the Enter button to access the Network settings. Select the DDNS option, and press the ENTER button to enter the DDNS SETUP.
3.Set the DDNS Enable to YES. Enter the information received in email using the Virtual Keyboard:
•DDNS ID
•DDNS Password
•Domain Name Select OK to save the settings.
4.Select the Status option to check the connection. A SUCCESS message will appear if the DVR successfully connects the DDNS Server on the Internet.
5.Remember to Save and Exit.
On your | 7 |
| |
Remote Computer |
|
Run the Lorex Client Software:
(on your Remote Computer - not included)
Lorex Client.EXE is included within the software CD provided with your system.
Click the Lorex Client Button on the softwre CD to save the EXE file to your computer’s desktop. Double click the exe file to run the software.
www.lorexcctv.com