Camera Setup
Camera Setup
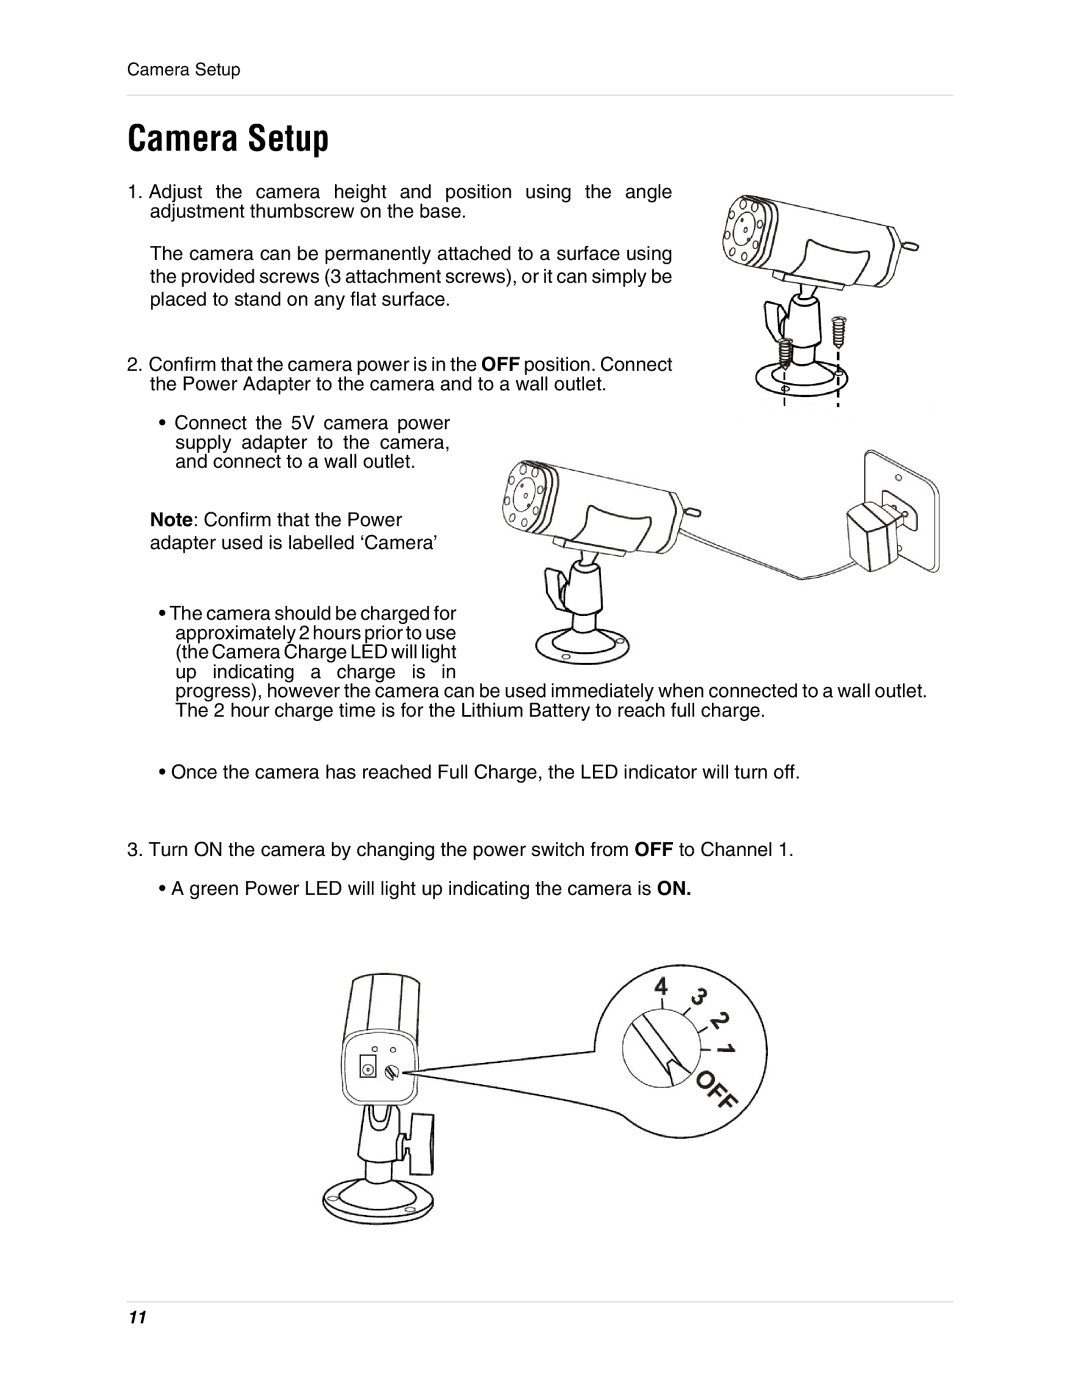
1.Adjust the camera height and position using the angle adjustment thumbscrew on the base.
The camera can be permanently attached to a surface using the provided screws (3 attachment screws), or it can simply be placed to stand on any flat surface.
2.Confirm that the camera power is in the OFF position. Connect the Power Adapter to the camera and to a wall outlet.
•Connect the 5V camera power supply adapter to the camera, and connect to a wall outlet.
Note: Confirm that the Power adapter used is labelled ‘Camera’
•The camera should be charged for approximately 2 hours prior to use (the Camera Charge LED will light up indicating a charge is in
progress), however the camera can be used immediately when connected to a wall outlet. The 2 hour charge time is for the Lithium Battery to reach full charge.
•Once the camera has reached Full Charge, the LED indicator will turn off.
3.Turn ON the camera by changing the power switch from OFF to Channel 1.
•A green Power LED will light up indicating the camera is ON.
11