Taking a Measurement
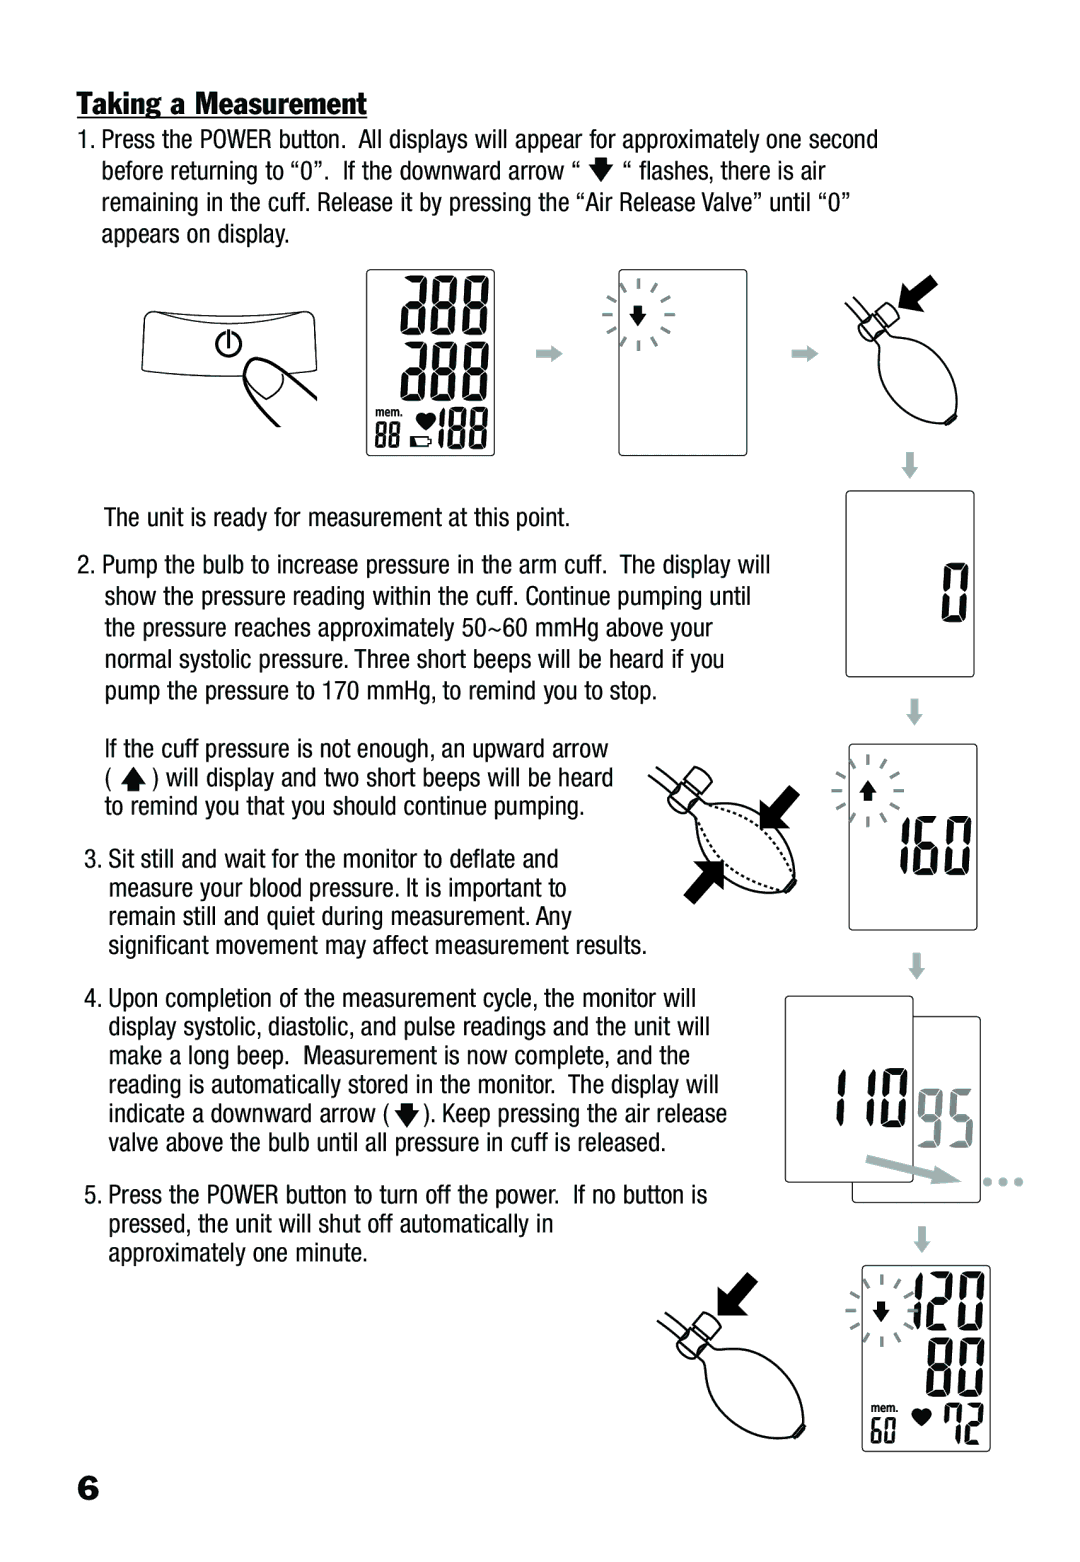
1.Press the POWER button. All displays will appear for approximately one second before returning to “0”. If the downward arrow “ ![]() “ flashes, there is air remaining in the cuff. Release it by pressing the “Air Release Valve” until “0” appears on display.
“ flashes, there is air remaining in the cuff. Release it by pressing the “Air Release Valve” until “0” appears on display.
The unit is ready for measurement at this point.
2. Pump the bulb to increase pressure in the arm cuff. The display will show the pressure reading within the cuff. Continue pumping until the pressure reaches approximately 50~60 mmHg above your normal systolic pressure. Three short beeps will be heard if you pump the pressure to 170 mmHg, to remind you to stop.
If the cuff pressure is not enough, an upward arrow ( ![]() ) will display and two short beeps will be heard to remind you that you should continue pumping.
) will display and two short beeps will be heard to remind you that you should continue pumping.
3. Sit still and wait for the monitor to deflate and measure your blood pressure. It is important to remain still and quiet during measurement. Any significant movement may affect measurement results.
4.Upon completion of the measurement cycle, the monitor will display systolic, diastolic, and pulse readings and the unit will make a long beep. Measurement is now complete, and the
reading is automatically stored in the monitor. The display will indicate a downward arrow ( ![]() ). Keep pressing the air release valve above the bulb until all pressure in cuff is released.
). Keep pressing the air release valve above the bulb until all pressure in cuff is released.
5.Press the POWER button to turn off the power. If no button is pressed, the unit will shut off automatically in approximately one minute.
6