Before turning on your VCR, make sure there are batteries in the remote control and the VCR and TV are connected correctly.

Follow the steps on this page only when you plug the VCR power cord into the wall outlet for the first time.

You can not program channels if you are using a Cable Box or a Direct Broadcast System.

If you are not using a Cable Box/DBS, the clock may set itself automatically after you connect the antenna/Cable signal to the VCR and plug in the power cord. The time will appear on the display panel.

Turning on Your VCR 11

2Turn on the TV.

1

POWER

VCR/TV

EJECT


VCR

TV

CBL/DBS

1

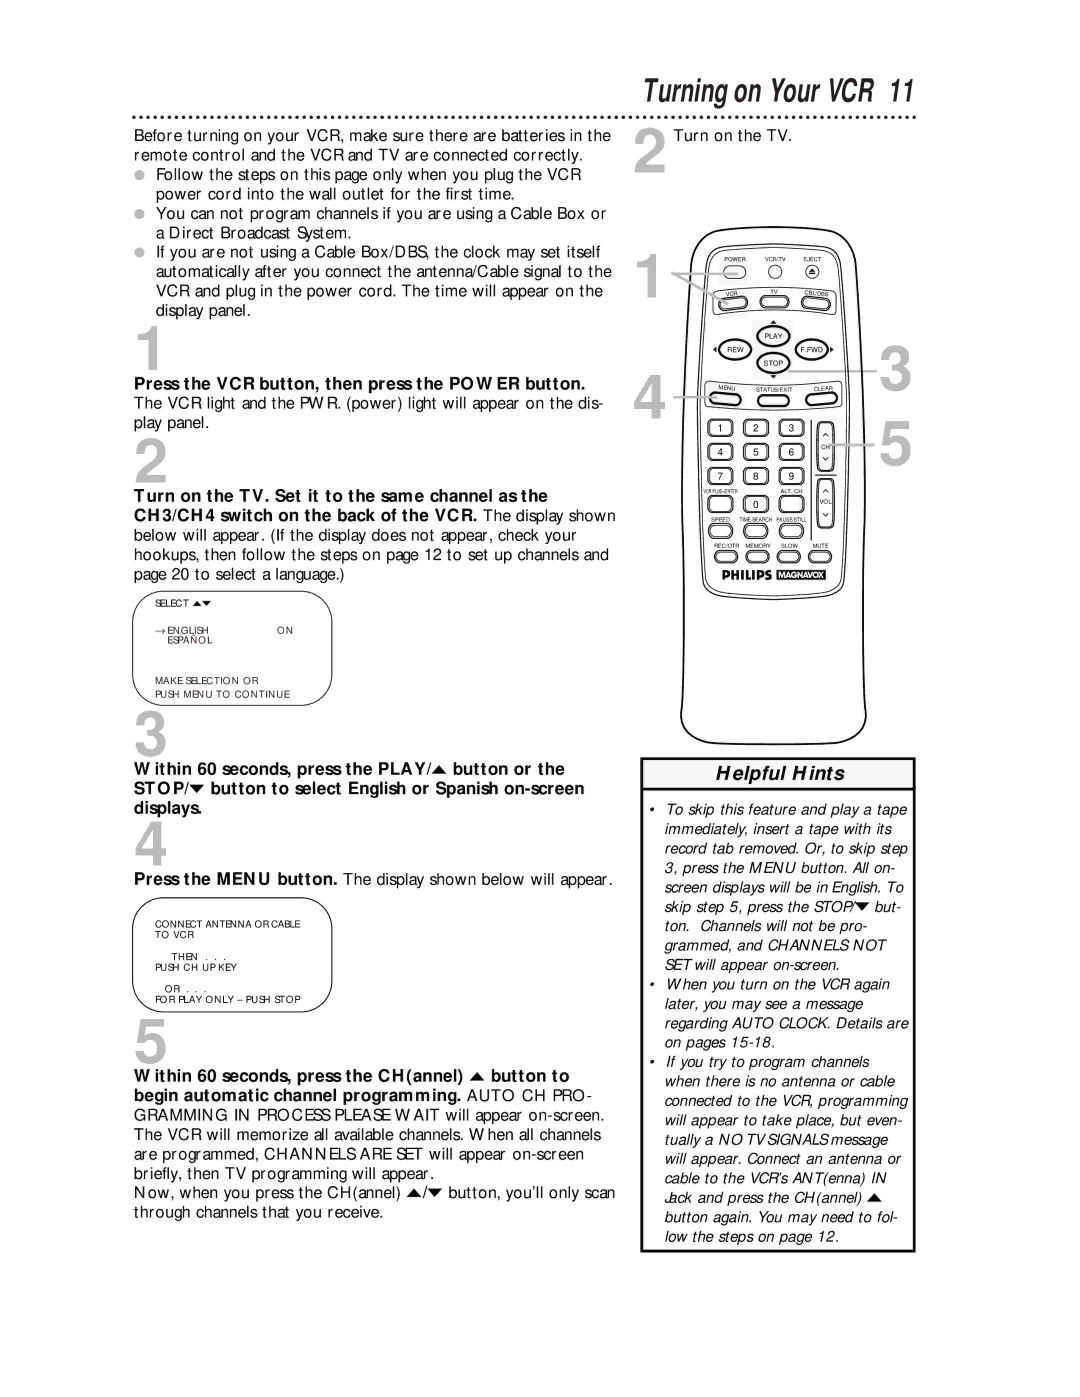
Press the VCR button, then press the POWER button. The VCR light and the PWR. (power) light will appear on the dis- play panel.

2

Turn on the TV. Set it to the same channel as the CH3/CH4 switch on the back of the VCR. The display shown

4

REW

MENU

1

4

7

VCR PLUS+/ENTER

PLAY


F.FWD

STOP


STATUS/EXIT

CLEAR

2

3


5

6

CH


8

9


ALT. CH


0


VOL


3

5

below will appear. (If the display does not appear, check your hookups, then follow the steps on page 12 to set up channels and page 20 to select a language.)

SPEED TIME SEARCH PAUSE/STILL

REC/OTR MEMORY SLOW MUTE

SELECT op


ENGLISH

ON

ESPAÑOL


MAKE SELECTION OR

PUSH MENU TO CONTINUE

3

Within 60 seconds, press the PLAY/o button or the STOP/p button to select English or Spanish on-screen displays.

4

Press the MENU button. The display shown below will appear.

CONNECT ANTENNA OR CABLE

TO VCR

THEN . . .

PUSH CH UP KEY

OR . . .

FOR PLAY ONLY – PUSH STOP

5

Within 60 seconds, press the CH(annel) o button to begin automatic channel programming. AUTO CH PRO- GRAMMING IN PROCESS PLEASE WAIT will appear on-screen. The VCR will memorize all available channels. When all channels are programmed, CHANNELS ARE SET will appear on-screen briefly, then TV programming will appear.

Now, when you press the CH(annel) o/p button, you’ll only scan through channels that you receive.

Helpful Hints

To skip this feature and play a tape immediately, insert a tape with its record tab removed. Or, to skip step 3, press the MENU button. All on- screen displays will be in English. To skip step 5, press the STOP/p but- ton. Channels will not be pro- grammed, and CHANNELS NOT SET will appear on-screen.

When you turn on the VCR again later, you may see a message regarding AUTO CLOCK. Details are on pages 15-18.

If you try to program channels when there is no antenna or cable connected to the VCR, programming will appear to take place, but even- tually a NO TV SIGNALS message will appear. Connect an antenna or cable to the VCR’s ANT(enna) IN Jack and press the CH(annel) o button again. You may need to fol- low the steps on page 12.

Page 11
Image 11
Magnavox VRA431AT99 owner manual Turning on Your VCR, Press the Menu button. The display shown below will appear

VRA431AT99 specifications

The Magnavox VRA431AT99 is a versatile and innovative piece of technology designed to meet the demands of both casual and advanced users. This unique device combines multiple functionalities, making it a valuable addition to any home entertainment setup.

One of the standout features of the VRA431AT99 is its comprehensive media playback capabilities. It supports a wide range of formats, enabling users to enjoy their favorite movies, music, and shows with ease. From DVDs and CDs to digital files stored on USB drives, the VRA431AT99 ensures that users can access their content without compatibility issues. The built-in media player enhances the user experience, allowing for smooth navigation through different media types.

In terms of connectivity, the VRA431AT99 excels with its array of input and output options. Equipped with HDMI, RCA, and USB ports, the device offers flexibility when connecting to various peripherals, such as televisions, sound systems, or external storage devices. Additionally, the inclusion of a built-in tuner allows users to access over-the-air broadcasts, making it an all-in-one media hub.

The design of the Magnavox VRA431AT99 is both compact and functional, making it easy to integrate into any entertainment center. Its sleek appearance is complemented by a user-friendly interface, allowing users to navigate settings and features effortlessly. The remote control adds convenience, making it possible to operate the device from a distance without having to get up.

One notable characteristic of the VRA431AT99 is its ability to upscale video content. The upscaling technology enhances the resolution of standard-definition videos, resulting in a clearer and more detailed viewing experience. This feature is especially beneficial for users who frequently watch older media or lower-resolution content.

Furthermore, the Magnavox VRA431AT99 is designed with energy efficiency in mind. It complies with energy-saving standards, ensuring that users can enjoy their entertainment without a significant impact on their electricity bills. The durability and reliability of the device also contribute to its appeal, promising years of dependable performance.

In summary, the Magnavox VRA431AT99 is a feature-rich multimedia player that caters to a diverse range of entertainment needs. Its robust media playback capabilities, versatile connectivity options, and energy-efficient design make it a go-to choice for anyone looking to enhance their home entertainment experience. With the VRA431AT99, Magnavox reaffirms its commitment to delivering quality and innovation in consumer electronics.