Removing or installing planer blades
CAUTION :
Always be sure that the tool is switched off and unplugged before removing or installing the blade.
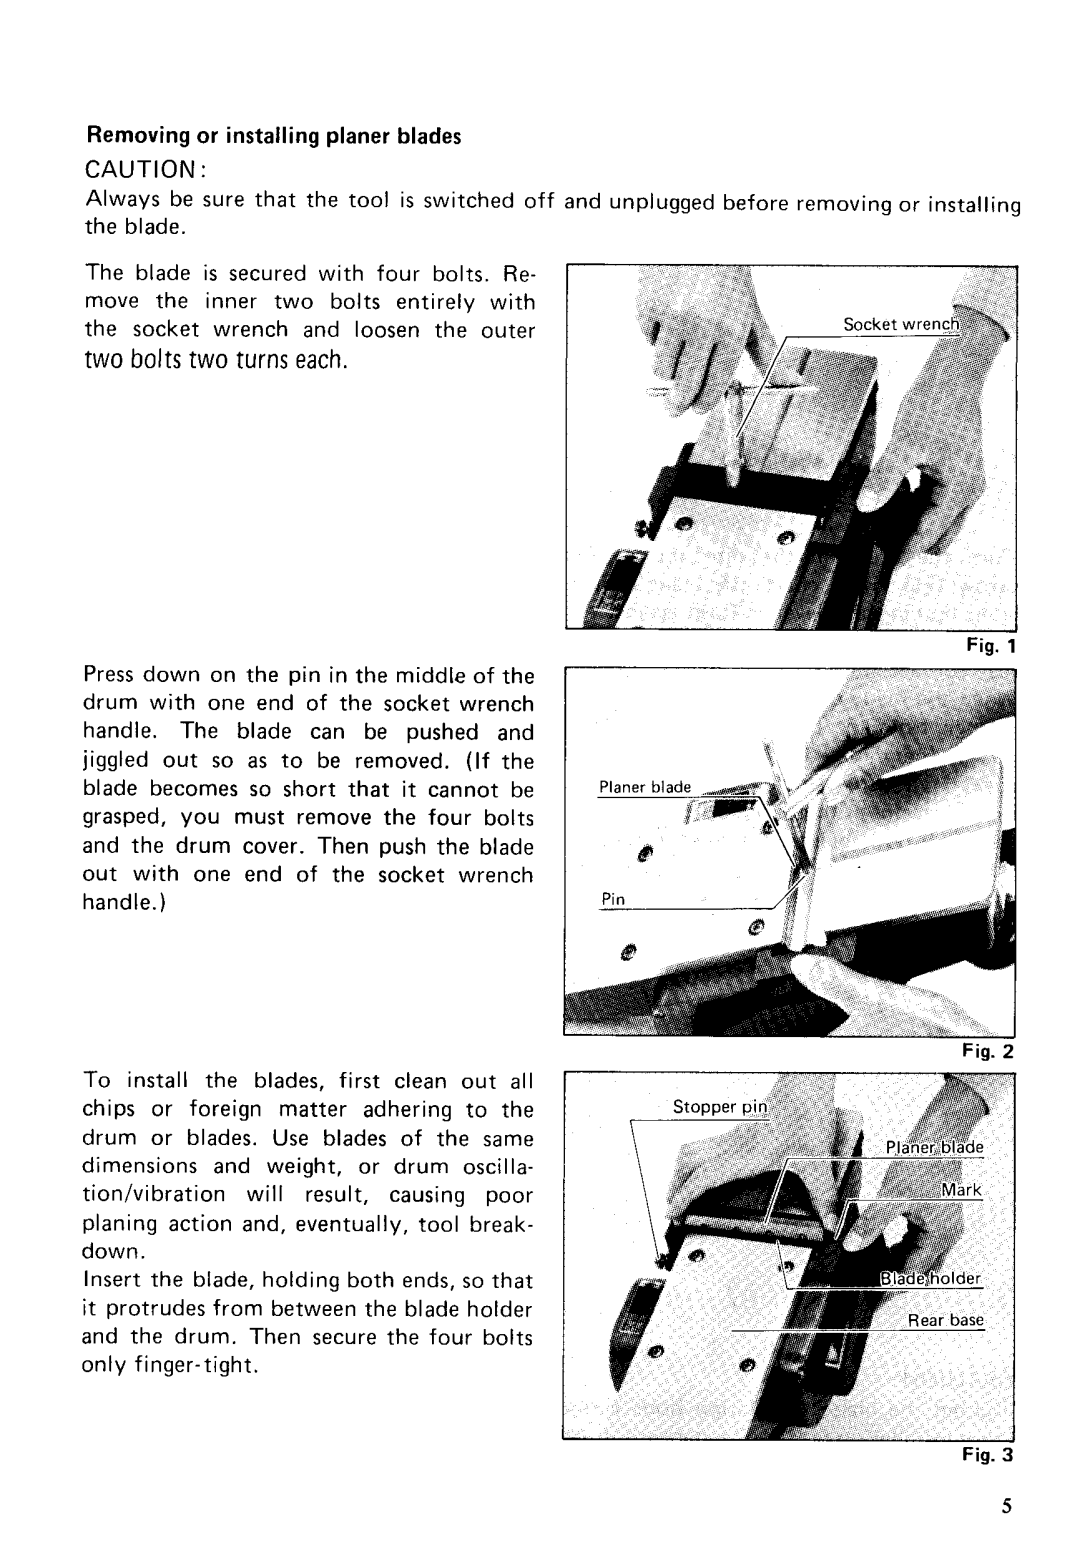
The blade is secured with four bolts. Re- move the inner two bolts entirely with the socket wrench and loosen the outer
two bolts two turns each.
Fig. 1
Press down on the pin in the middle of the drum with one end of the socket wrench handle. The blade can be pushed and jiggled out so as to be removed. (If the blade becomes so short that it cannot be grasped, you must remove the four bolts and the drum cover. Then push the blade out with one end of the socket wrench handle.)
Fig. 2
To install the blades, first clean out all chips or foreign matter adhering to the drum or blades. Use blades of the same dimensions and weight, or drum oscilla- tionhibration will result, causing poor planing action and, eventually, tool break- down.
Insert the blade, holding both ends, so that it protrudes from between the blade holder and the drum. Then secure the four bolts only
Fig. 3
5
