PRELlMlNARY I NSTRUCTlONS
Your electric tool i s precision built and manufactured to satisfy the highest standards. For maximum performance, long tool life, and your safety, follow these instructions carefully.
VOLTAGE WARNING: Before connecting the tool t o a power source (receptacle, outlet, etc.) be sure the voltage supplied i s the same as that specified on the nameplate of the tool. A power source
with voltage greater than that specified for t h e tool can result in SERIOUS INJURY t o the user - as well as damage to the tool. I f in doubt, DO NOT PLUG IN THE TOOL. Using a power source with voltage less than the nameplate rating i s harmful to the motor.
For all grounded tools with American type plug.
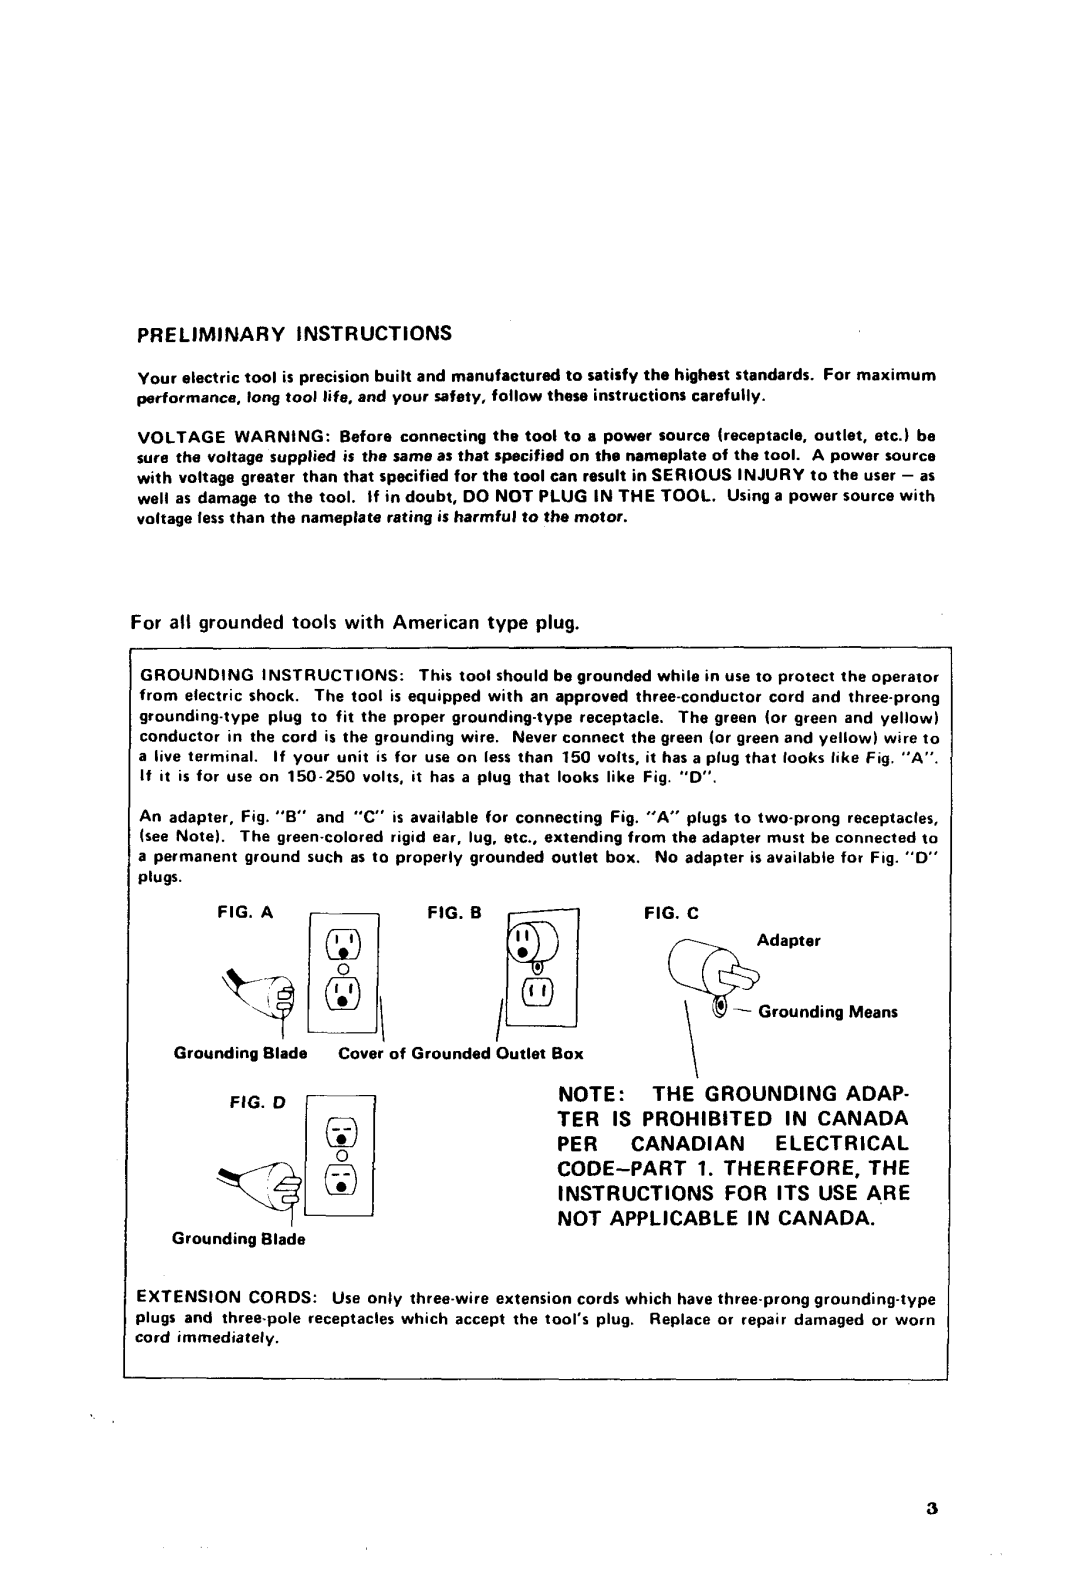
GROUNDING INSTRUCTIONS: This tool should be grounded while in use t o protect t h e operator from electric shock. The tool is equipped with an approved
It i t i s for ure on
An adapter, Fig. "B" and " C ' is available for connecting Fig. " A ' plugs t o
Grounding Blade
FIG. D
Grounding Blade
Cover' of Grounded Outlet Box | \ |
|
NOTE: THE GROUNDING ADAP-
TER IS PROHIBITED IN CANADA
PER CANADIAN ELECTRICAL
INSTRUCTIONS FOR ITS USE ARE
NOT APPLICABLE IN CANADA.
EXTENSION CORDS: Use only
plugs and
3
