Installing or removing trimmer bit
CAUTION :
Always be sure that the tool is switched off and unplugged before installing or removing the bit.
Insert the bit all the way into the collet cone and tighten the collet nut securely with the two wrenches.
To remove the bit, follow the installation procedure in reverse.
CAUTION :
0 Do not tighten the collet nut without inserting a bit, or the collet cone will break. 0 Use only the wrenches provided with the tool.
Adjusting bit protrusion
To adjust the bit protrusion, loosen the clamp screw and move the tool base up or down as desired. After adjusting, tighten the clamp screw firmly to secure the tool base. On the tool base, there are two sight windows through which you can read a graduation on the scale label. Select a sight window convenient for your work and align the scale label with the selected sight window.
installingtrimmer shoe (after it has been removed from the tool)
NOTE :
The trimmer shoe is factory installed on the tool.
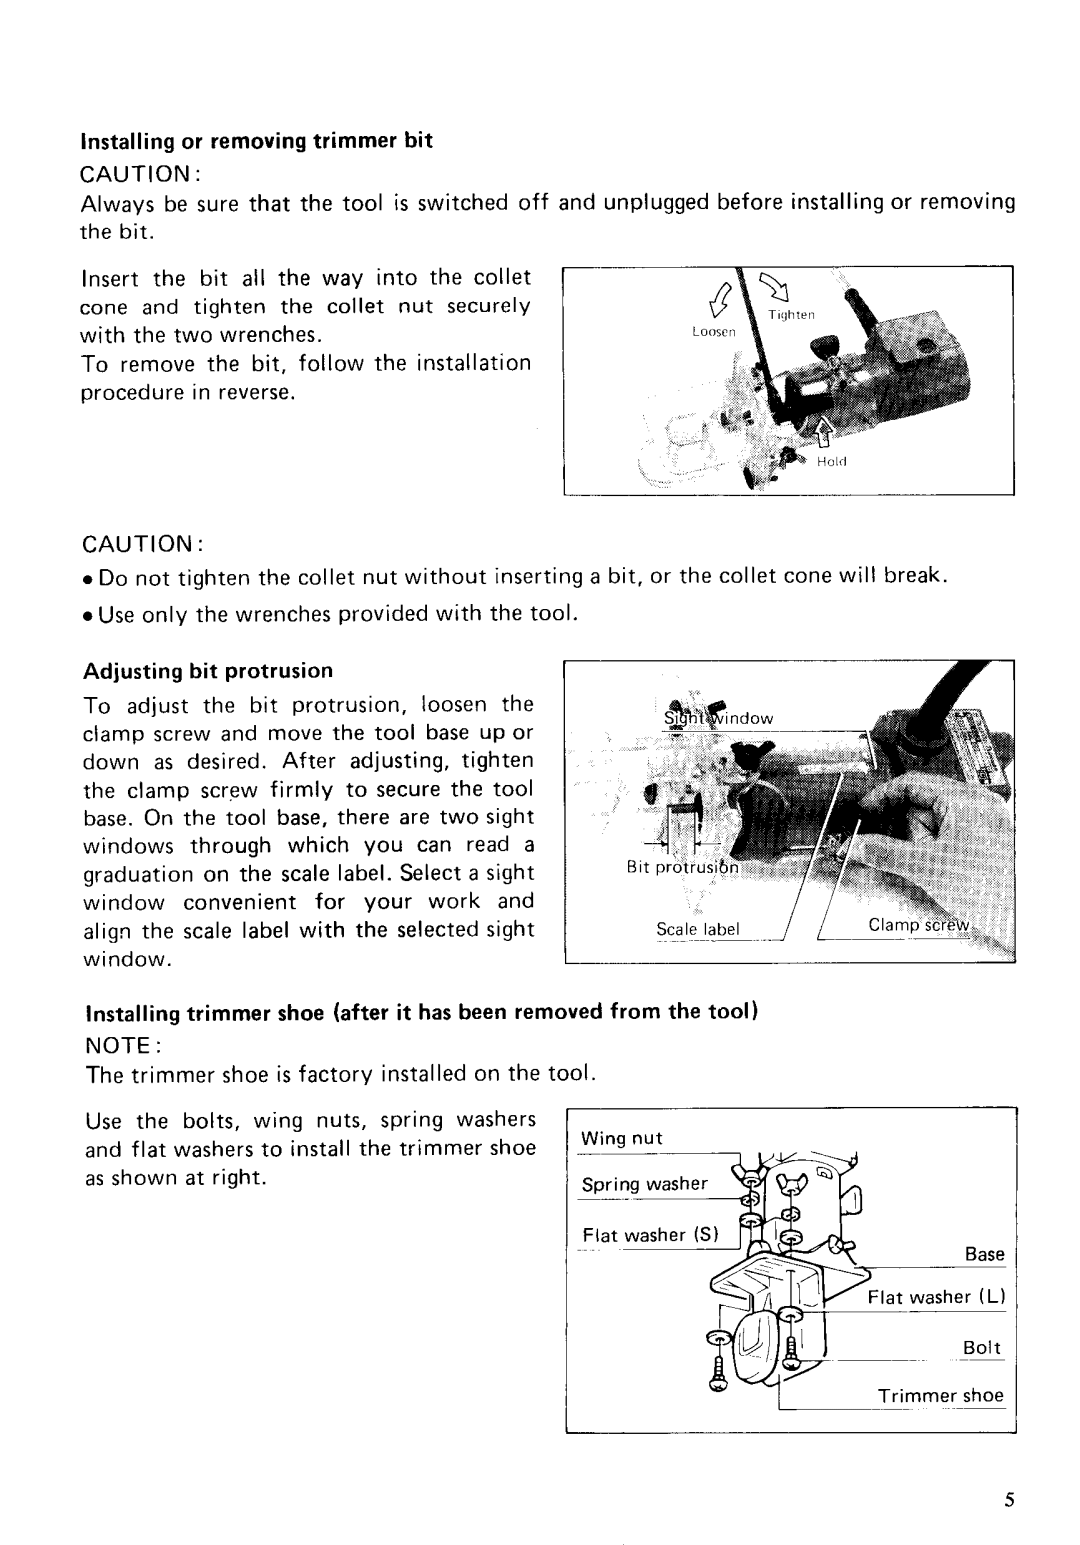
Use the bolts, wing nuts, spring washers
and flat washers to install the trimmer shoe Wing nut as shown a t right.
_ _ _ _ _ _ ~ ~ ~~
Trimmer shoe
5