P 10/20
 Repair
[3]DISASSEMBLY/ASSEMBLY
[3]-5. Air Motor Section
DISASSEMBLING
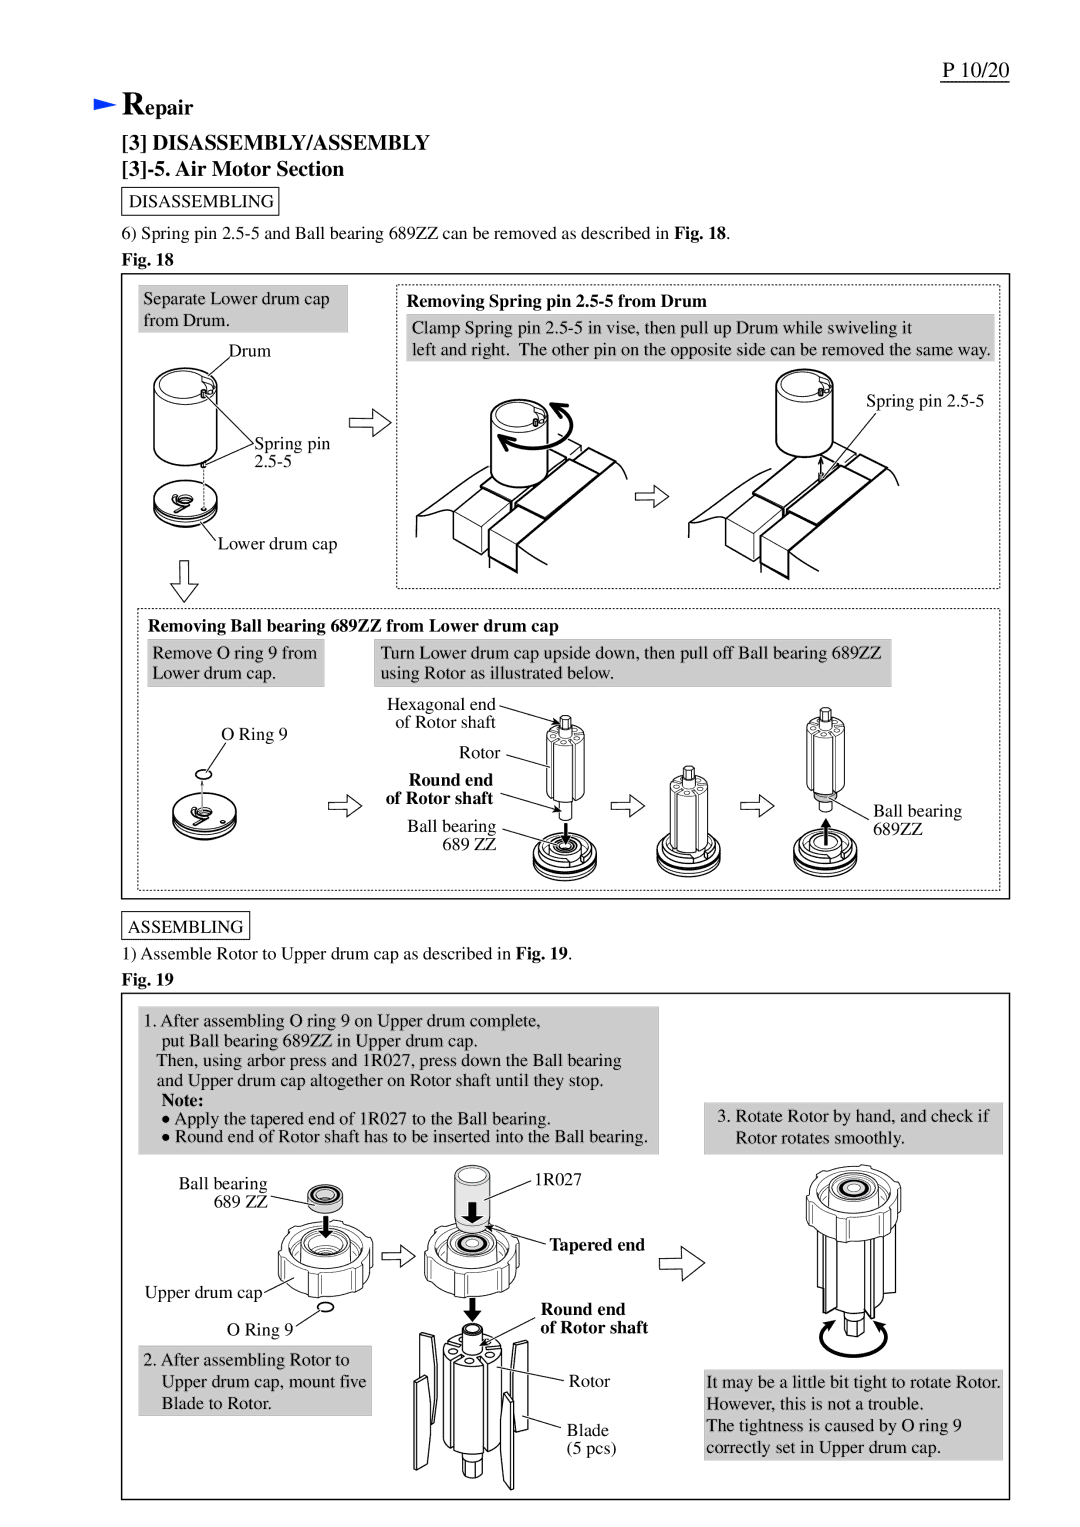
6)Spring pin
Fig. 18
Separate Lower drum cap | Removing Spring pin | |
from Drum. |
|
|
| Clamp Spring pin | |
|
| |
Drum |
| left and right. The other pin on the opposite side can be removed the same way. |
Spring pin
Spring pin
![]() Lower drum cap
Lower drum cap
Removing Ball bearing 689ZZ from Lower drum cap
Remove O ring 9 from Lower drum cap.
Turn Lower drum cap upside down, then pull off Ball bearing 689ZZ using Rotor as illustrated below.
| Hexagonal end | |
O Ring 9 | of Rotor shaft | |
Rotor | ||
| ||
| Round end | |
| of Rotor shaft | |
| Ball bearing | |
| 689 ZZ |
![]() Ball bearing 689ZZ
Ball bearing 689ZZ
ASSEMBLING
1) Assemble Rotor to Upper drum cap as described in Fig. 19.
Fig. 19
1. After assembling O ring 9 on Upper drum complete, |
|
put Ball bearing 689ZZ in Upper drum cap. |
|
Then, using arbor press and 1R027, press down the Ball bearing |
|
and Upper drum cap altogether on Rotor shaft until they stop. |
|
Note: | 3. Rotate Rotor by hand, and check if |
Apply the tapered end of 1R027 to the Ball bearing. | |
Round end of Rotor shaft has to be inserted into the Ball bearing. | Rotor rotates smoothly. |
Ball bearing
689 ZZ ![]()
![]()
Upper drum cap
![]()
![]()
![]()
![]()
O Ring 9
2.After assembling Rotor to Upper drum cap, mount five Blade to Rotor.
1R027

 Tapered end
Round end 
 of Rotor shaft
![]() Rotor
Rotor
![]() Blade (5 pcs)
Blade (5 pcs)
It may be a little bit tight to rotate Rotor. However, this is not a trouble.
The tightness is caused by O ring 9 correctly set in Upper drum cap.
