P 18/20
 Repair
[3] DISASSEMBLY/ASSEMBLY
[3]-8. Adjuster, Contact Arm Assembly
DISASSEMBLING
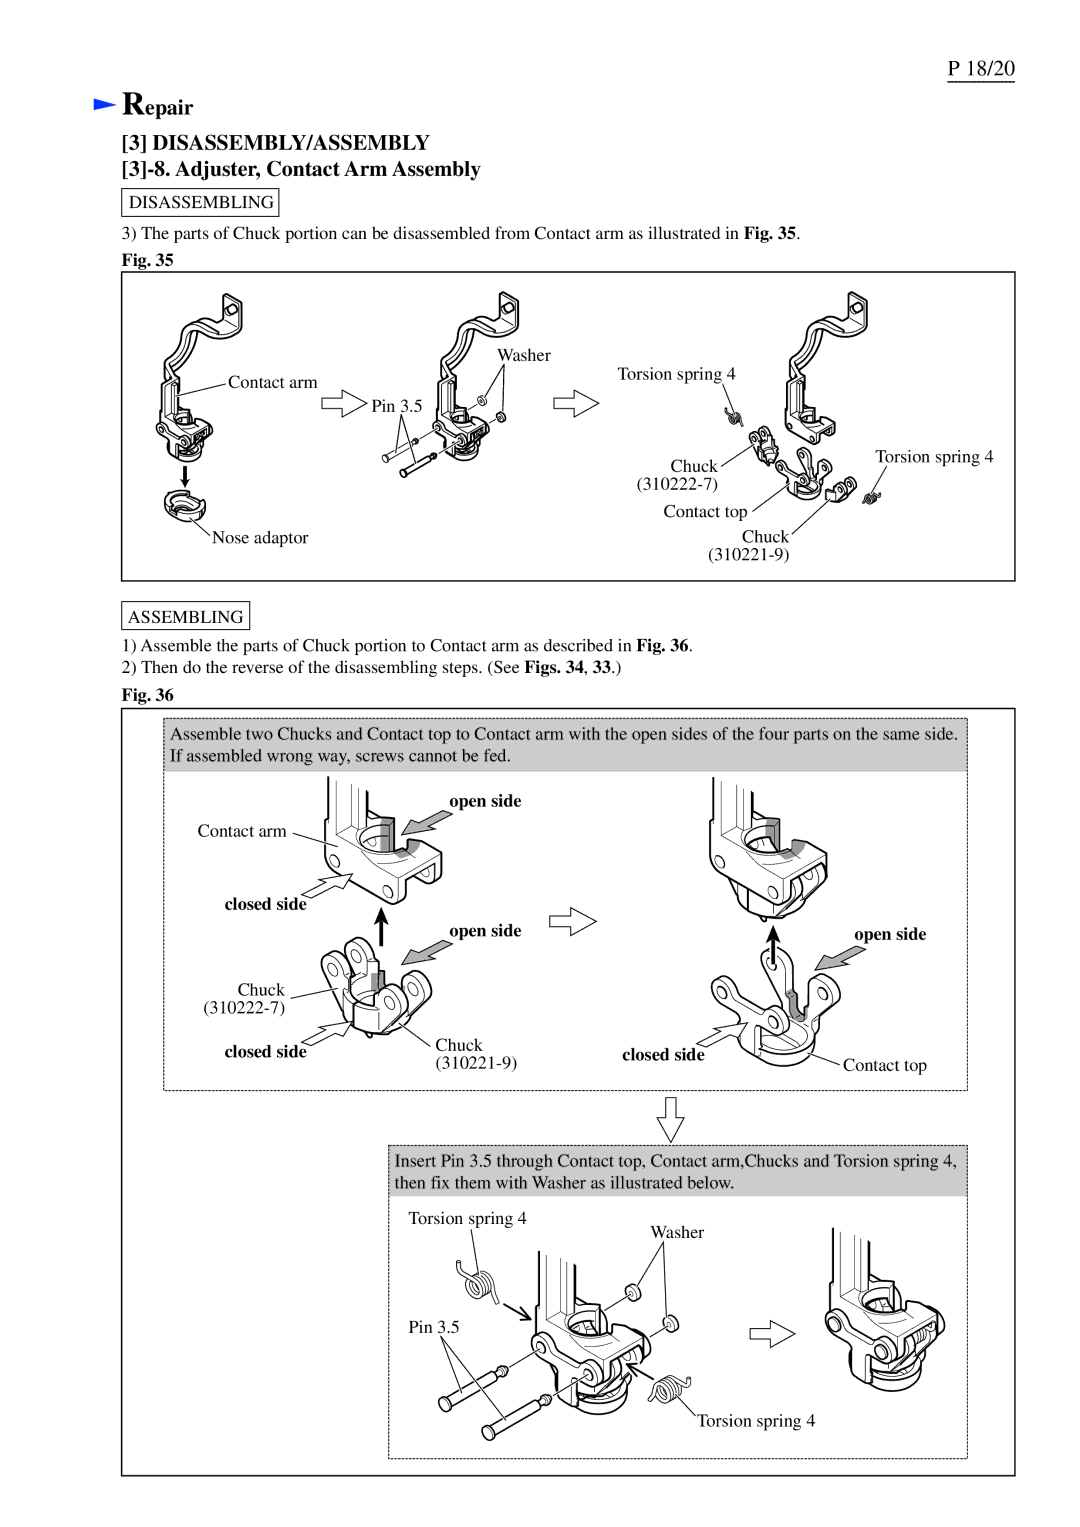
3)The parts of Chuck portion can be disassembled from Contact arm as illustrated in Fig. 35.
Fig. 35
Washer
Contact arm | Torsion spring 4 |
|
|
| |
| Pin 3.5 |
|
| Chuck | Torsion spring 4 |
|
| |
|
| |
| Contact top |
|
Nose adaptor | Chuck |
|
|
|
ASSEMBLING
1)Assemble the parts of Chuck portion to Contact arm as described in Fig. 36.
2)Then do the reverse of the disassembling steps. (See Figs. 34, 33.)
Fig. 36
Assemble two Chucks and Contact top to Contact arm with the open sides of the four parts on the same side. If assembled wrong way, screws cannot be fed.
Contact arm
closed side
open side
open side | open side |
Chuck |
|
|
| |
|
|
| ||
closed side | Chuck | closed side |
| |
Contact top | ||||
|
|
Insert Pin 3.5 through Contact top, Contact arm,Chucks and Torsion spring 4, then fix them with Washer as illustrated below.
Torsion spring 4
Pin 3.5
Washer
Torsion spring 4
