P 20/20
 Repair
[3]DISASSEMBLY/ASSEMBLY
[3]-9. Driver Guide, Feed Piston
ASSEMBLING
Do the reverse of the disassembling steps. (Refer to Figs. 39, 38, 37.)
[3]-10. Inlet Cap, Plug
DISASSEMBLING
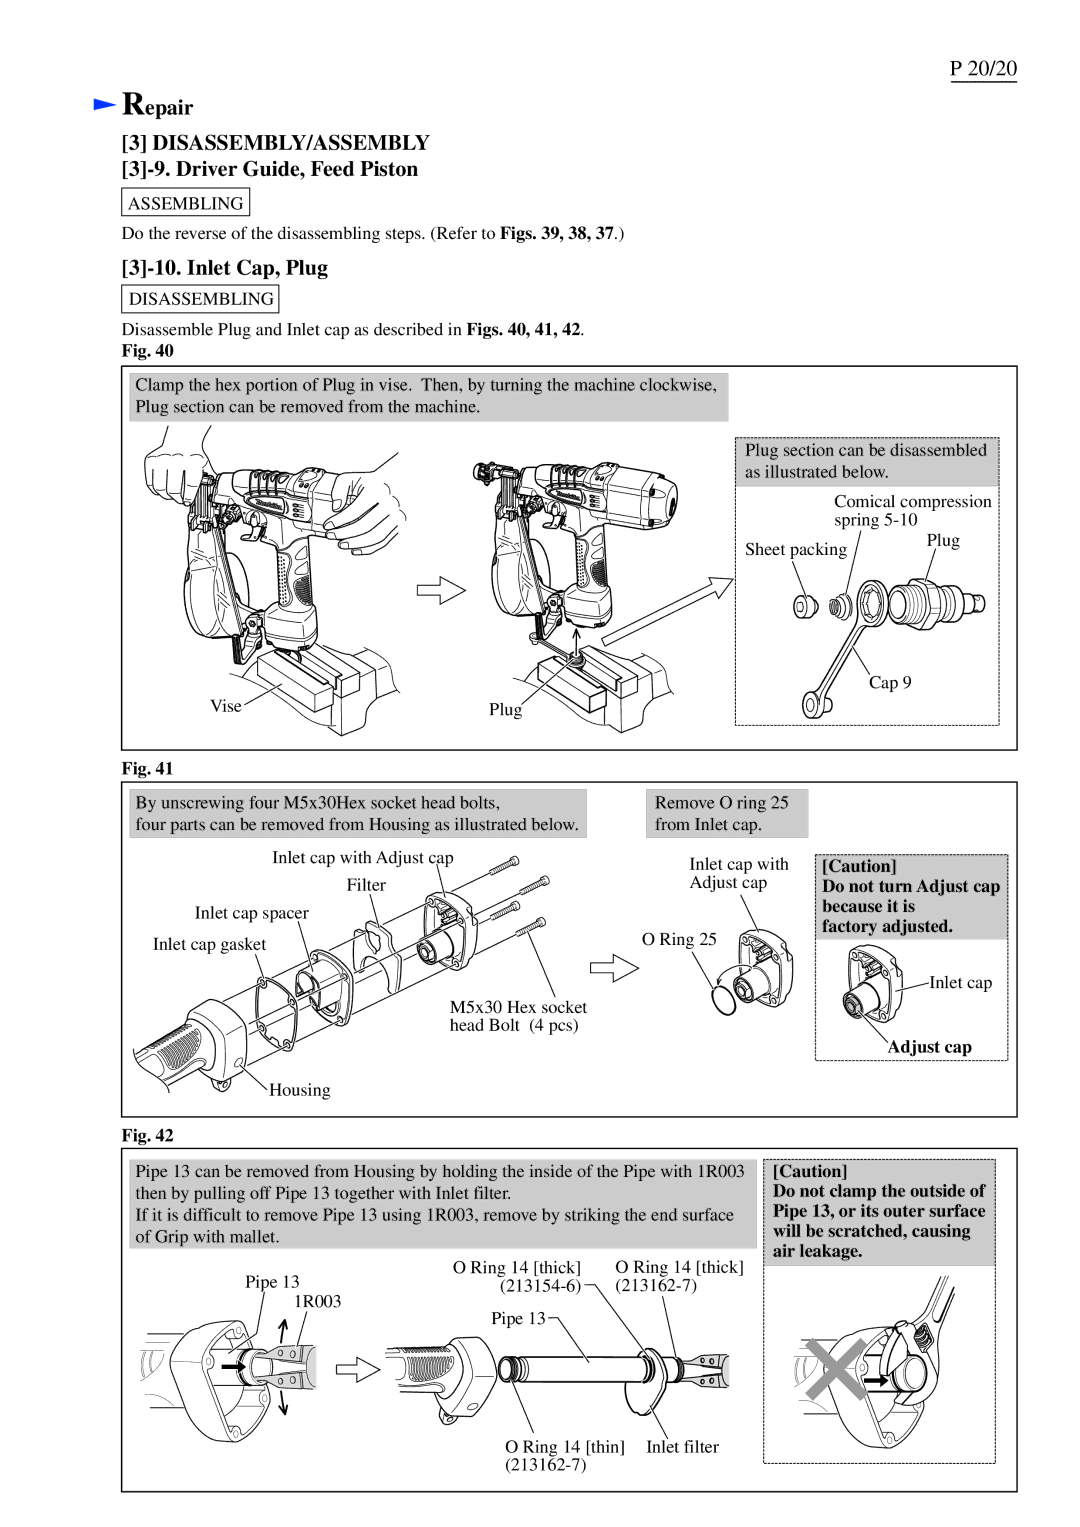
Disassemble Plug and Inlet cap as described in Figs. 40, 41, 42.
Fig. 40
Clamp the hex portion of Plug in vise. Then, by turning the machine clockwise,
Plug section can be removed from the machine.
Plug section can be disassembled as illustrated below.
Comical compression spring
Sheet packing | Plug |
|
| Cap 9 |
Vise | Plug |
Fig. 41
By unscrewing four M5x30Hex socket head bolts,
four parts can be removed from Housing as illustrated below.
Inlet cap with Adjust cap Filter ![]()
![]()
Inlet cap spacer Inlet cap gasket
M5x30 Hex socket head Bolt (4 pcs)
![]()
![]() Housing
Housing
Remove O ring 25 from Inlet cap.
Inlet cap with
Adjust cap
O Ring 25
[Caution]
Do not turn Adjust cap because it is
factory adjusted.
![]()
![]()
![]()
![]() Inlet cap
Inlet cap
Adjust cap
Fig. 42
Pipe 13 can be removed from Housing by holding the inside of the Pipe with 1R003 then by pulling off Pipe 13 together with Inlet filter.
If it is difficult to remove Pipe 13 using 1R003, remove by striking the end surface of Grip with mallet.
Pipe 13 | O Ring 14 [thick] | O Ring 14 [thick] |
1R003 |
|
|
Pipe 13![]()
[Caution]
Do not clamp the outside of Pipe 13, or its outer surface will be scratched, causing air leakage.
O Ring 14 [thin] Inlet filter