P 5/ 12
 Repair
[3] DISASSEMBLY/ASSEMBLY
[3] -2. Gear Assembly, Motor Section (cont.)
ASSEMBLING
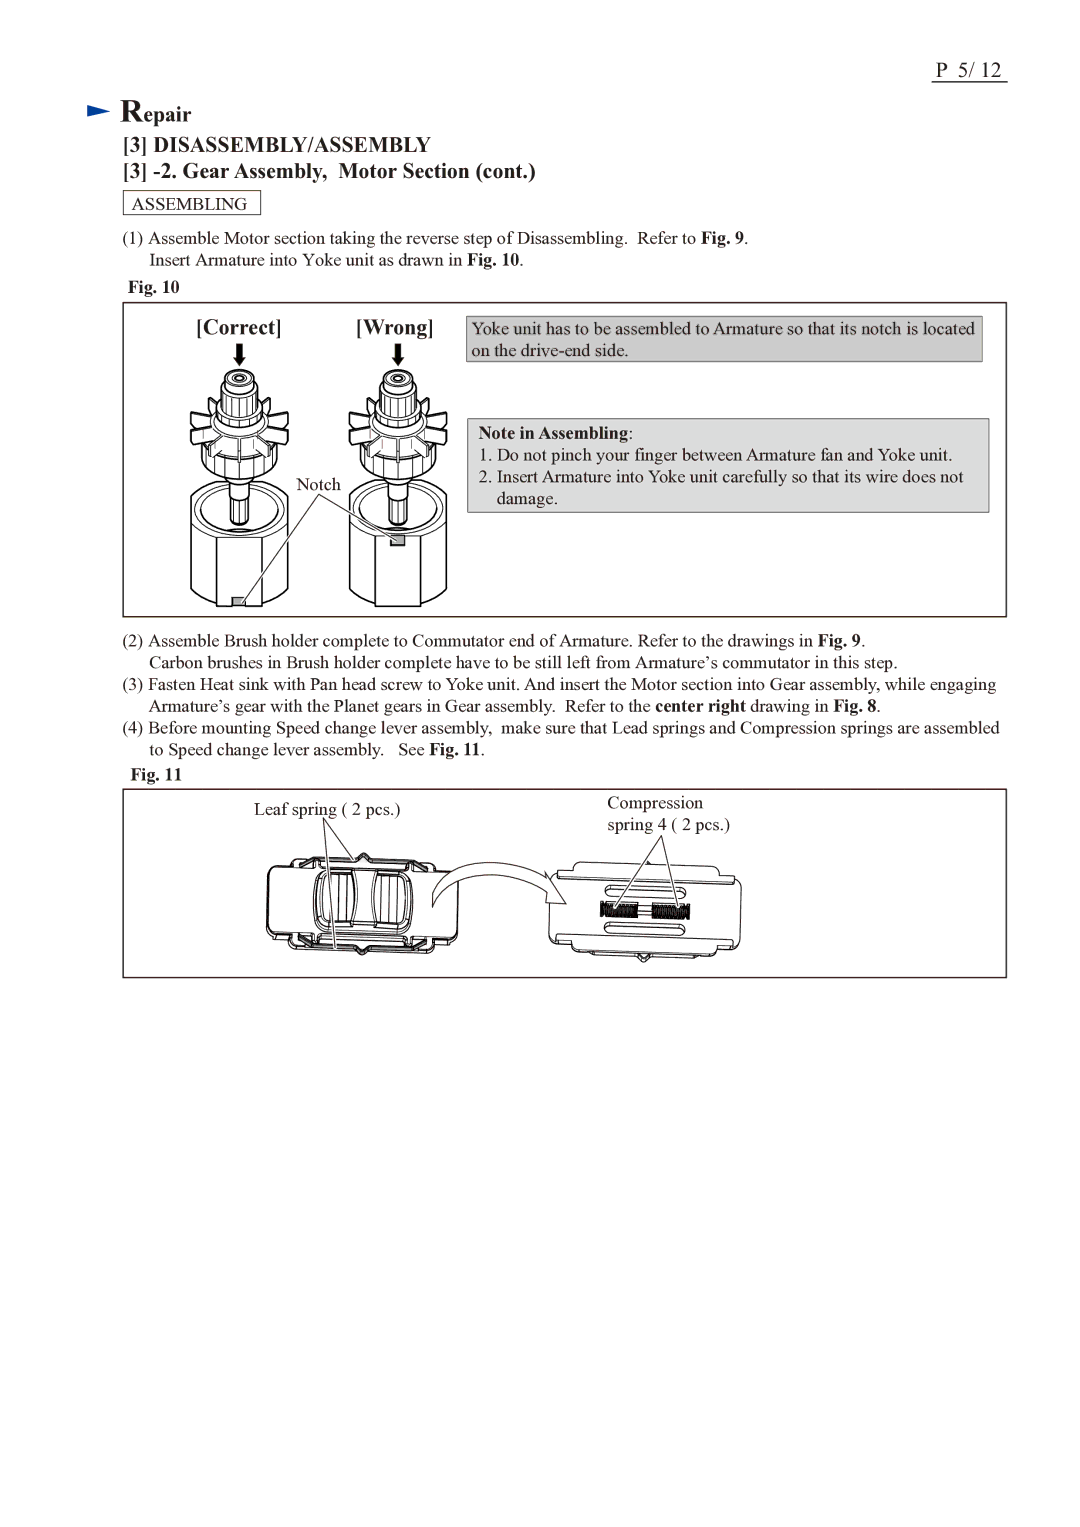
(1)Assemble Motor section taking the reverse step of Disassembling. Refer to Fig. 9. Insert Armature into Yoke unit as drawn in Fig. 10.
Fig. 10
[Correct] [Wrong]
Notch
Yoke unit has to be assembled to Armature so that its notch is located on the
Note in Assembling:
1.Do not pinch your finger between Armature fan and Yoke unit.
2.Insert Armature into Yoke unit carefully so that its wire does not damage.
(2)Assemble Brush holder complete to Commutator end of Armature. Refer to the drawings in Fig. 9. Carbon brushes in Brush holder complete have to be still left from Armature’s commutator in this step.
(3)Fasten Heat sink with Pan head screw to Yoke unit. And insert the Motor section into Gear assembly, while engaging Armature’s gear with the Planet gears in Gear assembly. Refer to the center right drawing in Fig. 8.
(4)Before mounting Speed change lever assembly, make sure that Lead springs and Compression springs are assembled to Speed change lever assembly. See Fig. 11.
Fig. 11
Leaf spring ( 2 pcs.) | Compression | |
spring 4 ( 2 pcs.) | ||
| ||
|
|
