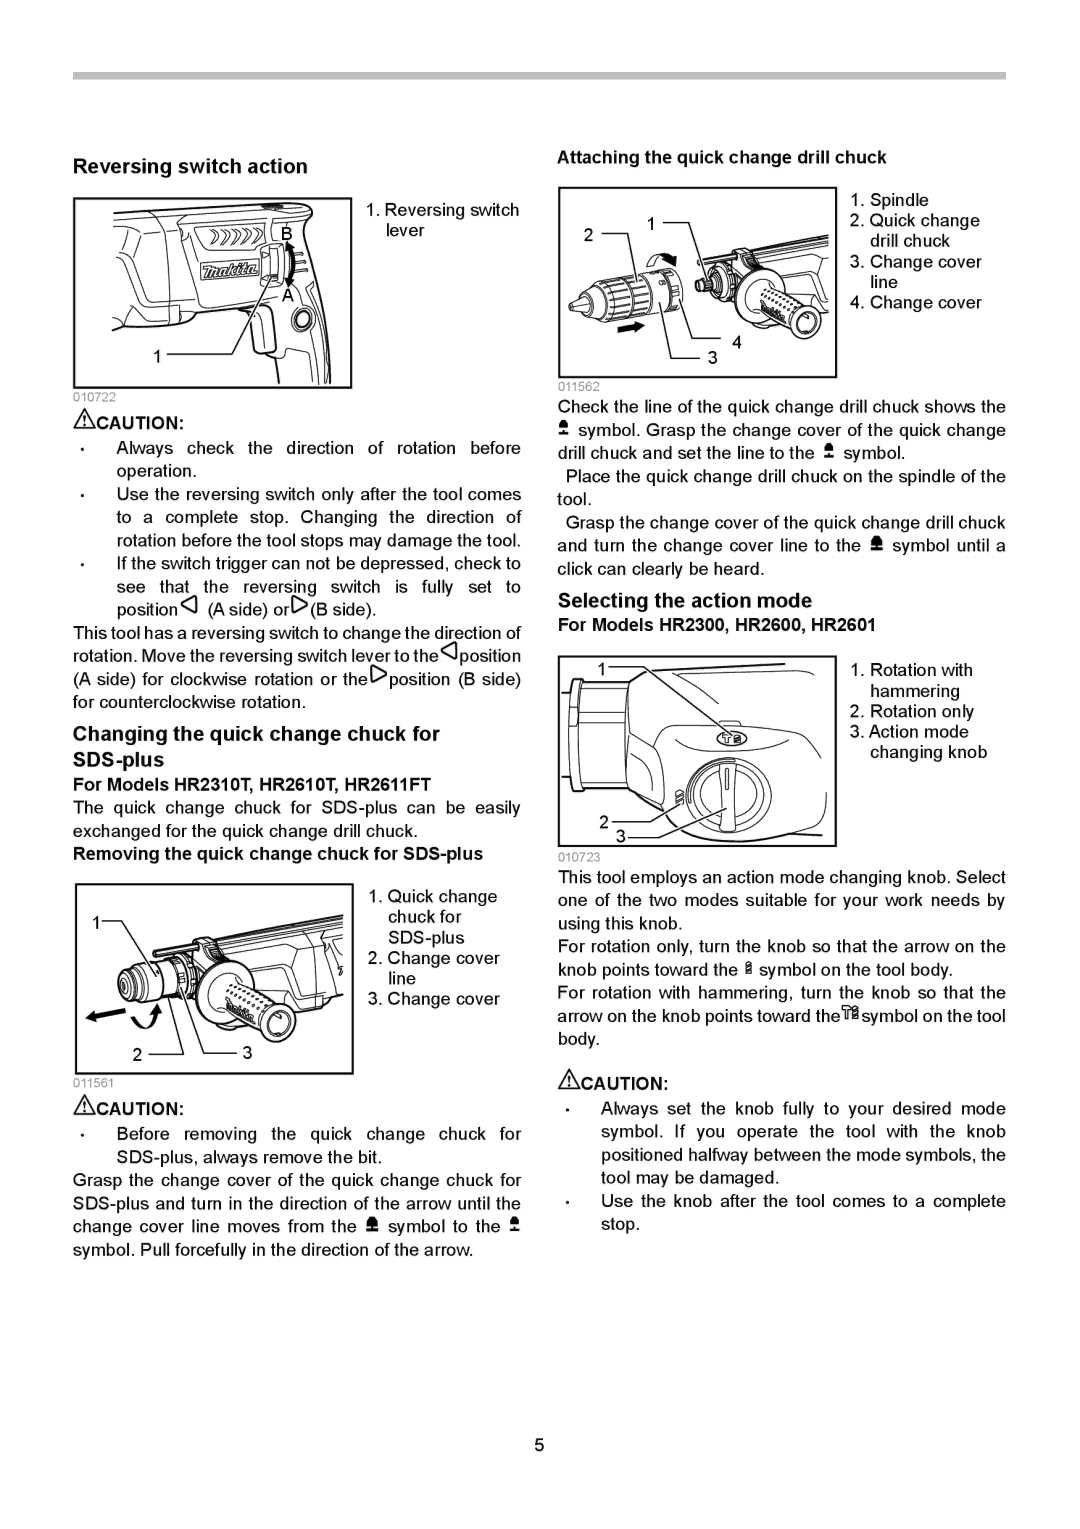
Reversing switch action
Attaching the quick change drill chuck
B
A
1
010722
1.Reversing switch lever
|
| 1. | Spindle |
2 | 1 | 2. Quick change | |
|
| drill chuck | |
|
| 3. | Change cover |
|
|
| line |
|
| 4. | Change cover |
| 3 | 4 |
|
011562 |
|
|
|
Check the line of the quick change drill chuck shows the
![]() CAUTION:
CAUTION:
•Always check the direction of rotation before operation.
•Use the reversing switch only after the tool comes to a complete stop. Changing the direction of rotation before the tool stops may damage the tool.
•If the switch trigger can not be depressed, check to see that the reversing switch is fully set to
position![]() (A side) or
(A side) or![]() (B side).
(B side).
This tool has a reversing switch to change the direction of rotation. Move the reversing switch lever to the![]() position (A side) for clockwise rotation or the
position (A side) for clockwise rotation or the![]() position (B side) for counterclockwise rotation.
position (B side) for counterclockwise rotation.
Changing the quick change chuck for SDS-plus
For Models HR2310T, HR2610T, HR2611FT
The quick change chuck for
Removing the quick change chuck for SDS-plus
| 1. Quick change | |
1 | chuck for | |
| ||
| 2. Change cover | |
| line | |
| 3. Change cover | |
2 | 3 | |
011561 |
| |
CAUTION: |
|
•Before removing the quick change chuck for
Grasp the change cover of the quick change chuck for ![]() symbol to the
symbol to the ![]() symbol. Pull forcefully in the direction of the arrow.
symbol. Pull forcefully in the direction of the arrow.
![]() symbol. Grasp the change cover of the quick change drill chuck and set the line to the
symbol. Grasp the change cover of the quick change drill chuck and set the line to the ![]() symbol.
symbol.
Place the quick change drill chuck on the spindle of the tool.
Grasp the change cover of the quick change drill chuck and turn the change cover line to the ![]() symbol until a click can clearly be heard.
symbol until a click can clearly be heard.
Selecting the action mode
For Models HR2300, HR2600, HR2601
1 | 1. | Rotation with |
|
| hammering |
| 2. | Rotation only |
| 3. Action mode | |
|
| changing knob |
2 3 |
|
|
010723 |
|
|
This tool employs an action mode changing knob. Select one of the two modes suitable for your work needs by using this knob.
For rotation only, turn the knob so that the arrow on the knob points toward the ![]() symbol on the tool body.
symbol on the tool body.
For rotation with hammering, turn the knob so that the arrow on the knob points toward the![]() symbol on the tool body.
symbol on the tool body.
![]() CAUTION:
CAUTION:
•Always set the knob fully to your desired mode symbol. If you operate the tool with the knob positioned halfway between the mode symbols, the tool may be damaged.
•Use the knob after the tool comes to a complete stop.
5
