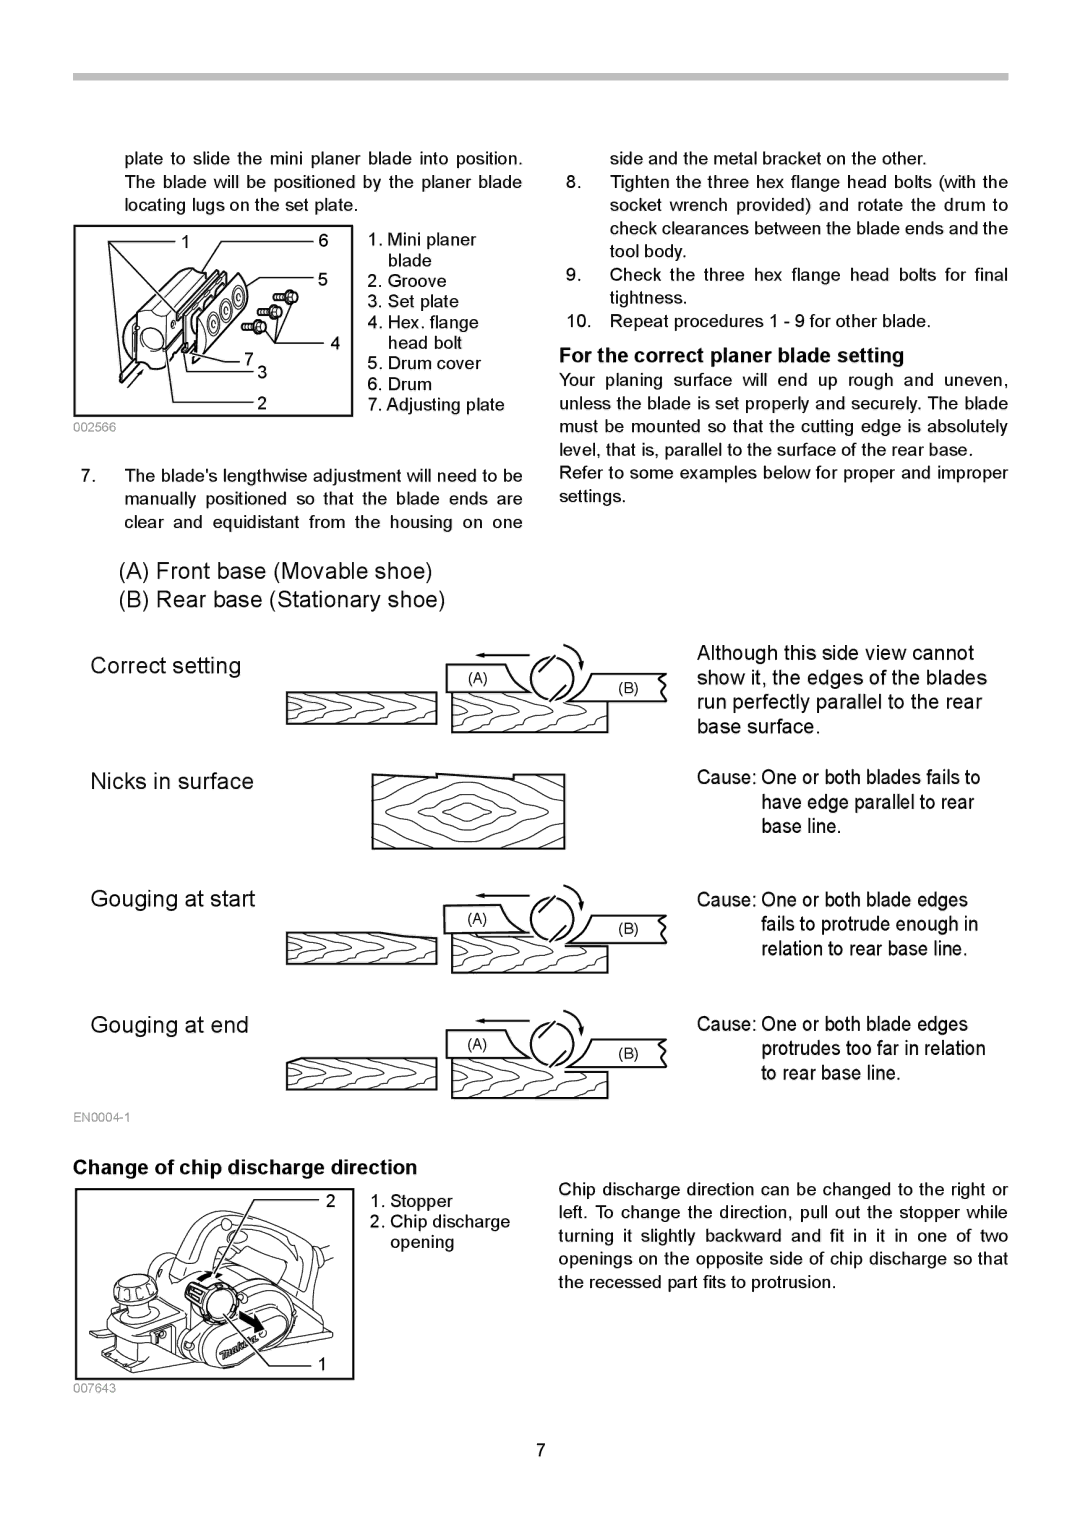
plate to slide the mini planer blade into position. The blade will be positioned by the planer blade locating lugs on the set plate.
1 |
| 6 | 1. | Mini planer |
|
| 5 |
| blade |
|
| 2. Groove | ||
|
|
| 3. | Set plate |
|
|
| 4. | Hex. flange |
| 7 |
| 4 | head bolt |
| 3 | 5. | Drum cover | |
|
| 6. | Drum | |
|
| 2 | ||
|
| 7. Adjusting plate | ||
002566 |
|
|
|
|
7.The blade's lengthwise adjustment will need to be manually positioned so that the blade ends are clear and equidistant from the housing on one
side and the metal bracket on the other.
8.Tighten the three hex flange head bolts (with the socket wrench provided) and rotate the drum to check clearances between the blade ends and the tool body.
9.Check the three hex flange head bolts for final tightness.
10.Repeat procedures 1 - 9 for other blade.
For the correct planer blade setting
Your planing surface will end up rough and uneven, unless the blade is set properly and securely. The blade must be mounted so that the cutting edge is absolutely level, that is, parallel to the surface of the rear base.
Refer to some examples below for proper and improper settings.
(A)Front base (Movable shoe)
(B)Rear base (Stationary shoe)
Correct setting |
|
| Although this side view cannot | |
(A) | (B) | show it, the edges of the blades | ||
| ||||
|
| run perfectly parallel to the rear | ||
|
|
| ||
|
|
| base surface. | |
Nicks in surface |
|
| Cause: One or both blades fails to | |
|
|
| have edge parallel to rear | |
|
|
| base line. | |
Gouging at start | (A) |
| Cause: One or both blade edges | |
| (B) | fails to protrude enough in | ||
|
|
| relation to rear base line. | |
Gouging at end | (A) |
| Cause: One or both blade edges | |
| (B) | protrudes too far in relation | ||
|
|
| to rear base line. | |
|
|
|
Change of chip discharge direction
2 | 1. | Stopper |
| 2. | Chip discharge |
|
| opening |
1
007643
Chip discharge direction can be changed to the right or left. To change the direction, pull out the stopper while turning it slightly backward and fit in it in one of two openings on the opposite side of chip discharge so that the recessed part fits to protrusion.
7