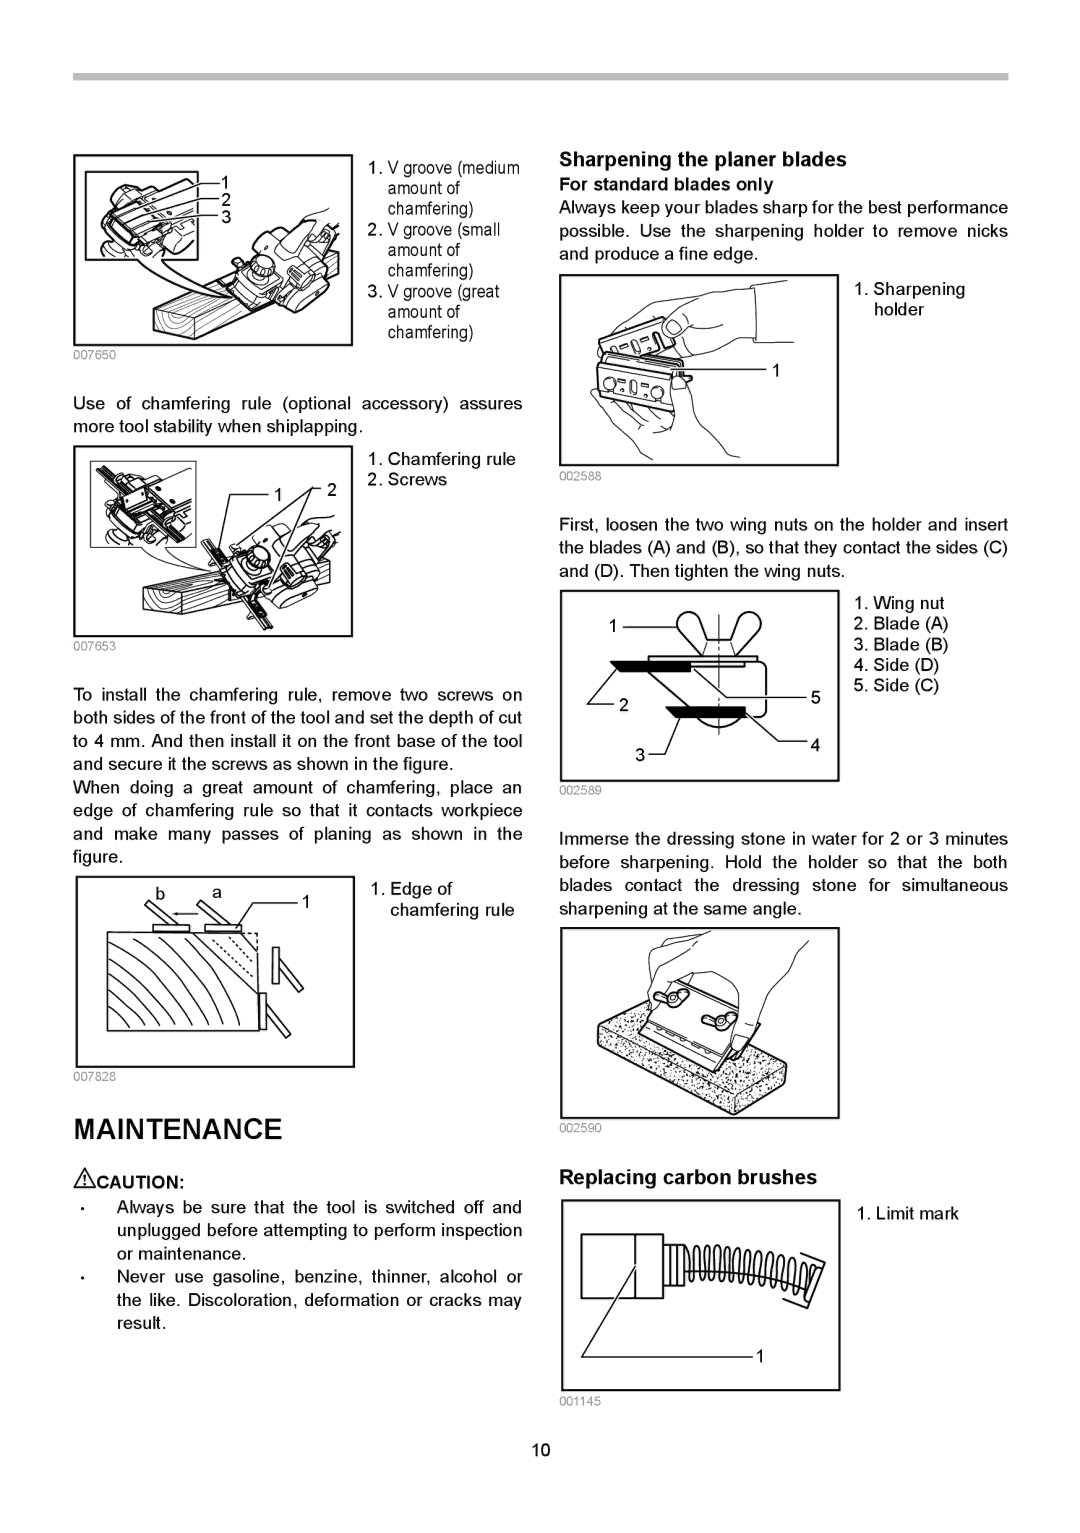
1 | 1. | V groove (medium | |
| amount of | ||
2 |
| chamfering) | |
3 |
| ||
2. | V groove (small | ||
| |||
|
| amount of | |
|
| chamfering) | |
| 3. | V groove (great | |
|
| amount of | |
|
| chamfering) | |
007650 |
|
|
Use of chamfering rule (optional accessory) assures more tool stability when shiplapping.
|
| 1. | Chamfering rule |
1 | 2 | 2. | Screws |
|
| ||
007653 |
|
|
|
To install the chamfering rule, remove two screws on both sides of the front of the tool and set the depth of cut to 4 mm. And then install it on the front base of the tool and secure it the screws as shown in the figure.
When doing a great amount of chamfering, place an edge of chamfering rule so that it contacts workpiece and make many passes of planing as shown in the figure.
b | a | 1 | 1. Edge of |
|
| chamfering rule | |
|
|
| |
|
|
|
|
Sharpening the planer blades
For standard blades only
Always keep your blades sharp for the best performance possible. Use the sharpening holder to remove nicks and produce a fine edge.
1. Sharpening holder
1
002588
First, loosen the two wing nuts on the holder and insert the blades (A) and (B), so that they contact the sides (C) and (D). Then tighten the wing nuts.
|
|
|
| 1. Wing nut | |
1 |
|
|
| 2. | Blade (A) |
|
|
|
| 3. | Blade (B) |
|
|
|
| 4. | Side (D) |
| 2 |
| 5 | 5. | Side (C) |
|
|
|
| ||
|
|
|
|
| |
|
| 3 | 4 |
|
|
|
|
|
|
| |
002589 |
|
|
|
|
|
Immerse the dressing stone in water for 2 or 3 minutes before sharpening. Hold the holder so that the both blades contact the dressing stone for simultaneous sharpening at the same angle.
007828
MAINTENANCE
002590
![]() CAUTION:
CAUTION:
•Always be sure that the tool is switched off and unplugged before attempting to perform inspection or maintenance.
•Never use gasoline, benzine, thinner, alcohol or the like. Discoloration, deformation or cracks may result.
Replacing carbon brushes
1 |
001145 |
1. Limit mark
10
