
25117460 specifications
The Razor 25117460 is an innovative electric scooter designed for commuters and leisure riders alike, blending modern aesthetics with advanced features. This scooter stands out for its robust design and exceptional performance, making it a suitable choice for individuals seeking a reliable and enjoyable mode of transportation.One of the main features of the Razor 25117460 is its powerful motor, which delivers impressive acceleration and speed. With a maximum speed that reaches up to 15 miles per hour, this scooter offers an exhilarating ride while still being practical for urban commuting. The efficient battery provides a range of up to 10 miles per charge, ensuring that riders can easily navigate their daily journeys without frequent recharging interruptions.
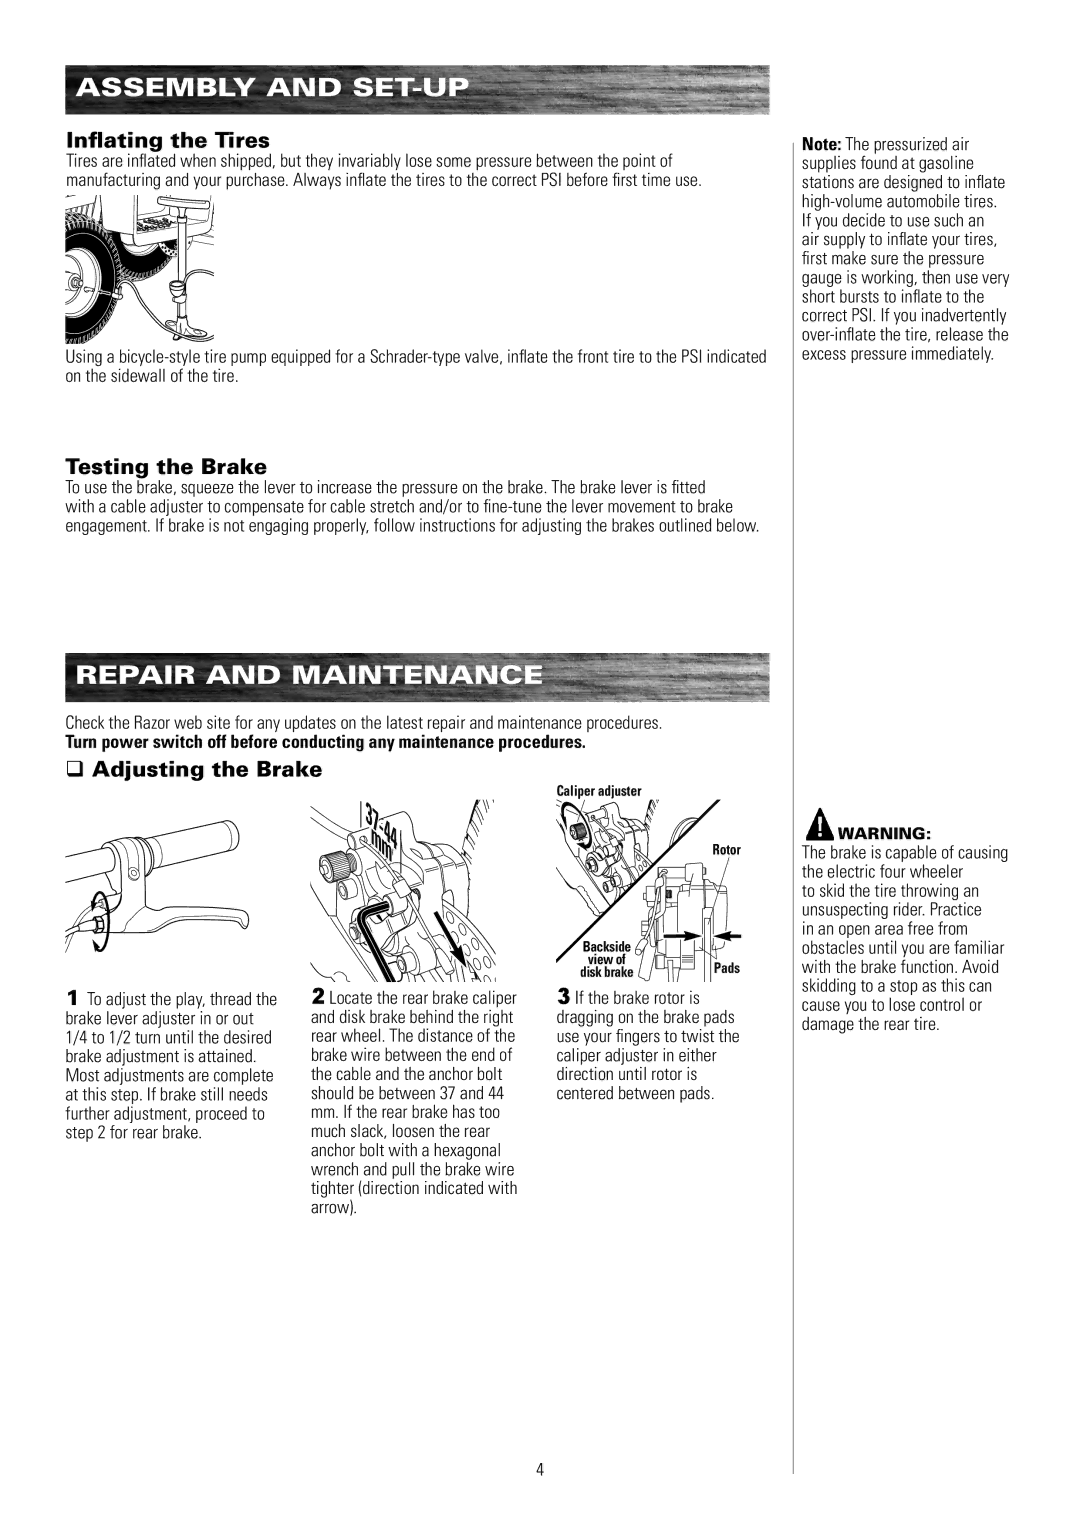
The Razor 25117460 is equipped with 8-inch pneumatic tires that enhance both comfort and durability. These tires offer improved traction and a smooth ride, effectively absorbing bumps and rough terrain encountered during urban travel. This makes the scooter an excellent choice for navigating city streets, sidewalks, and park pathways.
The scooter features a sturdy frame made from high-quality materials, ensuring stability and long-term durability. It is designed to support riders of various weights, with a maximum weight capacity of up to 220 pounds. This robust construction ensures that the Razor can withstand daily use while providing users with a safe riding experience.
Additional technologies integrated into the Razor 25117460 include an easy-to-use push-button throttle for simple acceleration control. This intuitive design makes it accessible for riders of all ages, promoting enjoyable experiences for beginners and experienced riders alike. Furthermore, the scooter incorporates an electronic brake system, delivering efficient stopping power for improved safety.
For added convenience, the Razor 25117460 is designed with a foldable frame, allowing for effortless storage and transportation. This compact design means users can easily carry it onto public transportation or store it in tight spaces, making it ideal for urban environments where space can be limited.
In summary, the Razor 25117460 is a cutting-edge electric scooter that combines speed, comfort, and practicality. Its powerful motor, durable construction, and user-friendly features make it a standout choice for anyone looking to enhance their commute or enjoy a leisurely ride. With its high-quality design and advanced technologies, the Razor 25117460 redefines the electric scooter experience, catering to the needs of modern riders.