P 4/ 8
 Repair
[2]DISASSEMBLY/ASSEMBLY
[2]-1. Gear 12-31, Helical gear 47
ASSEMBLING
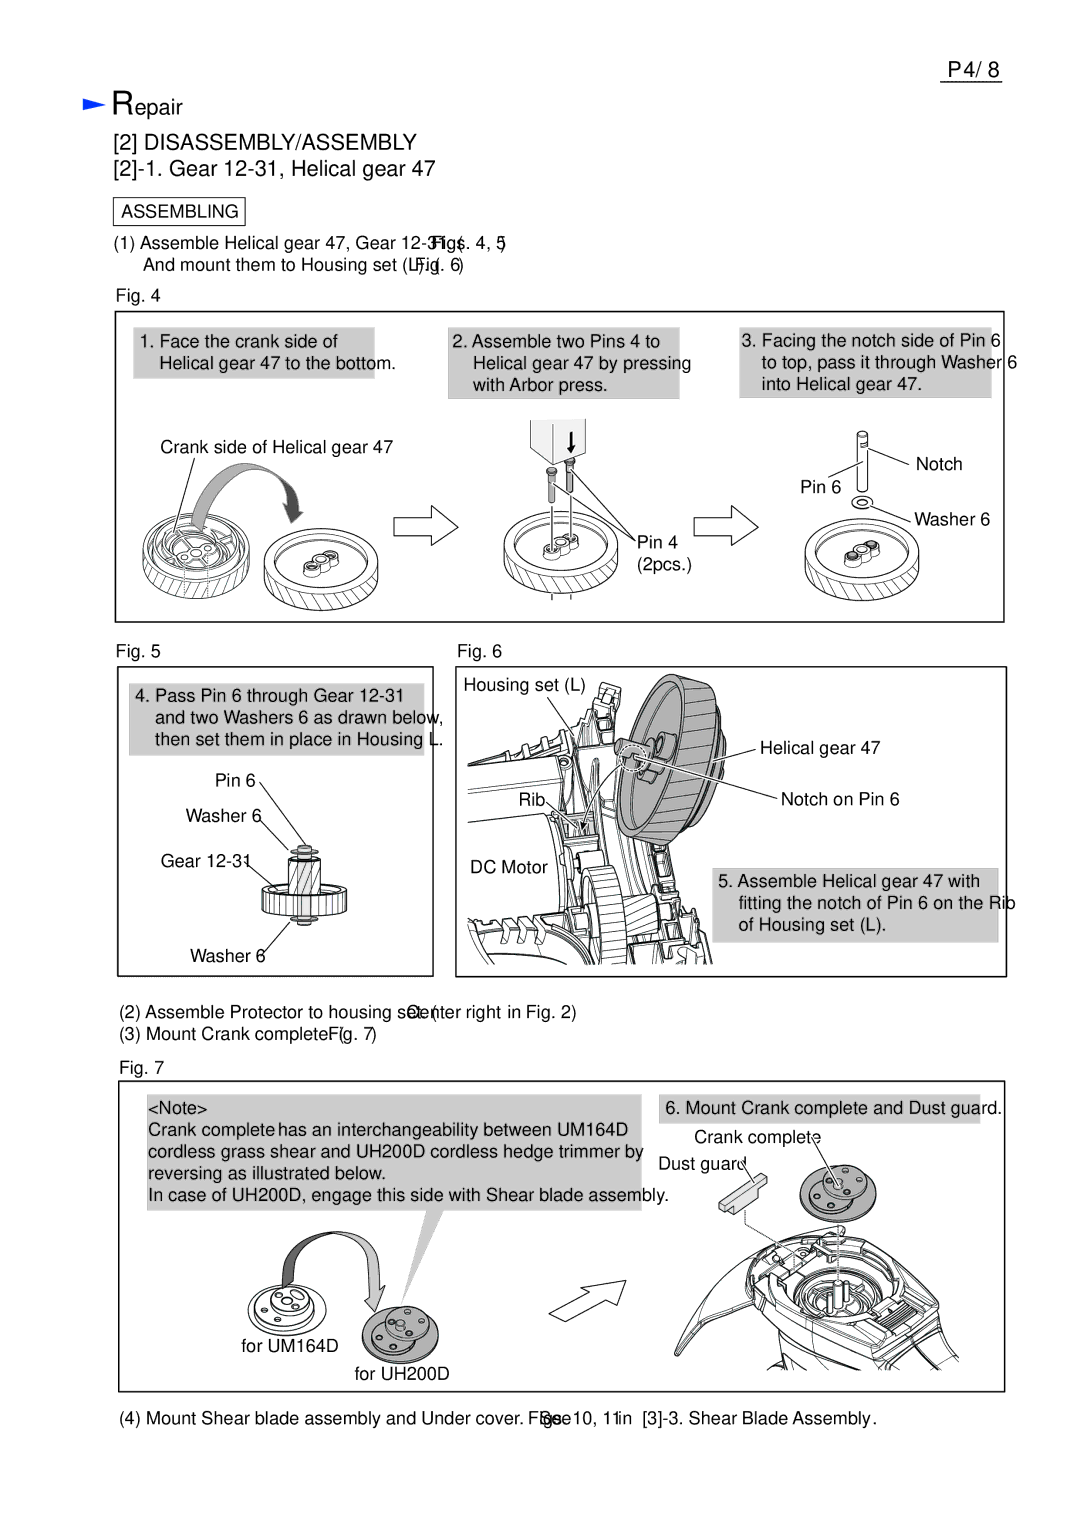
(1)Assemble Helical gear 47, Gear
Fig. 4
1.Face the crank side of Helical gear 47 to the bottom.
2.Assemble two Pins 4 to Helical gear 47 by pressing with Arbor press.
3.Facing the notch side of Pin 6 to top, pass it through Washer 6 into Helical gear 47.
Crank side of Helical gear 47
![]() Notch
Notch
Pin 6
![]() Washer 6
Washer 6
Pin 4 (2pcs.)
Fig. 5 | Fig. 6 |
| |
4. Pass Pin 6 through Gear | Housing set (L) |
| |
|
| ||
and two Washers 6 as drawn below, |
|
| |
then set them in place in Housing L. |
| Helical gear 47 | |
|
| ||
Pin 6 | Rib | Notch on Pin 6 | |
Washer 6 | |||
|
| ||
Gear | DC Motor | 5. Assemble Helical gear 47 with | |
| |||
|
| ||
|
| fitting the notch of Pin 6 on the Rib | |
|
| of Housing set (L). | |
Washer 6 |
|
|
(2)Assemble Protector to housing set. (Center right in Fig. 2)
(3)Mount Crank complete. (Fig. 7)
Fig. 7
<Note>
Crank complete has an interchangeability between UM164D cordless grass shear and UH200D cordless hedge trimmer by reversing as illustrated below.
In case of UH200D, engage this side with Shear blade assembly.
6. Mount Crank complete and Dust guard.
Crank complete
Dust guard
for UM164D ![]()
![]() for UH200D
for UH200D
(4) Mount Shear blade assembly and Under cover. See Figs. 10, 11 in
