P 6/ 8
 Repair
[2]DISASSEMBLY/ASSEMBLY
[2]-3. Shear blade assembly
DISASSEMBLING
(1)Pull the rear portion of Base frame toward rear side designated with arrow. (Top left in Fig. 2)
(2)With pressing Lock lever, turn under cover complete to the unlocked position. (Top right in Fig. 2)
(3)Disassemble Under cover, and then remove Shear blade assembly. (Center left in Fig. 2)
ASSEMBLING
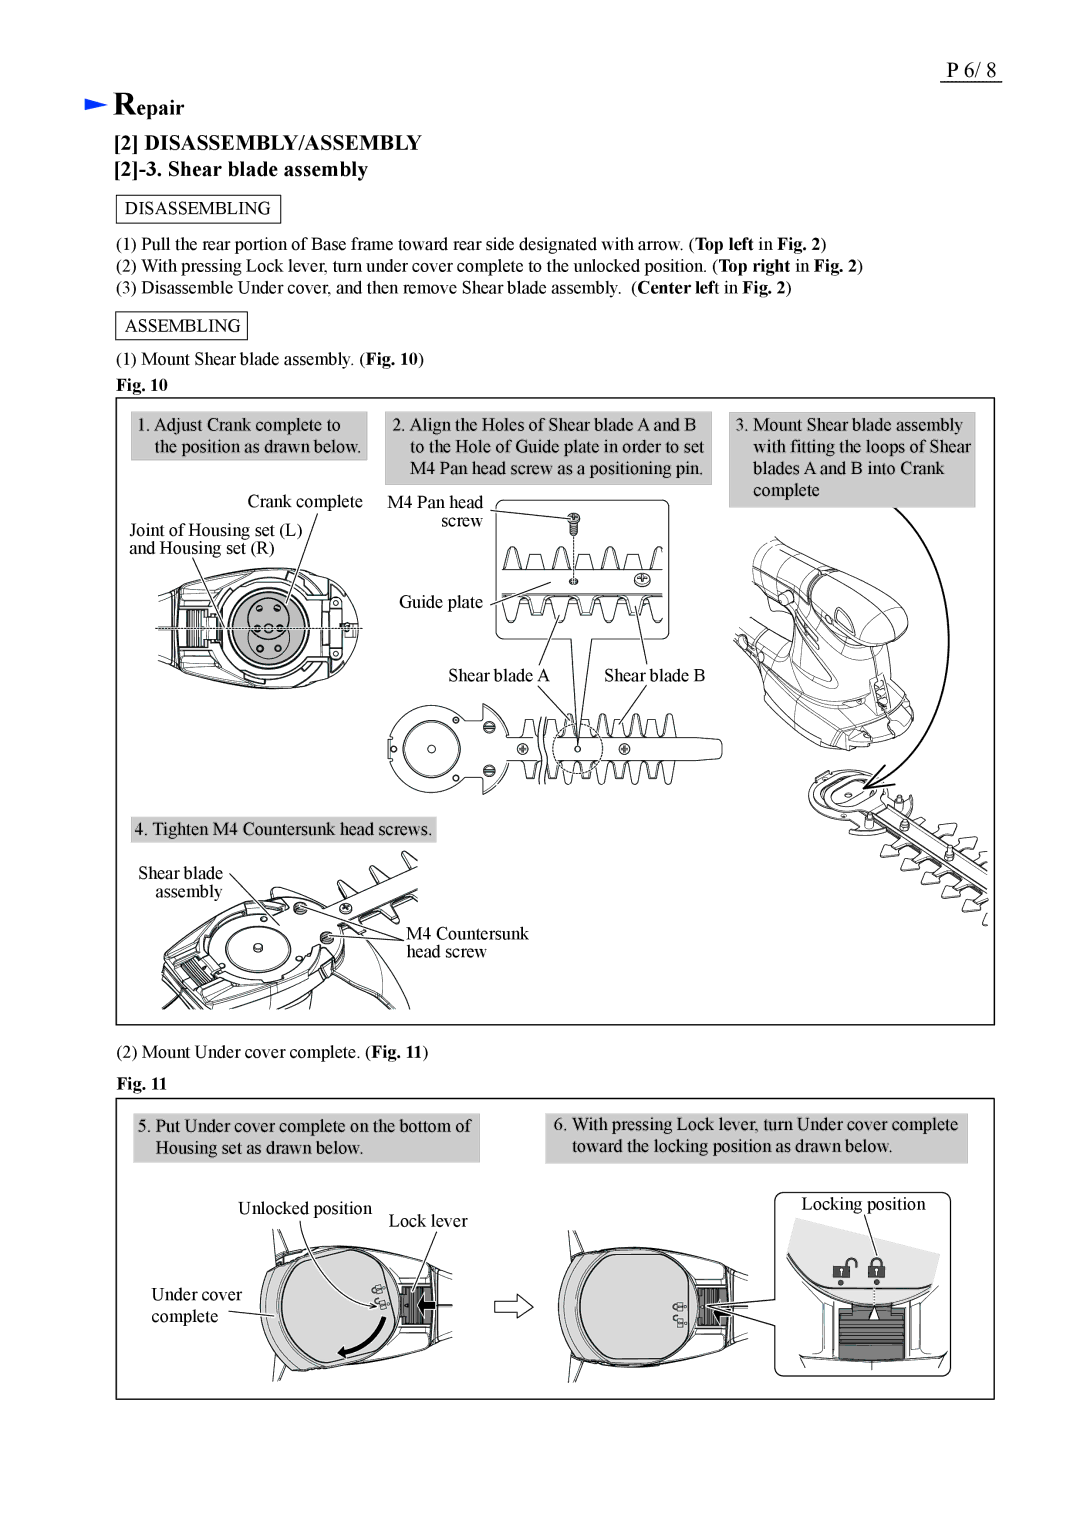
(1)Mount Shear blade assembly. (Fig. 10)
Fig. 10
1.Adjust Crank complete to the position as drawn below.
Crank complete
Joint of Housing set (L) and Housing set (R)
2.Align the Holes of Shear blade A and B to the Hole of Guide plate in order to set M4 Pan head screw as a positioning pin.
M4 Pan head screw ![]()
![]()
Guide plate ![]()
![]()
![]()
![]()
![]()
3.Mount Shear blade assembly with fitting the loops of Shear blades A and B into Crank complete
Shear blade A | Shear blade B |
4. Tighten M4 Countersunk head screws.
Shear blade assembly
M4 Countersunk head screw
(2)Mount Under cover complete. (Fig. 11)
Fig. 11
5.Put Under cover complete on the bottom of Housing set as drawn below.
6.With pressing Lock lever, turn Under cover complete toward the locking position as drawn below.
Unlocked position | Locking position |
Lock lever |
Under cover complete ![]()