AV9000 specifications
The Marantz AV9000 is a revered home theater processor that has etched its place in the annals of audio and video entertainment technology. Known for its impressive performance and rich features, the AV9000 has been a favorite among audiophiles and home theater enthusiasts since its release.One of the most notable characteristics of the Marantz AV9000 is its superior audio processing capabilities. It utilizes advanced 24-bit/192kHz DACs (Digital-to-Analog Converters) that ensure high-resolution sound playback, allowing for an expansive soundstage and remarkable detail in audio reproduction. The processor supports various surround sound formats, including Dolby Digital, DTS, and even the more complex surround formats of the time, which accentuate the immersive experience of cinema-like sound in home settings.
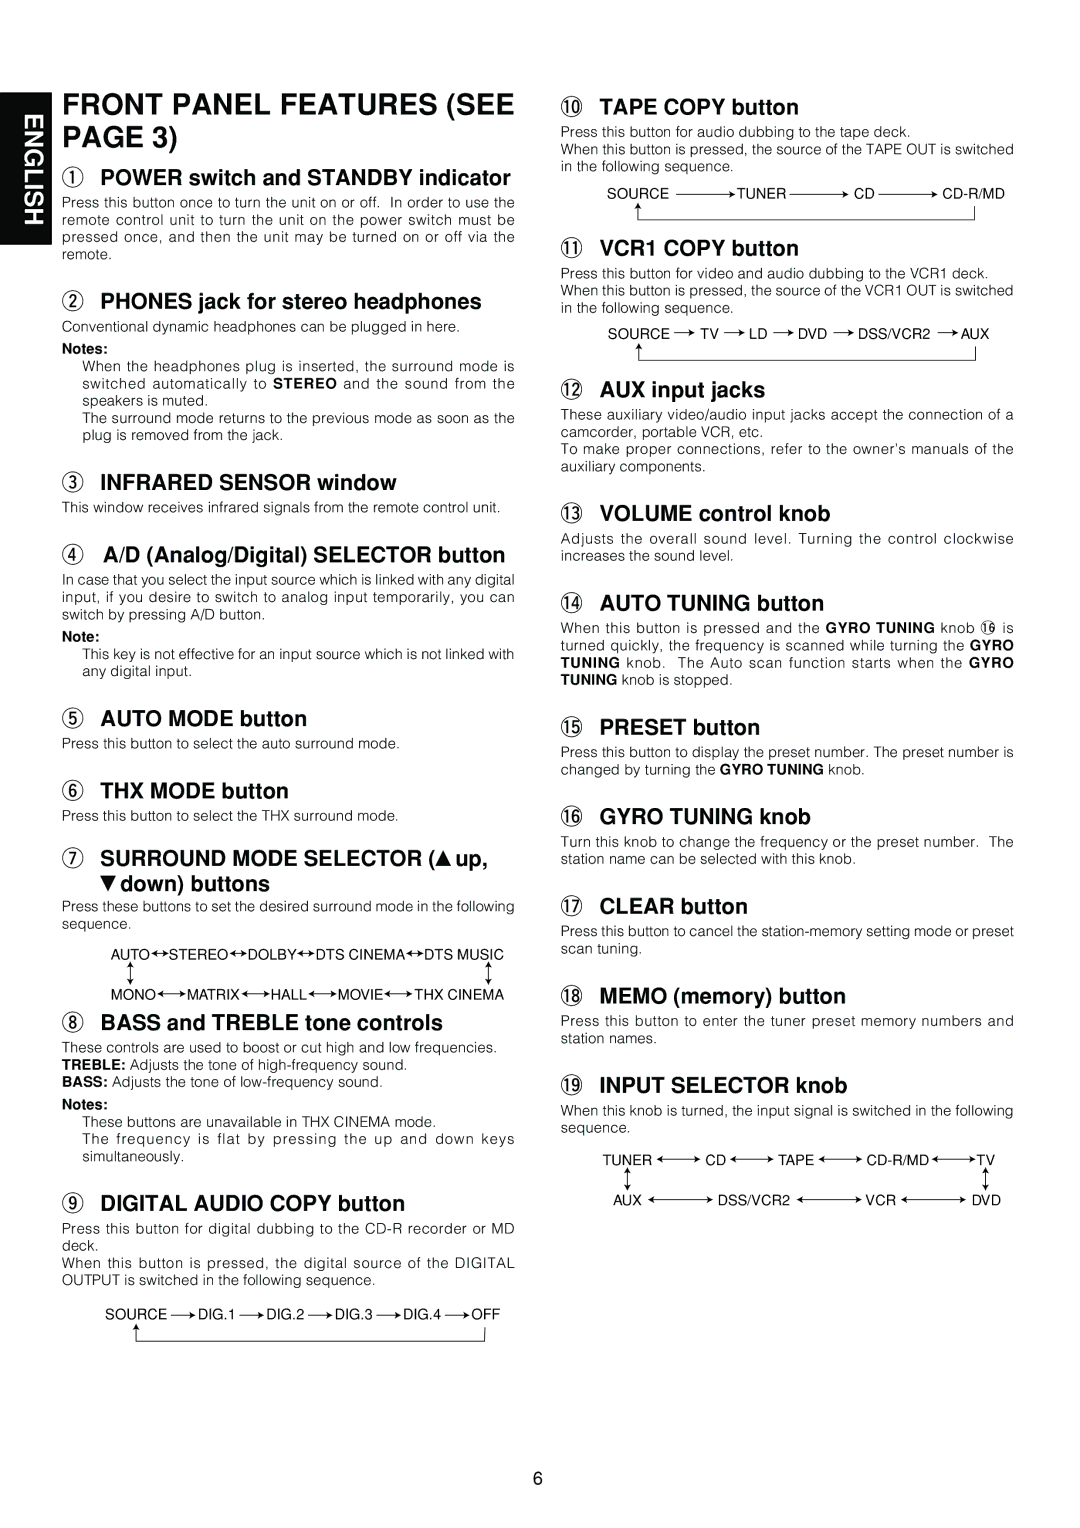
In terms of video capabilities, the Marantz AV9000 boasts a wealth of features that enhance the viewing experience. It supports multiple video formats, including composite, S-video, and component video, ensuring compatibility with a wide range of source devices. The processor also incorporates video switching, allowing users to connect various components seamlessly and switch between them without needing to manually intervene.
The AV9000 is equipped with a user-friendly interface that simplifies operation. Its on-screen display provides easy access to settings and inputs, making it a breeze for users to navigate through options. Furthermore, the unit has substantial connectivity options, including multiple analog and digital audio inputs, video inputs, and outputs that cater to extensive home theater setups.
Marantz has also focused on build quality, and the AV9000 is no exception. The unit is constructed with a robust chassis that minimizes vibration and external interference, ensuring an uncolored audio performance.
Another significant feature is its flexibility with multi-zone setups, enabling users to experience audio and video in different rooms simultaneously. This is perfect for larger homes where different family members can enjoy their respective media without disruption.
Sound tuning was critically emphasized in the AV9000, with Marantz’s proprietary tuning technologies enhancing audio quality. These features allow for adjustments based on room acoustics, optimizing the listening experience tailored to specific environments.
In conclusion, the Marantz AV9000 stands out as a sophisticated audio-video processor with its rich feature set, high-quality sound, versatile video capabilities, and robust construction. It embodies the Marantz legacy of exceptional performance and elaborate design, making it a notable choice for anyone looking to elevate their home entertainment experience.