ENGLISH

Using the macro function(s) you have programmed:

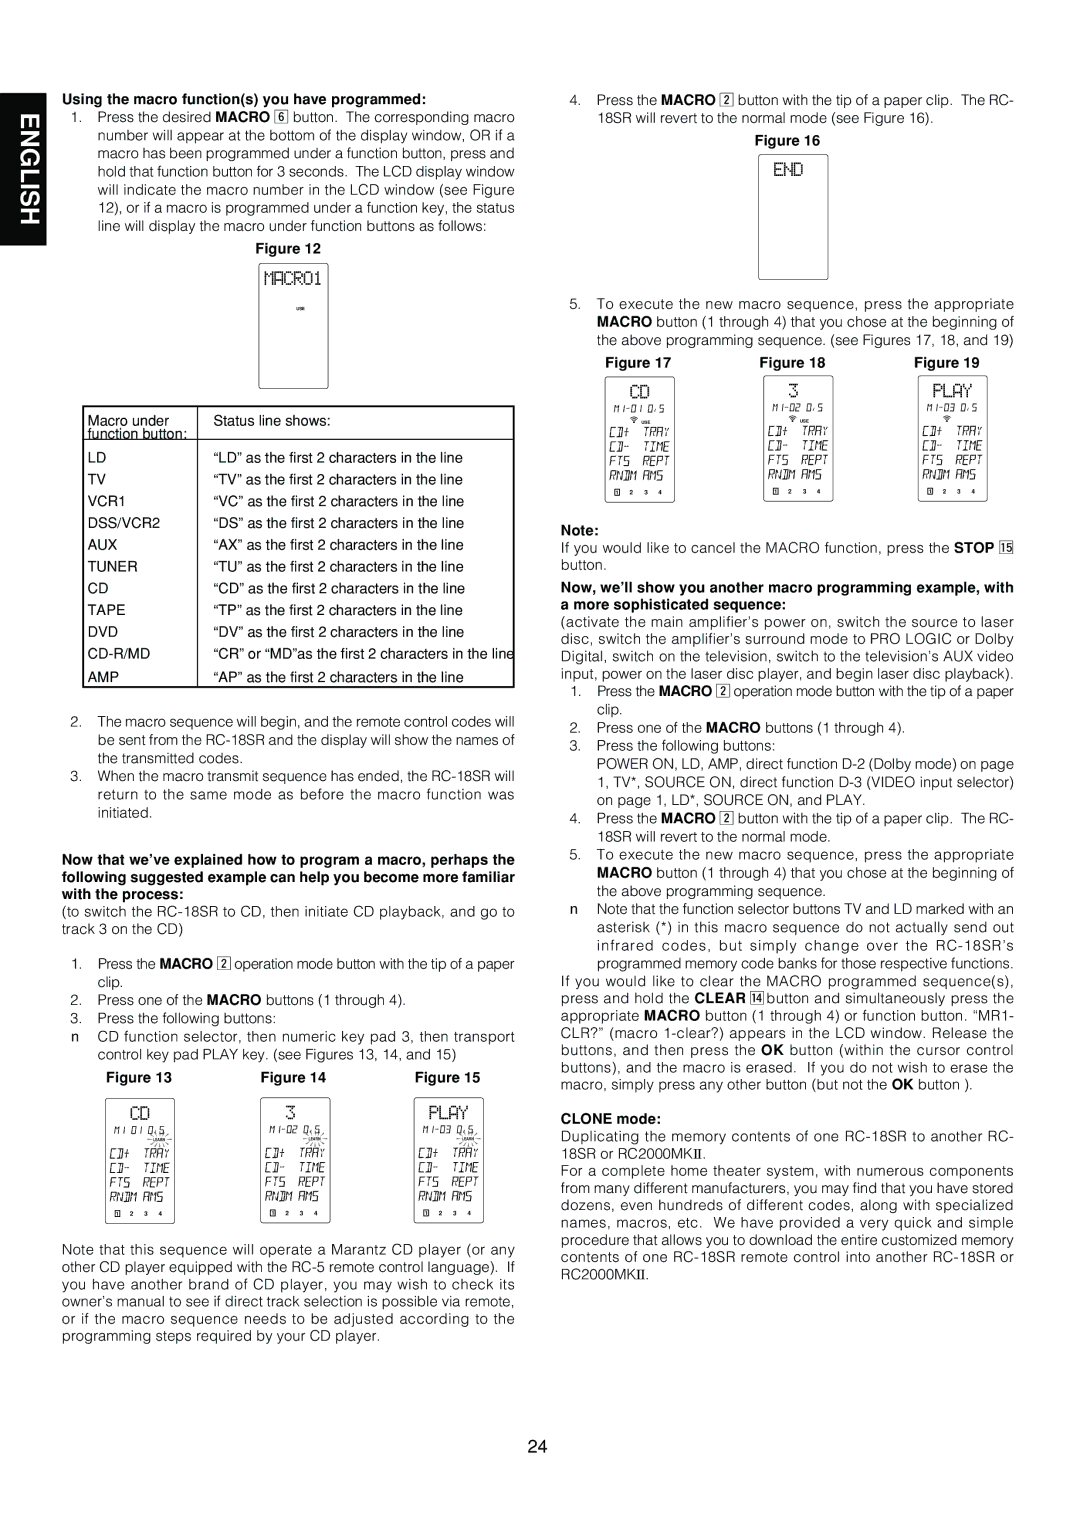
1. Press the desired MACRO n button. The corresponding macro

number will appear at the bottom of the display window, OR if a


macro has been programmed under a function button, press and


hold that function button for 3 seconds. The LCD display window


will indicate the macro number in the LCD window (see Figure


12), or if a macro is programmed under a function key, the status


line will display the macro under function buttons as follows:


Figure 12


USE

Macro under

Status line shows:

function button:


LD

“LD” as the first 2 characters in the line

TV

“TV” as the first 2 characters in the line

VCR1

“VC” as the first 2 characters in the line

DSS/VCR2

“DS” as the first 2 characters in the line

AUX

“AX” as the first 2 characters in the line

TUNER

“TU” as the first 2 characters in the line

CD

“CD” as the first 2 characters in the line

TAPE

“TP” as the first 2 characters in the line

DVD

“DV” as the first 2 characters in the line

CD-R/MD

“CR” or “MD”as the first 2 characters in the line

AMP

“AP” as the first 2 characters in the line

2.The macro sequence will begin, and the remote control codes will be sent from the RC-18SR and the display will show the names of the transmitted codes.

3.When the macro transmit sequence has ended, the RC-18SR will return to the same mode as before the macro function was initiated.

Now that we’ve explained how to program a macro, perhaps the following suggested example can help you become more familiar with the process:

(to switch the RC-18SR to CD, then initiate CD playback, and go to track 3 on the CD)

1.Press the MACRO x operation mode button with the tip of a paper clip.

2.Press one of the MACRO buttons (1 through 4).

3.Press the following buttons:

nCD function selector, then numeric key pad 3, then transport control key pad PLAY key. (see Figures 13, 14, and 15)

Figure 13

Figure 14

Figure 15

LOW


LEARN

LOW


LEARN

LOW


LEARN


NAME


NAME


NAME

1

2

3

4

1

2

3

4

1

2

3

4

Note that this sequence will operate a Marantz CD player (or any other CD player equipped with the RC-5 remote control language). If you have another brand of CD player, you may wish to check its owner’s manual to see if direct track selection is possible via remote, or if the macro sequence needs to be adjusted according to the programming steps required by your CD player.

4.Press the MACRO x button with the tip of a paper clip. The RC- 18SR will revert to the normal mode (see Figure 16).

Figure 16

5.To execute the new macro sequence, press the appropriate MACRO button (1 through 4) that you chose at the beginning of the above programming sequence. (see Figures 17, 18, and 19)

Figure 17

Figure 18

Figure 19

LOW


LOW


LEARN

LOW


LEARN


USE NAME


USE NAME


NAME

1

2

3

4

1

2

3

4

1

2

3

4

Note:

If you would like to cancel the MACRO function, press the STOP ⁄5 button.

Now, we’ll show you another macro programming example, with a more sophisticated sequence:

(activate the main amplifier’s power on, switch the source to laser disc, switch the amplifier’s surround mode to PRO LOGIC or Dolby Digital, switch on the television, switch to the television’s AUX video input, power on the laser disc player, and begin laser disc playback).

1.Press the MACRO x operation mode button with the tip of a paper clip.

2.Press one of the MACRO buttons (1 through 4).

3.Press the following buttons:

POWER ON, LD, AMP, direct function D-2 (Dolby mode) on page 1, TV*, SOURCE ON, direct function D-3 (VIDEO input selector) on page 1, LD*, SOURCE ON, and PLAY.

4.Press the MACRO x button with the tip of a paper clip. The RC- 18SR will revert to the normal mode.

5.To execute the new macro sequence, press the appropriate

MACRO button (1 through 4) that you chose at the beginning of the above programming sequence.

nNote that the function selector buttons TV and LD marked with an asterisk (*) in this macro sequence do not actually send out infrared codes, but simply change over the RC-18SR’s

programmed memory code banks for those respective functions. If you would like to clear the MACRO programmed sequence(s), press and hold the CLEAR ⁄4button and simultaneously press the appropriate MACRO button (1 through 4) or function button. “MR1- CLR?” (macro 1-clear?) appears in the LCD window. Release the buttons, and then press the OK button (within the cursor control buttons), and the macro is erased. If you do not wish to erase the macro, simply press any other button (but not the OK button ).

CLONE mode:

Duplicating the memory contents of one RC-18SR to another RC- 18SR or RC2000MKII.

For a complete home theater system, with numerous components from many different manufacturers, you may find that you have stored dozens, even hundreds of different codes, along with specialized names, macros, etc. We have provided a very quick and simple procedure that allows you to download the entire customized memory contents of one RC-18SR remote control into another RC-18SR or RC2000MKII.

24

Page 29
Image 29
Marantz AV9000 manual Using the macro functions you have programmed, Clone mode

AV9000 specifications

The Marantz AV9000 is a revered home theater processor that has etched its place in the annals of audio and video entertainment technology. Known for its impressive performance and rich features, the AV9000 has been a favorite among audiophiles and home theater enthusiasts since its release.

One of the most notable characteristics of the Marantz AV9000 is its superior audio processing capabilities. It utilizes advanced 24-bit/192kHz DACs (Digital-to-Analog Converters) that ensure high-resolution sound playback, allowing for an expansive soundstage and remarkable detail in audio reproduction. The processor supports various surround sound formats, including Dolby Digital, DTS, and even the more complex surround formats of the time, which accentuate the immersive experience of cinema-like sound in home settings.

In terms of video capabilities, the Marantz AV9000 boasts a wealth of features that enhance the viewing experience. It supports multiple video formats, including composite, S-video, and component video, ensuring compatibility with a wide range of source devices. The processor also incorporates video switching, allowing users to connect various components seamlessly and switch between them without needing to manually intervene.

The AV9000 is equipped with a user-friendly interface that simplifies operation. Its on-screen display provides easy access to settings and inputs, making it a breeze for users to navigate through options. Furthermore, the unit has substantial connectivity options, including multiple analog and digital audio inputs, video inputs, and outputs that cater to extensive home theater setups.

Marantz has also focused on build quality, and the AV9000 is no exception. The unit is constructed with a robust chassis that minimizes vibration and external interference, ensuring an uncolored audio performance.

Another significant feature is its flexibility with multi-zone setups, enabling users to experience audio and video in different rooms simultaneously. This is perfect for larger homes where different family members can enjoy their respective media without disruption.

Sound tuning was critically emphasized in the AV9000, with Marantz’s proprietary tuning technologies enhancing audio quality. These features allow for adjustments based on room acoustics, optimizing the listening experience tailored to specific environments.

In conclusion, the Marantz AV9000 stands out as a sophisticated audio-video processor with its rich feature set, high-quality sound, versatile video capabilities, and robust construction. It embodies the Marantz legacy of exceptional performance and elaborate design, making it a notable choice for anyone looking to elevate their home entertainment experience.