ENGLISH

RECORDING AN ANALOG SOURCE

the record mode.


In normal operation, the audio or video source selected for listening


through the SR8200 is sent to the record outputs.


This means that any program you are watching or listening to may be


recorded simply by placing machines connected to the outputs for


TAPE OUT , CD-R/MD OUT, VCR1 OUT, and VCR2/DVD-R OUT in


To record the input source signal you are currently watching or


listening to

1.


SELECTOR


DISPLAY

CLEAR

MEMO

DOWN

TUNING

UP

F/P

T-MODE

P-SCAN

DOWN


SELECT

ENTER

7.1CH-IN

DVD

DSS TV

VCR1

VCR2/DVD-R

CD

TAPE

CD-R

TUNER

1.


POWERSTANDBYON/STANDBY

PHONES

MULTIMULTIROOM-SPK SLEEPA/D

S-NIGHTDIRECT

AUX1AUX2

DIGITAL

S-VIDEO

VIDEOAUX1INPUTL AUDIO R


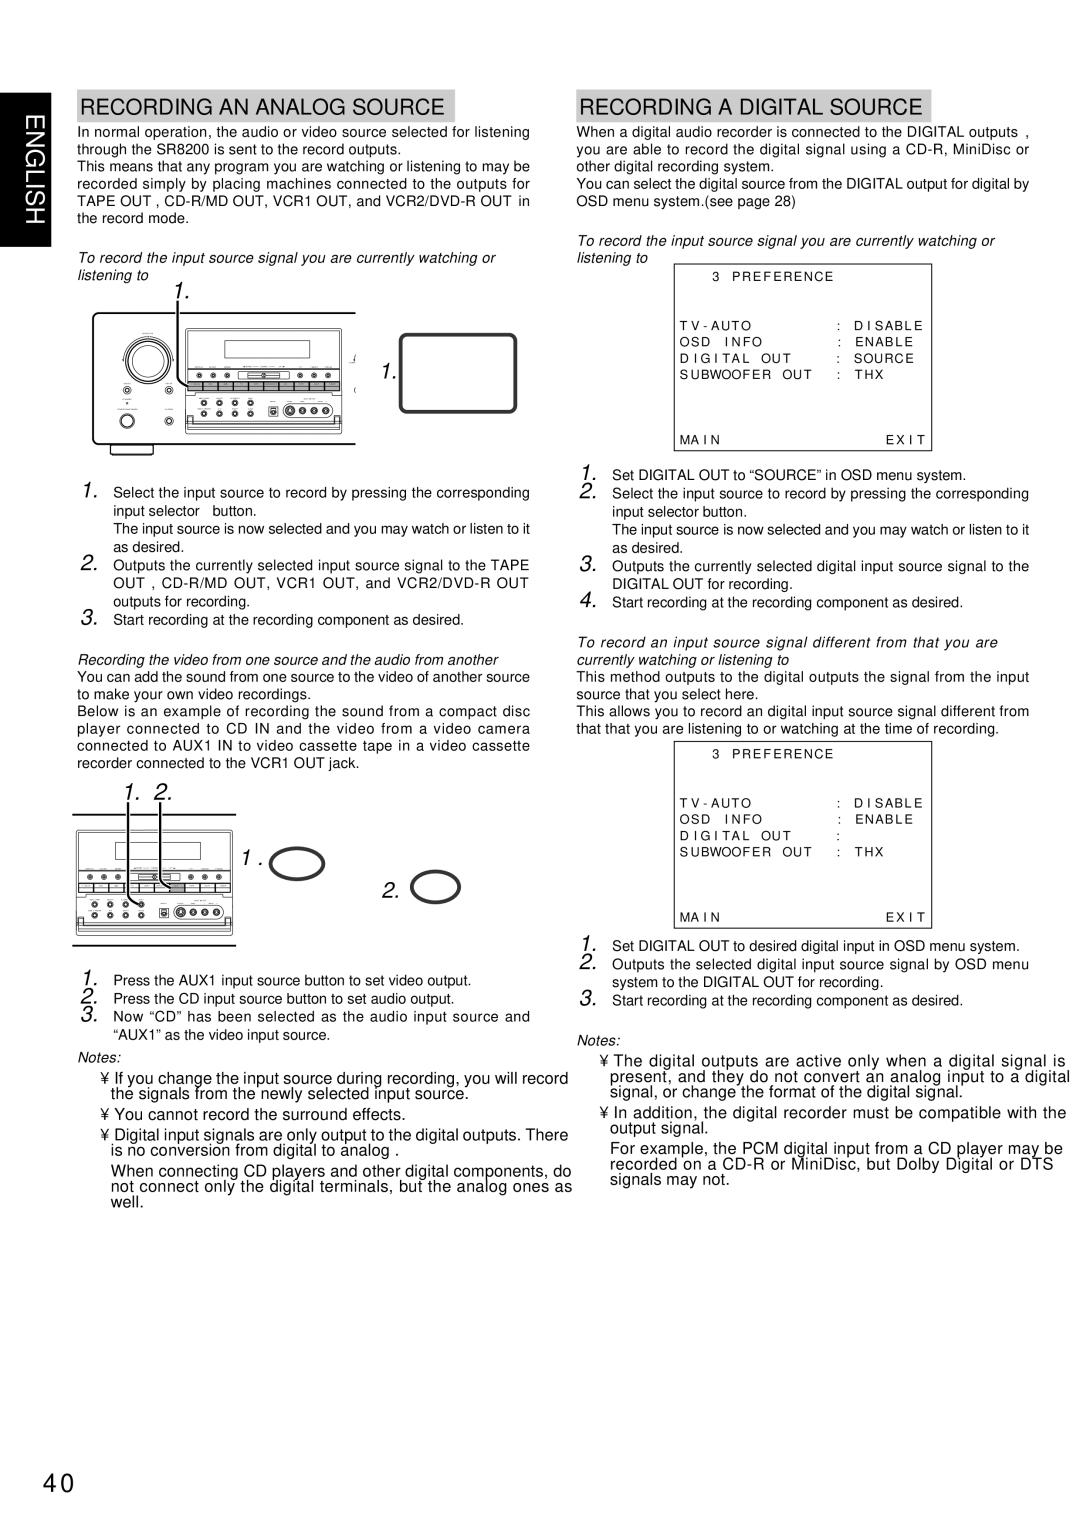
1. Select the input source to record by pressing the corresponding

input selector button.

The input source is now selected and you may watch or listen to it as desired.

2. Outputs the currently selected input source signal to the TAPE

OUT , CD-R/MD OUT, VCR1 OUT, and VCR2/DVD-R OUT

outputs for recording.

3. Start recording at the recording component as desired.

Recording the video from one source and the audio from another You can add the sound from one source to the video of another source to make your own video recordings.

Below is an example of recording the sound from a compact disc player connected to CD IN and the video from a video camera connected to AUX1 IN to video cassette tape in a video cassette recorder connected to the VCR1 OUT jack.


1.

2.


DISPLAY

CLEAR


MEMO

DOWN

TUNING

UP

F/P

T-MODE

P-SCAN

1 .

7.1CH-INMULTI-SPKDVD

SLEEP

DSS S-DIRECTTV

AUX1VCR1

VCR2/DVDDIGITAL-R

CDS-VIDEO

TAPEVIDEOAUX1INPUTLCD-RAUDIO

R

TUNER

2.

MULTIROOM

A/D

NIGHT

AUX2


1. Press the AUX1 input source button to set video output.

2. Press the CD input source button to set audio output.

3. Now “CD” has been selected as the audio input source and “AUX1” as the video input source.

Notes:

If you change the input source during recording, you will record the signals from the newly selected input source.

You cannot record the surround effects.

Digital input signals are only output to the digital outputs. There is no conversion from digital to analog .

When connecting CD players and other digital components, do not connect only the digital terminals, but the analog ones as well.

RECORDING A DIGITAL SOURCE

When a digital audio recorder is connected to the DIGITAL outputs, you are able to record the digital signal using a CD-R, MiniDisc or other digital recording system.

You can select the digital source from the DIGITAL output for digital by OSD menu system.(see page 28)

To record the input source signal you are currently watching or listening to

3 P R E F E R E NC E


T V - A U T O

: D I S AB L E

O S D I N F O

: E NA B L E

D I G I T A L OU T

: SOU RC E

S UBWOOF E R OU T

: T H X

MA I N

E X I T


1. Set DIGITAL OUT to “SOURCE” in OSD menu system.

2. Select the input source to record by pressing the corresponding input selector button.

The input source is now selected and you may watch or listen to it as desired.

3. Outputs the currently selected digital input source signal to the DIGITAL OUT for recording.

4. Start recording at the recording component as desired.

To record an input source signal different from that you are currently watching or listening to

This method outputs to the digital outputs the signal from the input source that you select here.

This allows you to record an digital input source signal different from that that you are listening to or watching at the time of recording.

3 P R E F E R E NC E


T V - A U T O

: D I S AB L E

O S D I N F O

: E NA B L E

D I G I T A L OU T

: D I G . 1

S UBWOOF E R OU T

: T H X

MA I N

E X I T


1. Set DIGITAL OUT to desired digital input in OSD menu system.

2. Outputs the selected digital input source signal by OSD menu system to the DIGITAL OUT for recording.

3. Start recording at the recording component as desired.

Notes:

The digital outputs are active only when a digital signal is present, and they do not convert an analog input to a digital signal, or change the format of the digital signal.

In addition, the digital recorder must be compatible with the output signal.

For example, the PCM digital input from a CD player may be recorded on a CD-R or MiniDisc, but Dolby Digital or DTS signals may not.

40

Page 44
Image 44
Marantz SR8200 manual Recording AN Analog Source, Recording a Digital Source, Listening to

SR8200 specifications

The Marantz SR8200 is a remarkable AV receiver that has garnered attention from audio enthusiasts for its exceptional performance and advanced features. Released as part of Marantz’s prestigious lineup, it showcases a perfect blend of powerful audio capabilities and sophisticated technology, making it an ideal choice for home theater setups.

One of the standout features of the SR8200 is its multi-channel amplifier, which delivers up to 110 watts per channel across seven channels. This capability ensures that users can experience immersive surround sound, whether they are watching movies or listening to music. The amplifier utilizes a high-current design, allowing it to drive demanding speakers with ease, contributing to an overall dynamic listening experience.

In terms of audio technologies, the Marantz SR8200 is equipped with DTS and Dolby Digital decoding, providing support for a variety of surround sound formats. These technologies enhance the audio experience by delivering crisp and detailed sound, effectively transporting listeners into the heart of their favorite entertainment. Additionally, the receiver incorporates Marantz's proprietary HDAM (Hyper-Dynamic Amplifier Module) technology. This ensures low noise levels and high-speed response, further improving sound quality across the frequency spectrum.

The SR8200 also features a powerful DSP (Digital Signal Processing) engine, which allows for various audio modes and surround processing options such as 5.1 and 7.1 channel setups. Users can customize their audio experience to match their preferences or the specifics of their room layout. Moreover, the receiver is equipped with an extensive array of input and output options, including multiple HDMI ports, component video inputs, and analog connections, making it versatile for various audio and visual sources.

For ease of use, the SR8200 comes with an intuitively designed remote control and an on-screen display that simplifies navigation through settings and features. It also includes a room calibration system, which analyzes the acoustics of the room and automatically adjusts the speaker settings to ensure optimal sound staging.

In conclusion, the Marantz SR8200 represents a high-quality AV receiver that combines powerful amplification, advanced audio technologies, and user-friendly features. Its ability to deliver stunning audio performance makes it a worthy investment for enthusiasts looking to enhance their home theater experience. With its robust build quality and stylish design, the SR8200 is not just an audio device, but a key component in creating a rich and engaging entertainment environment.